
Virtual Tactile Art Club - Tin Foil Explorations
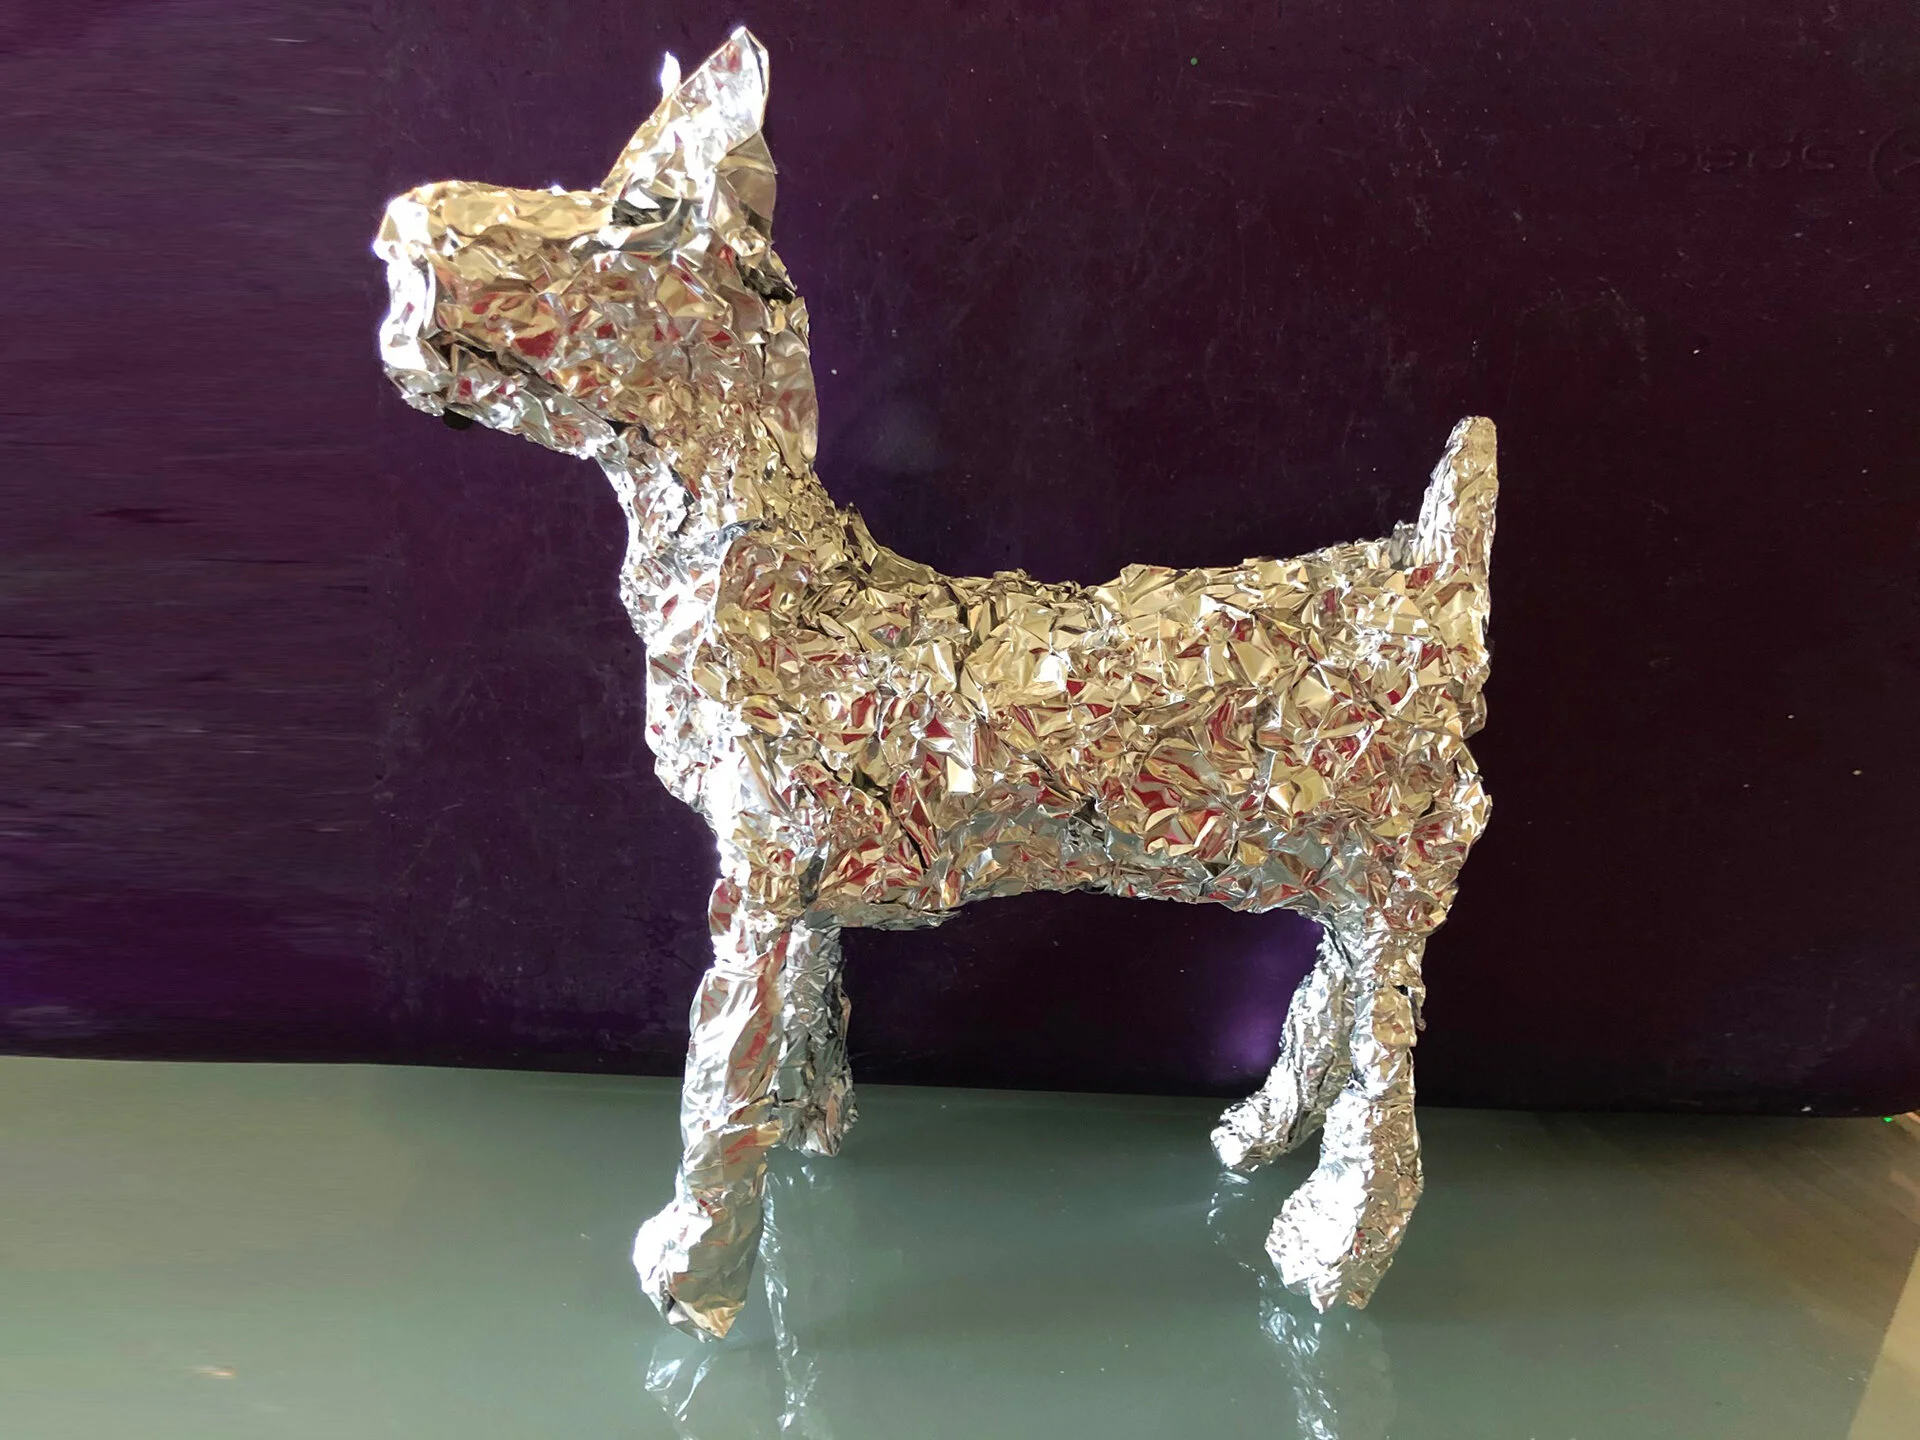
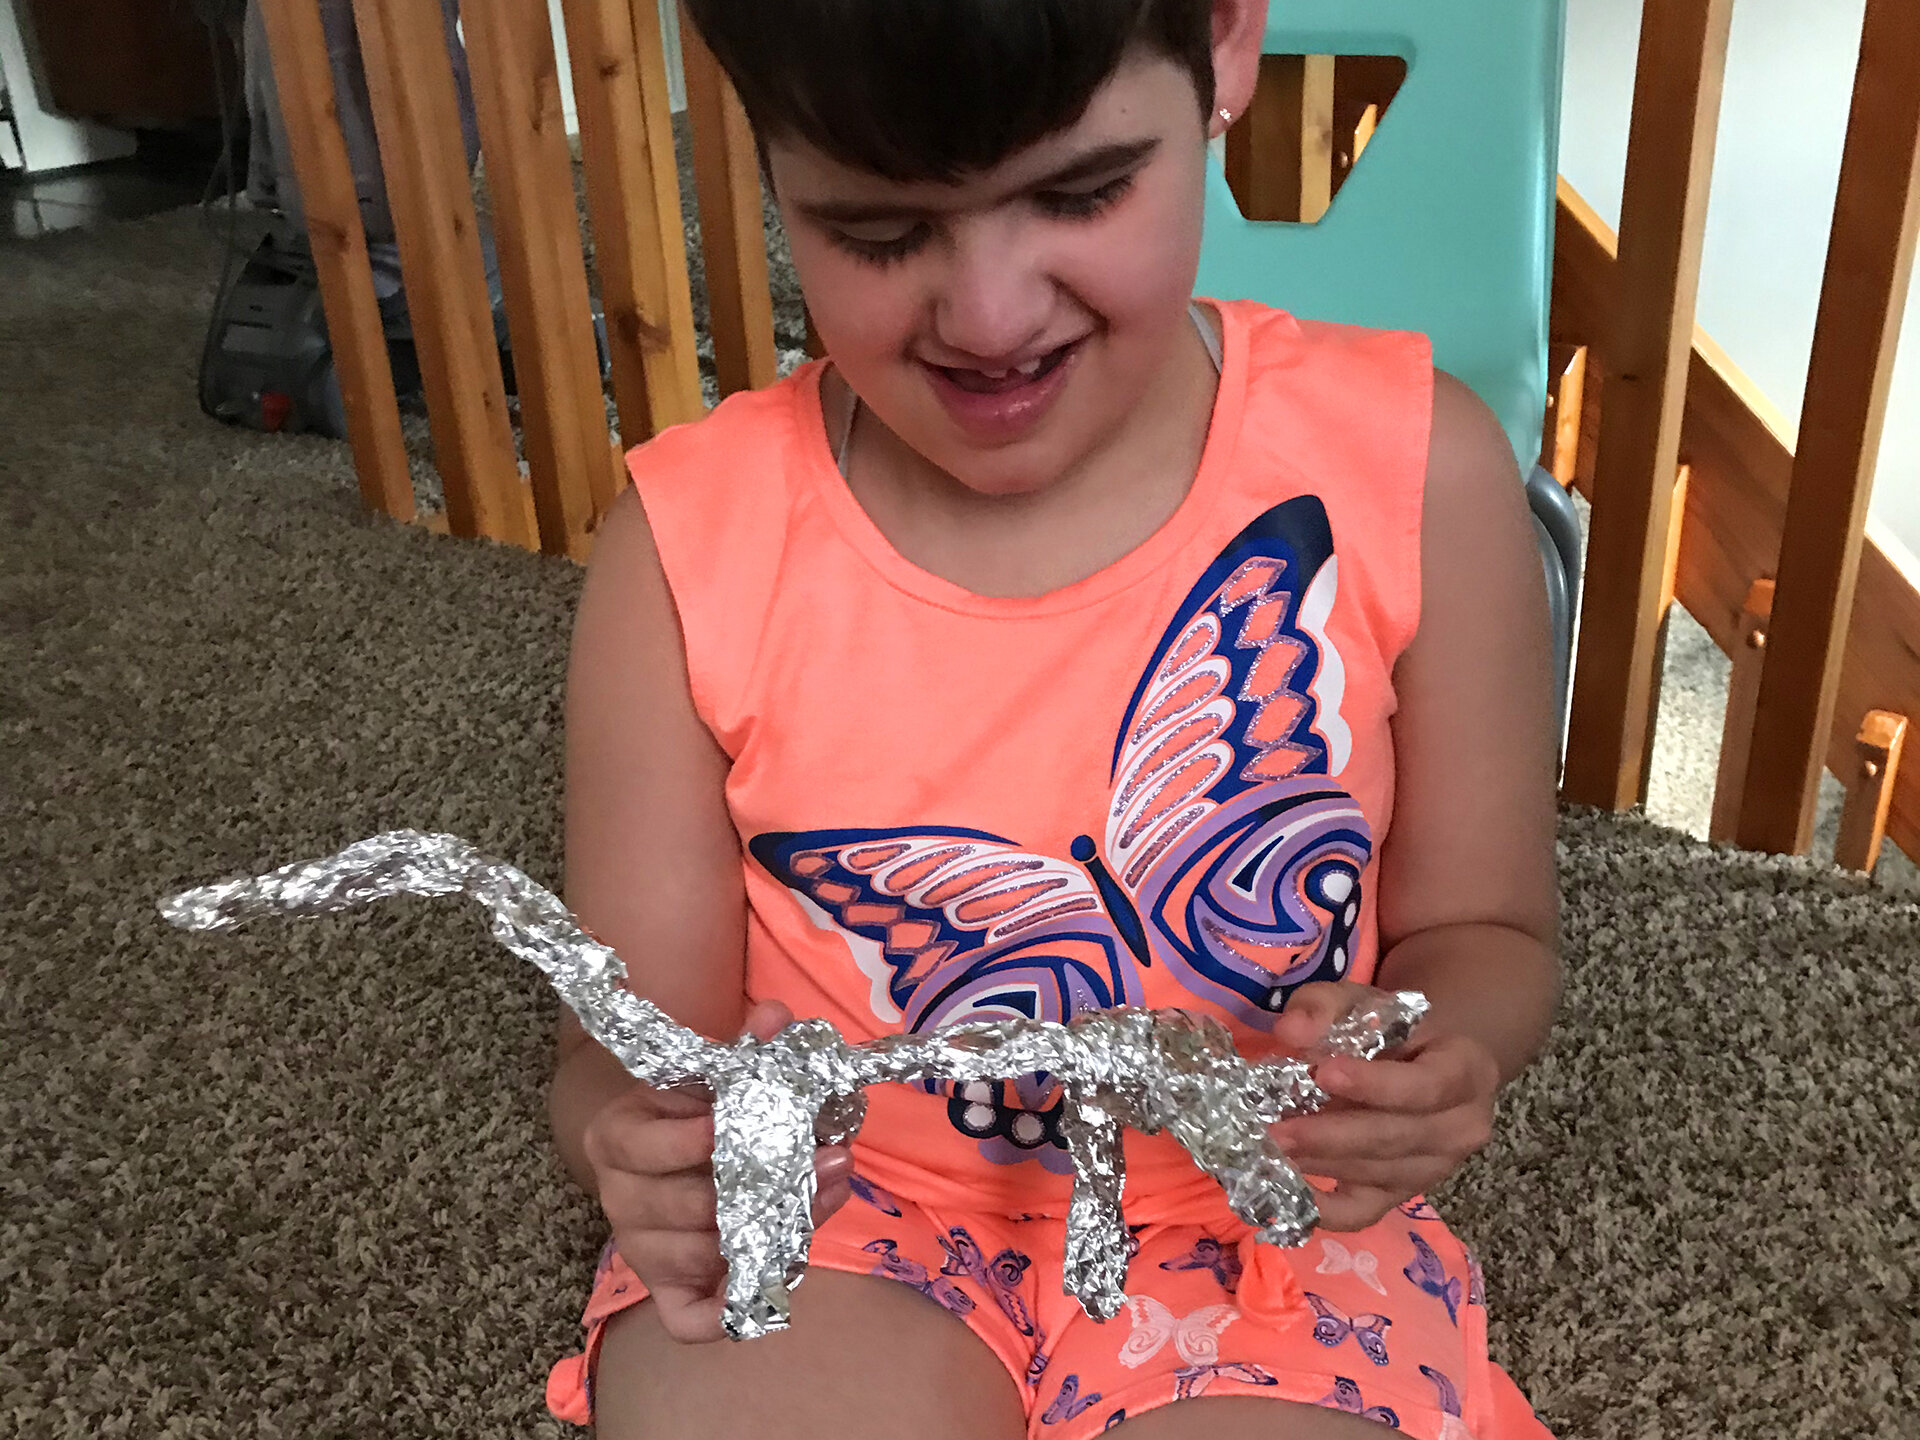
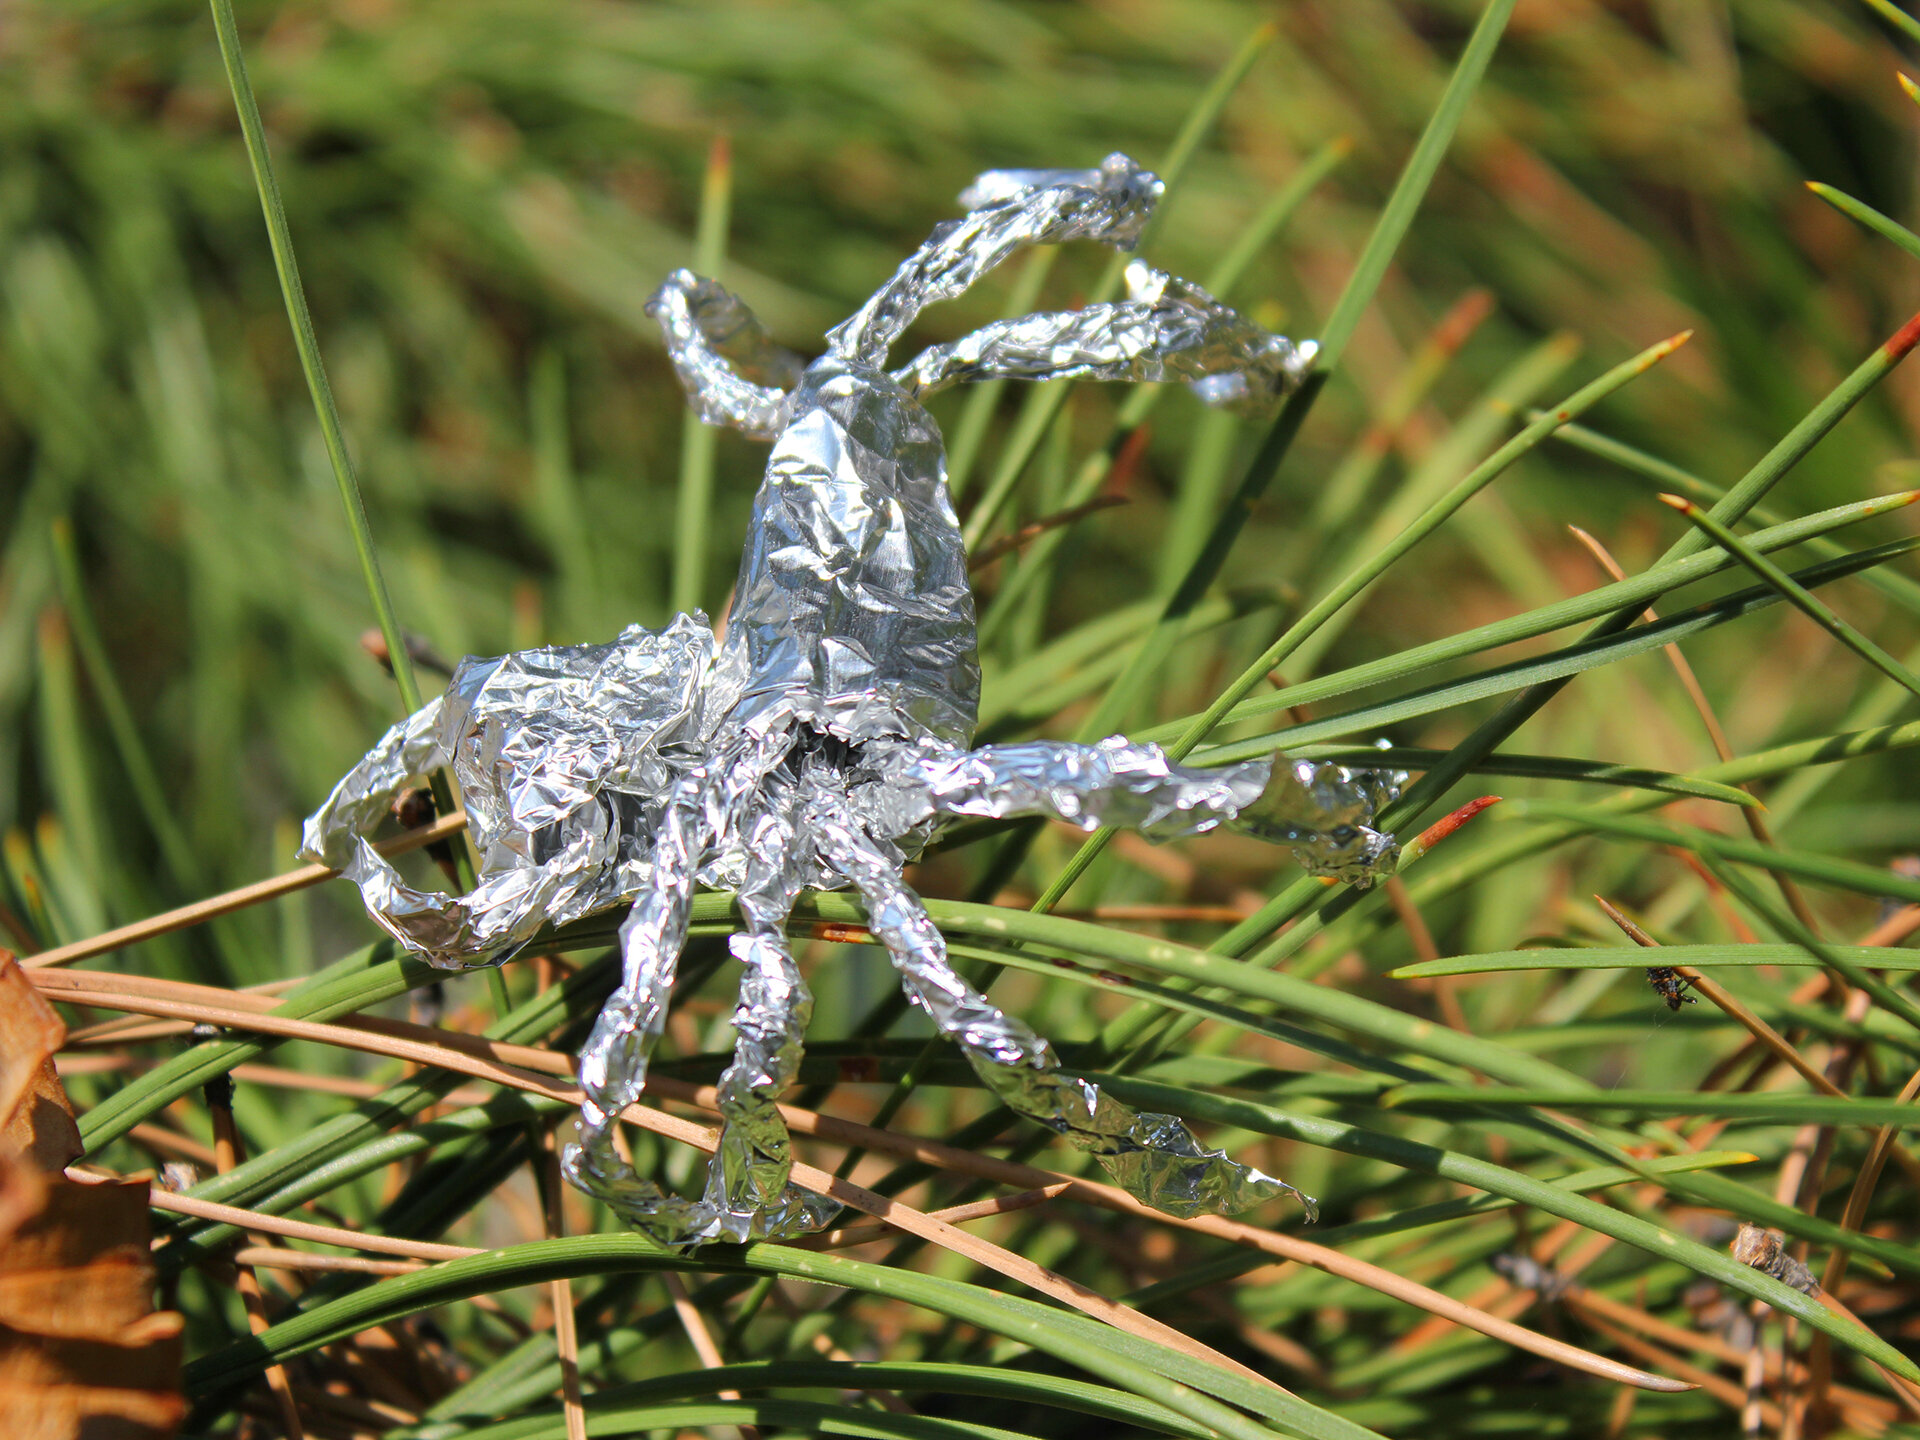
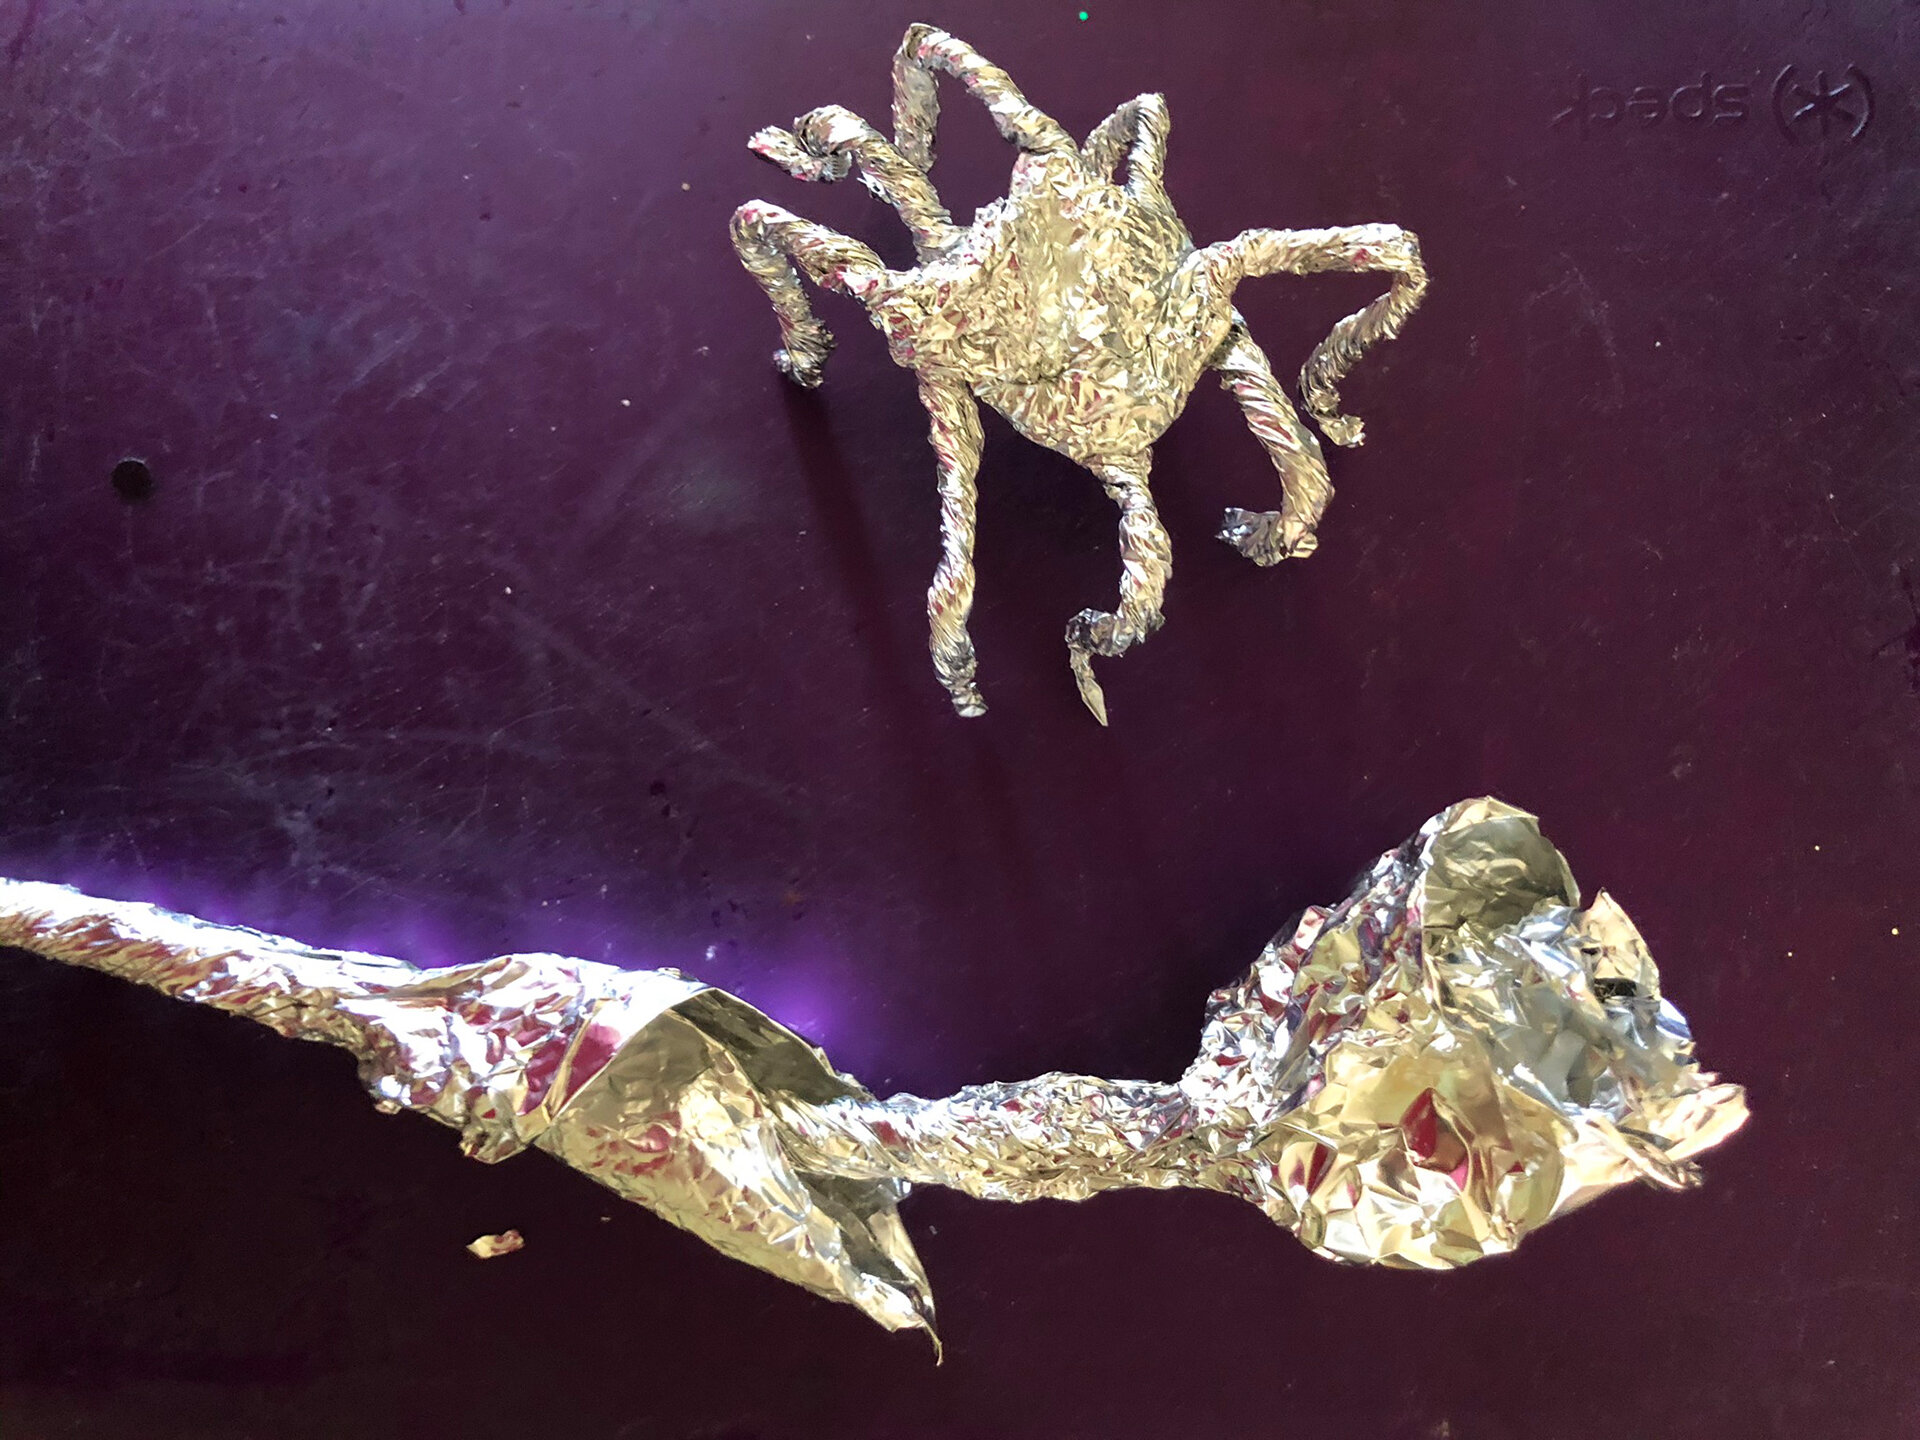
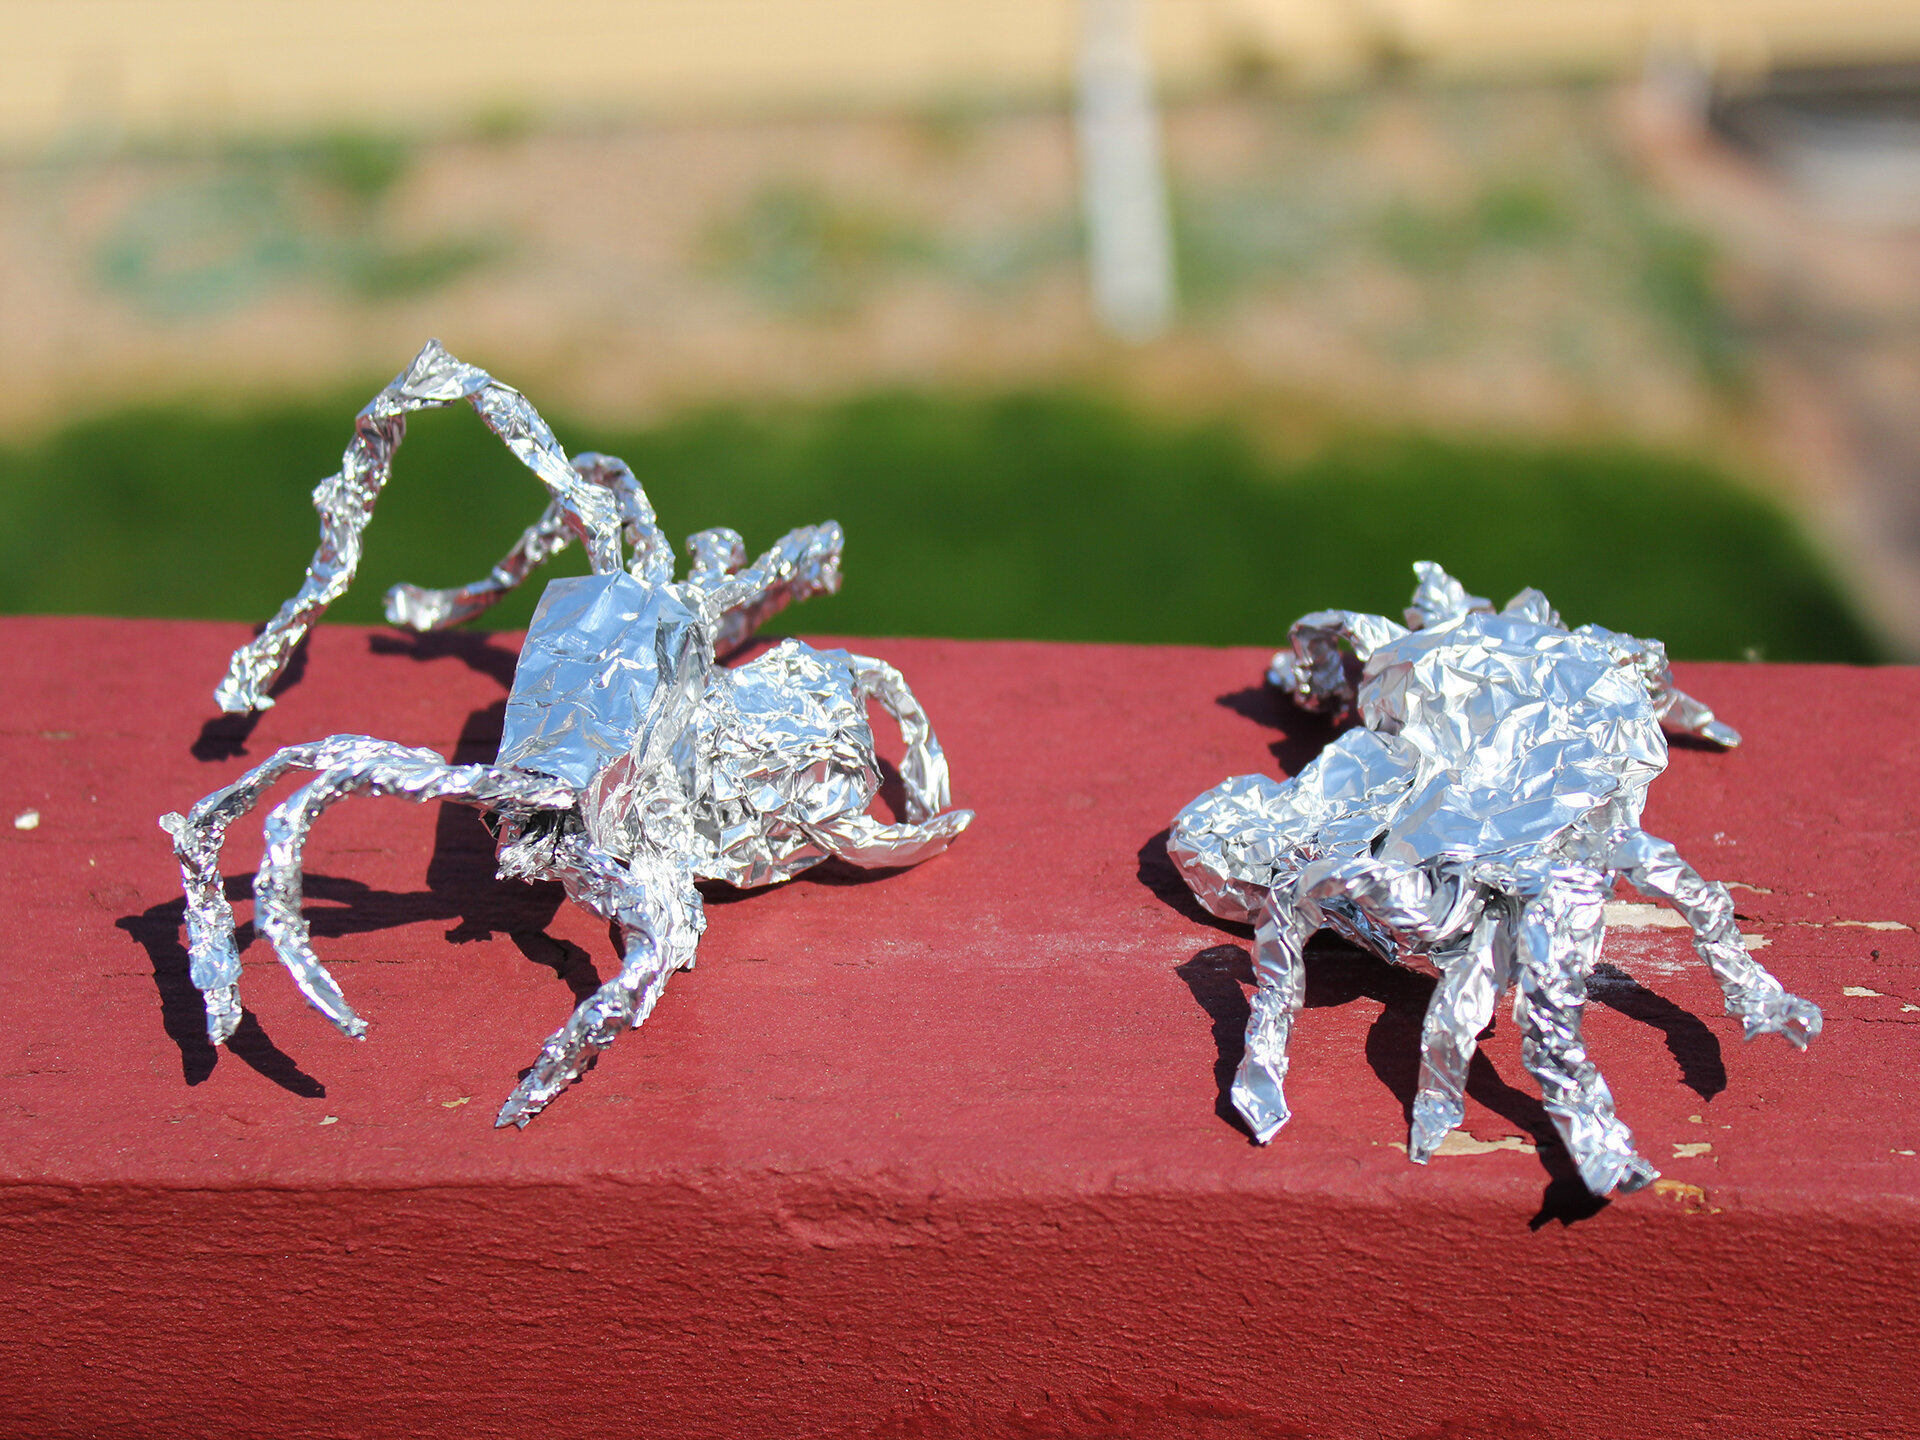
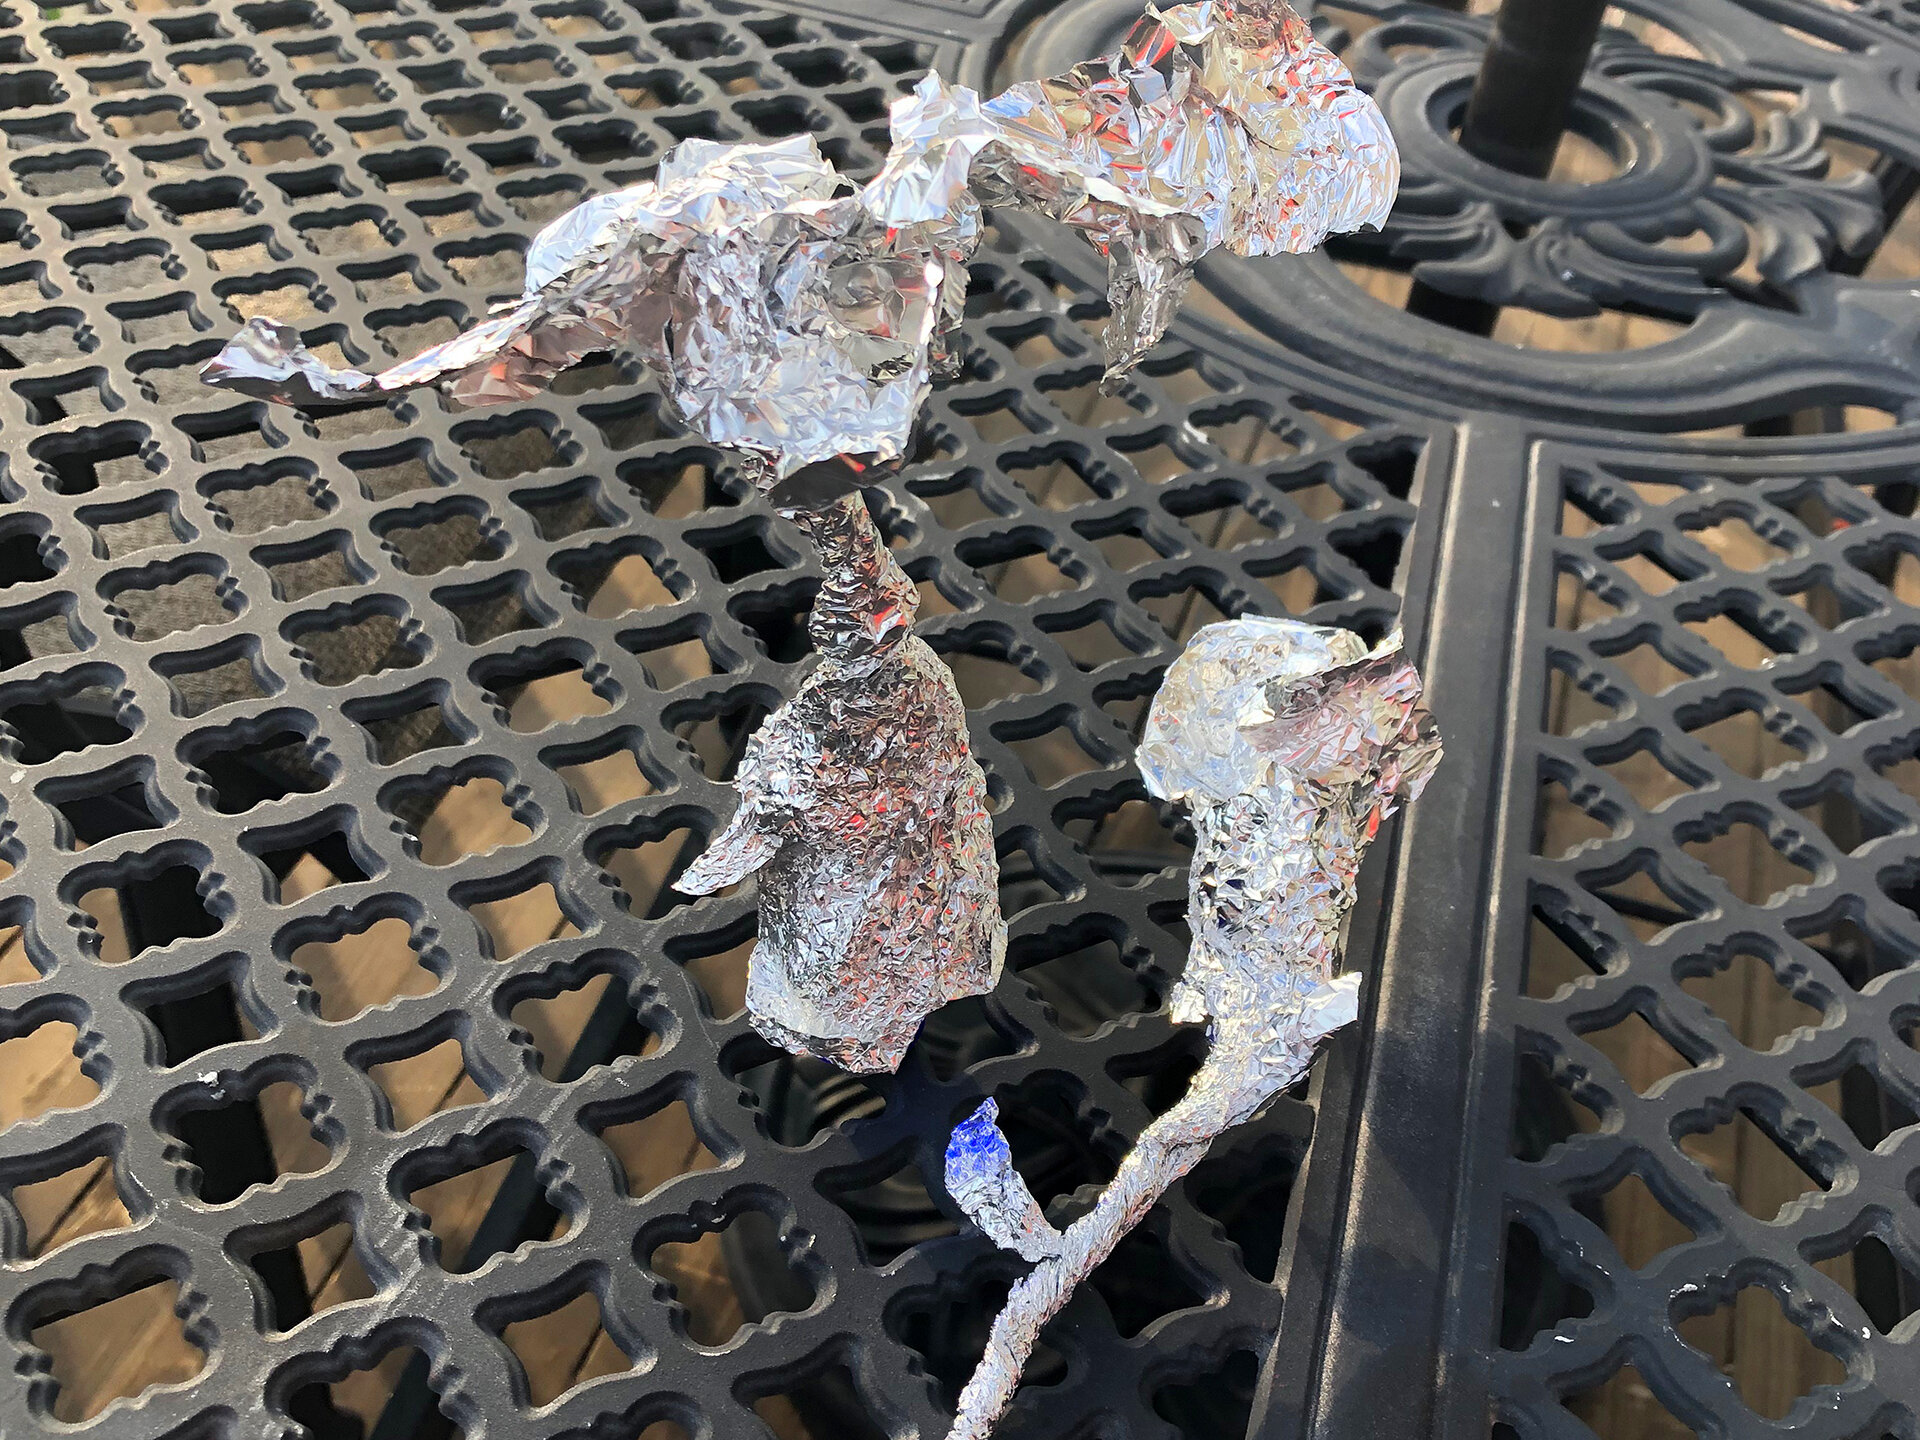
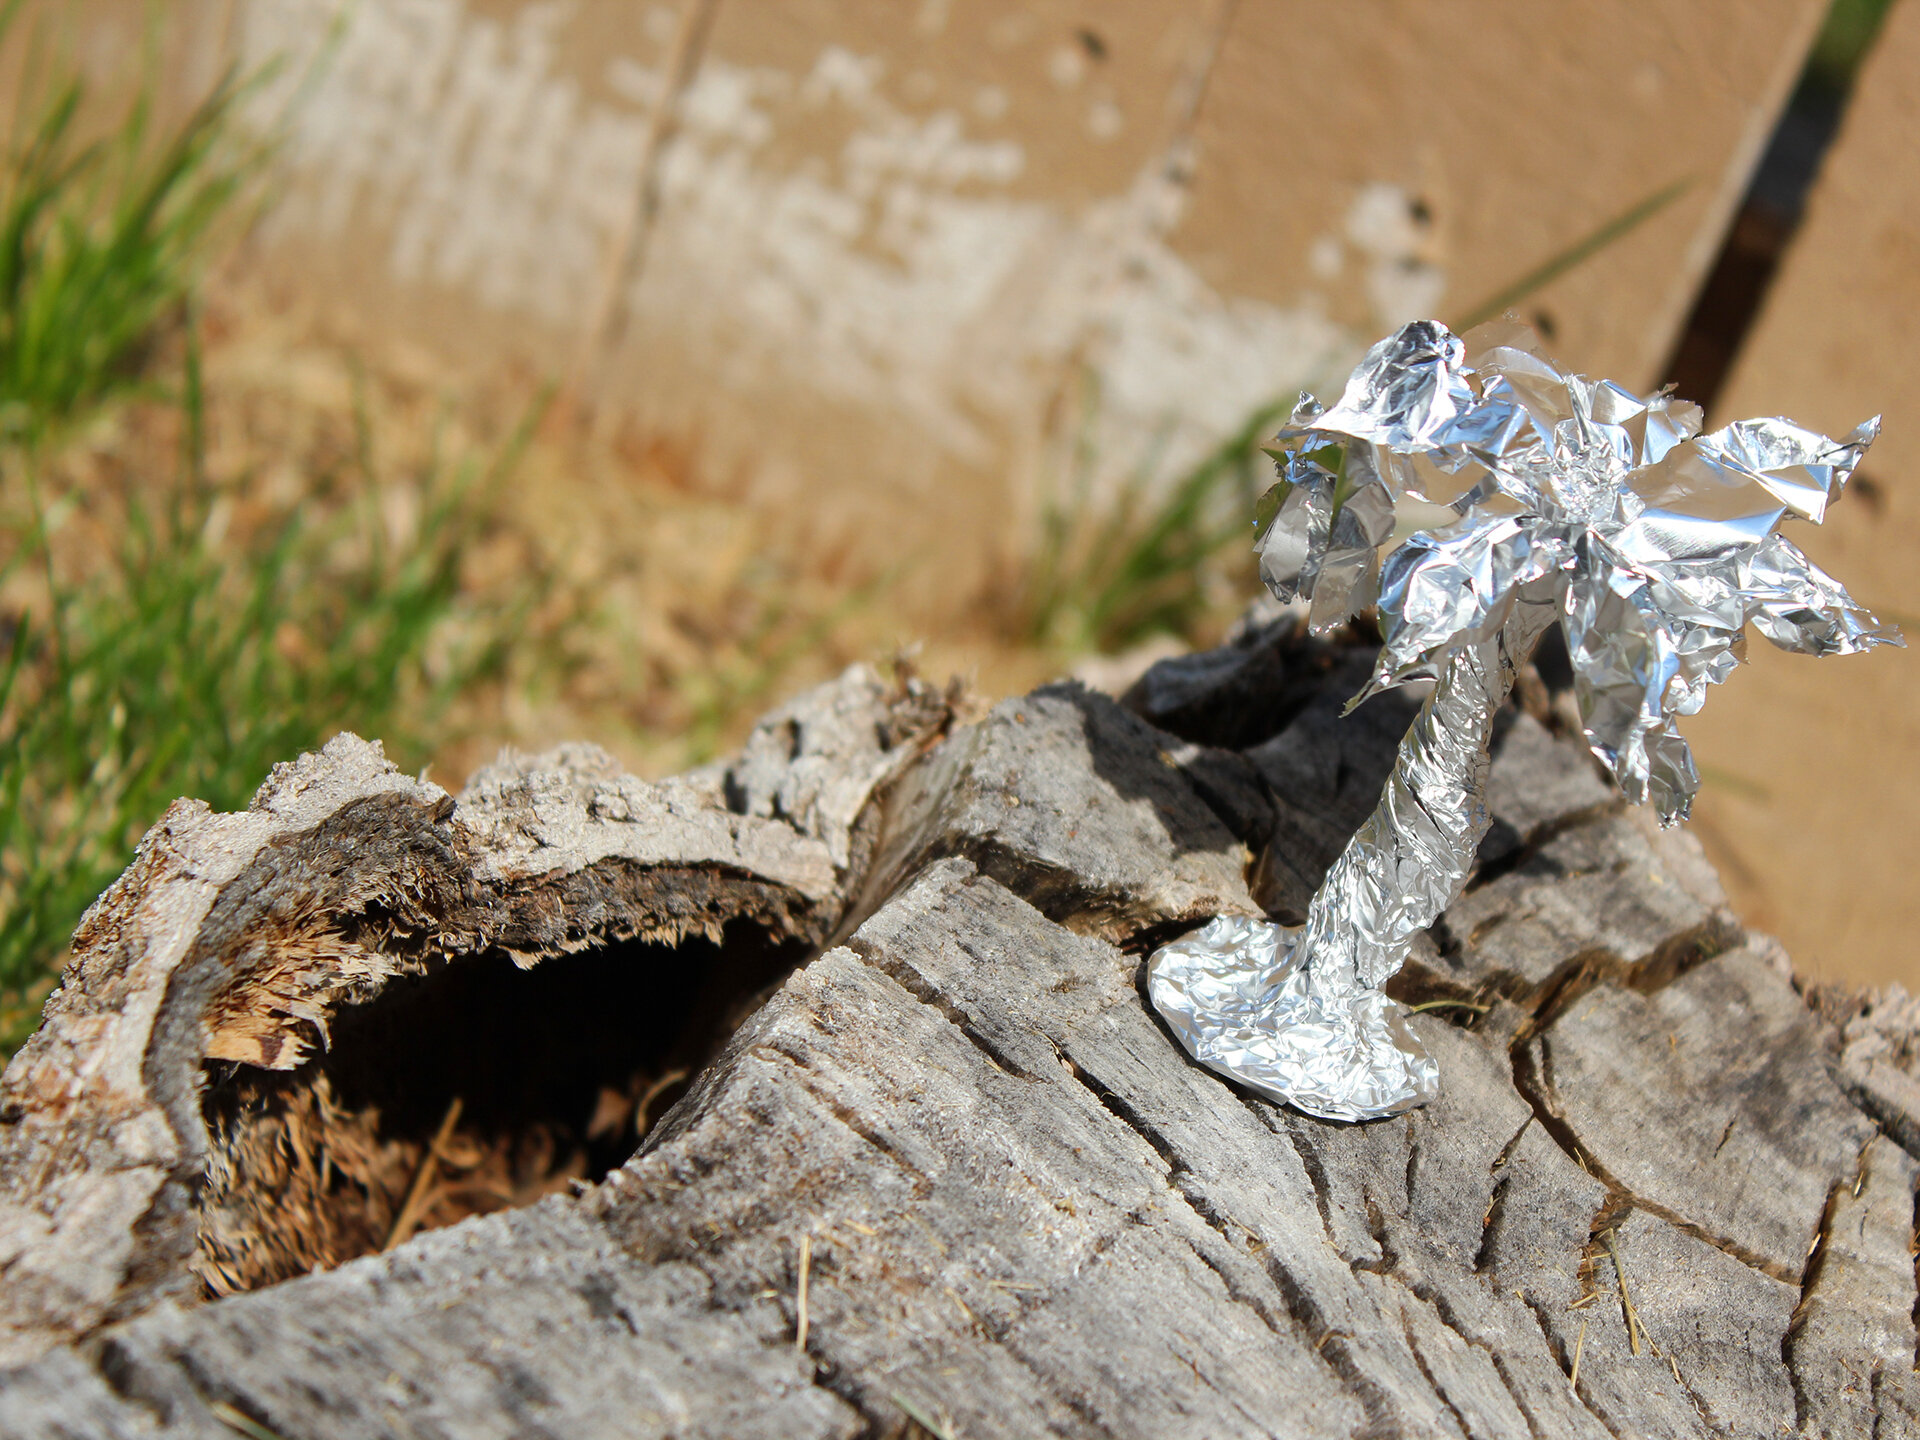
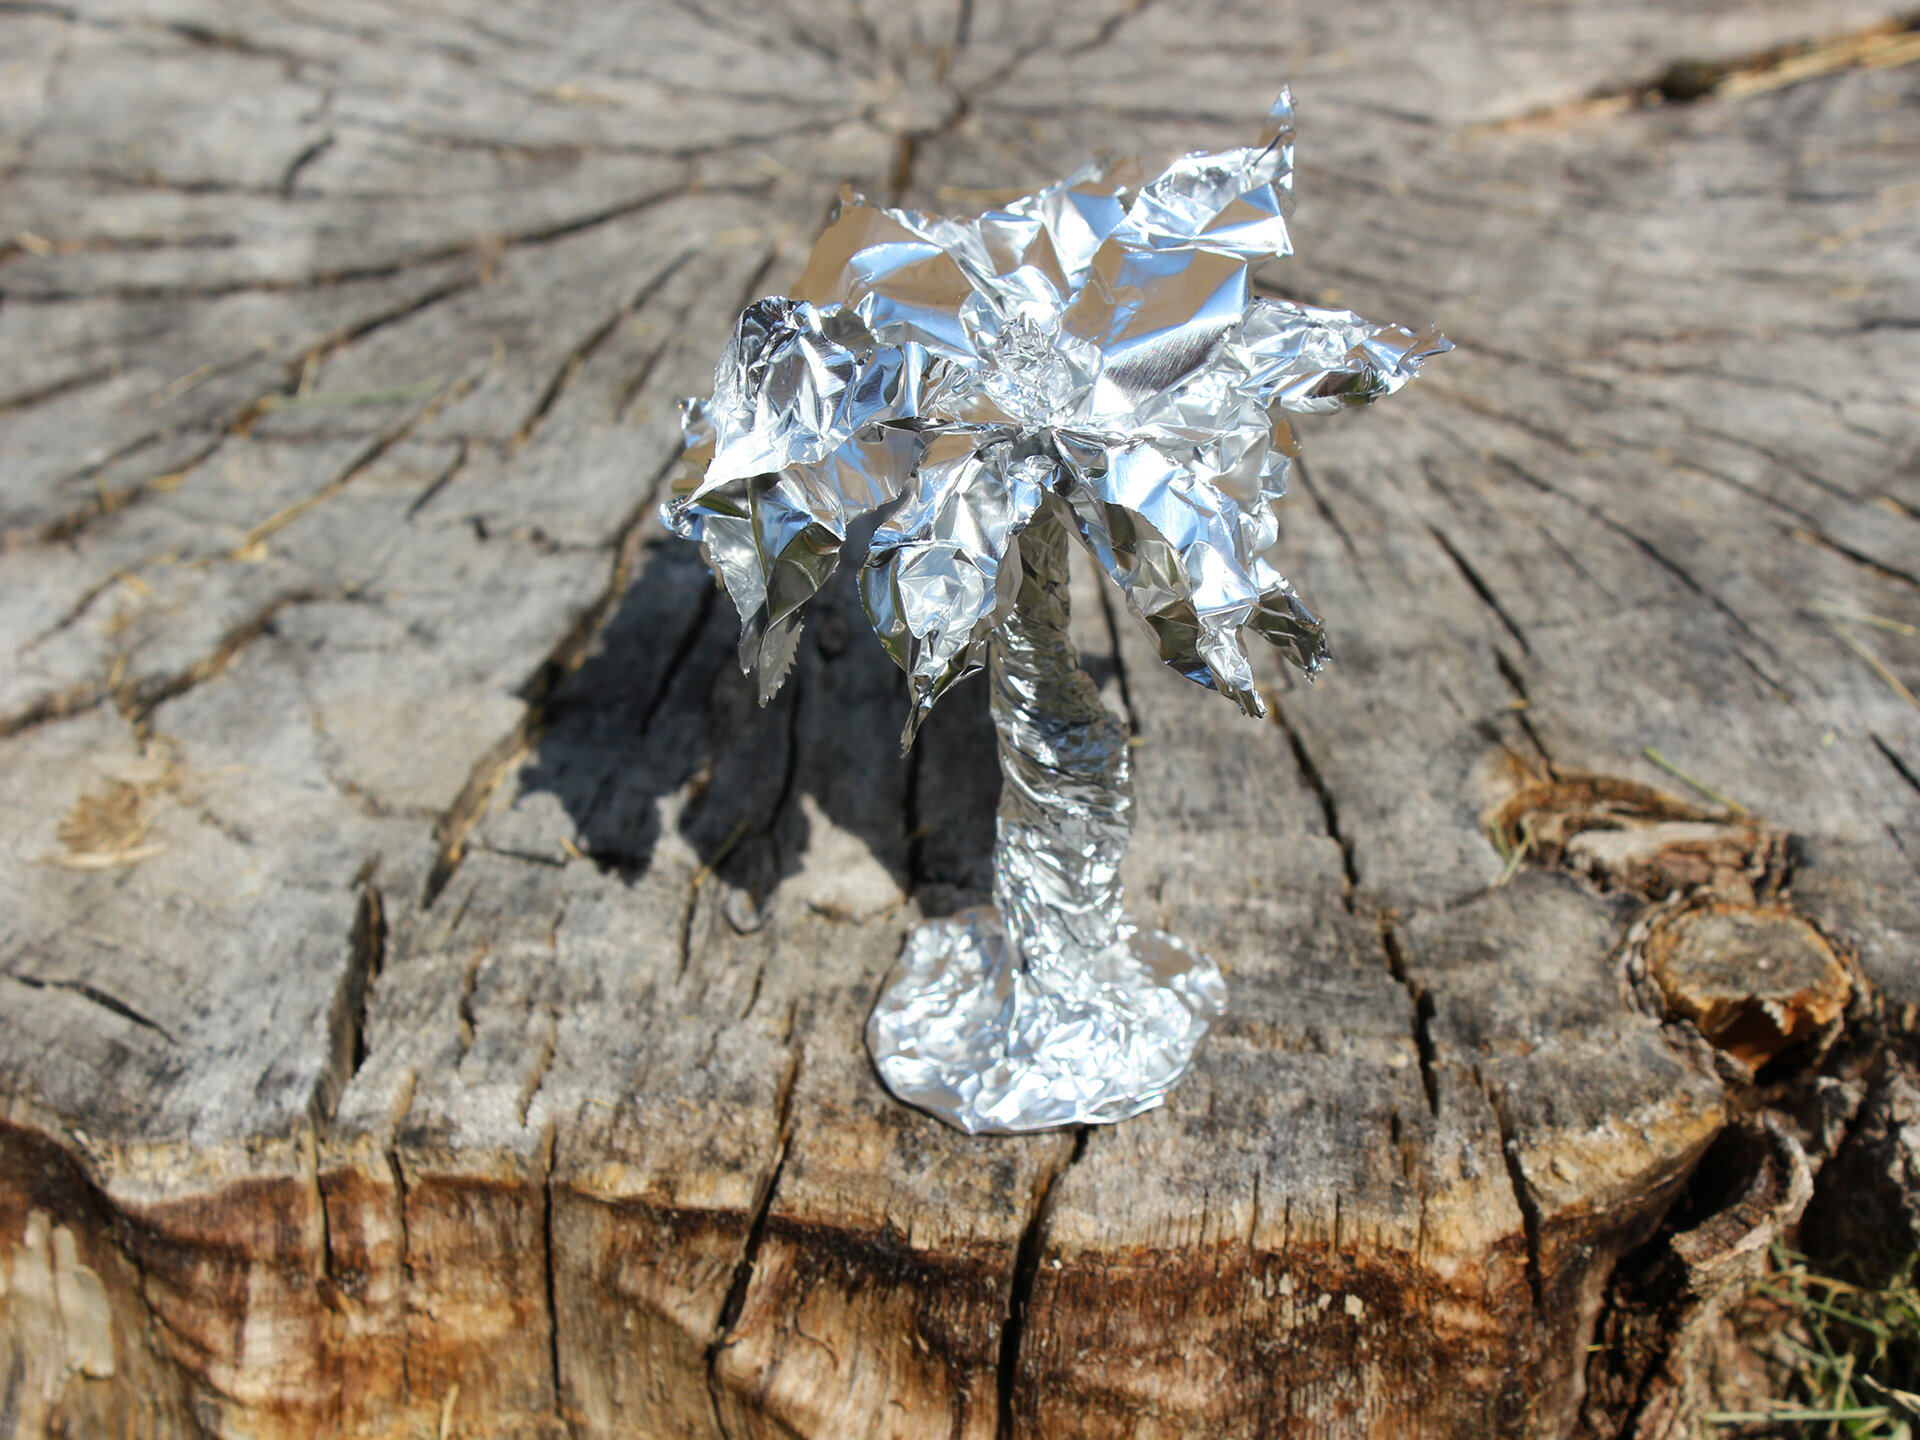
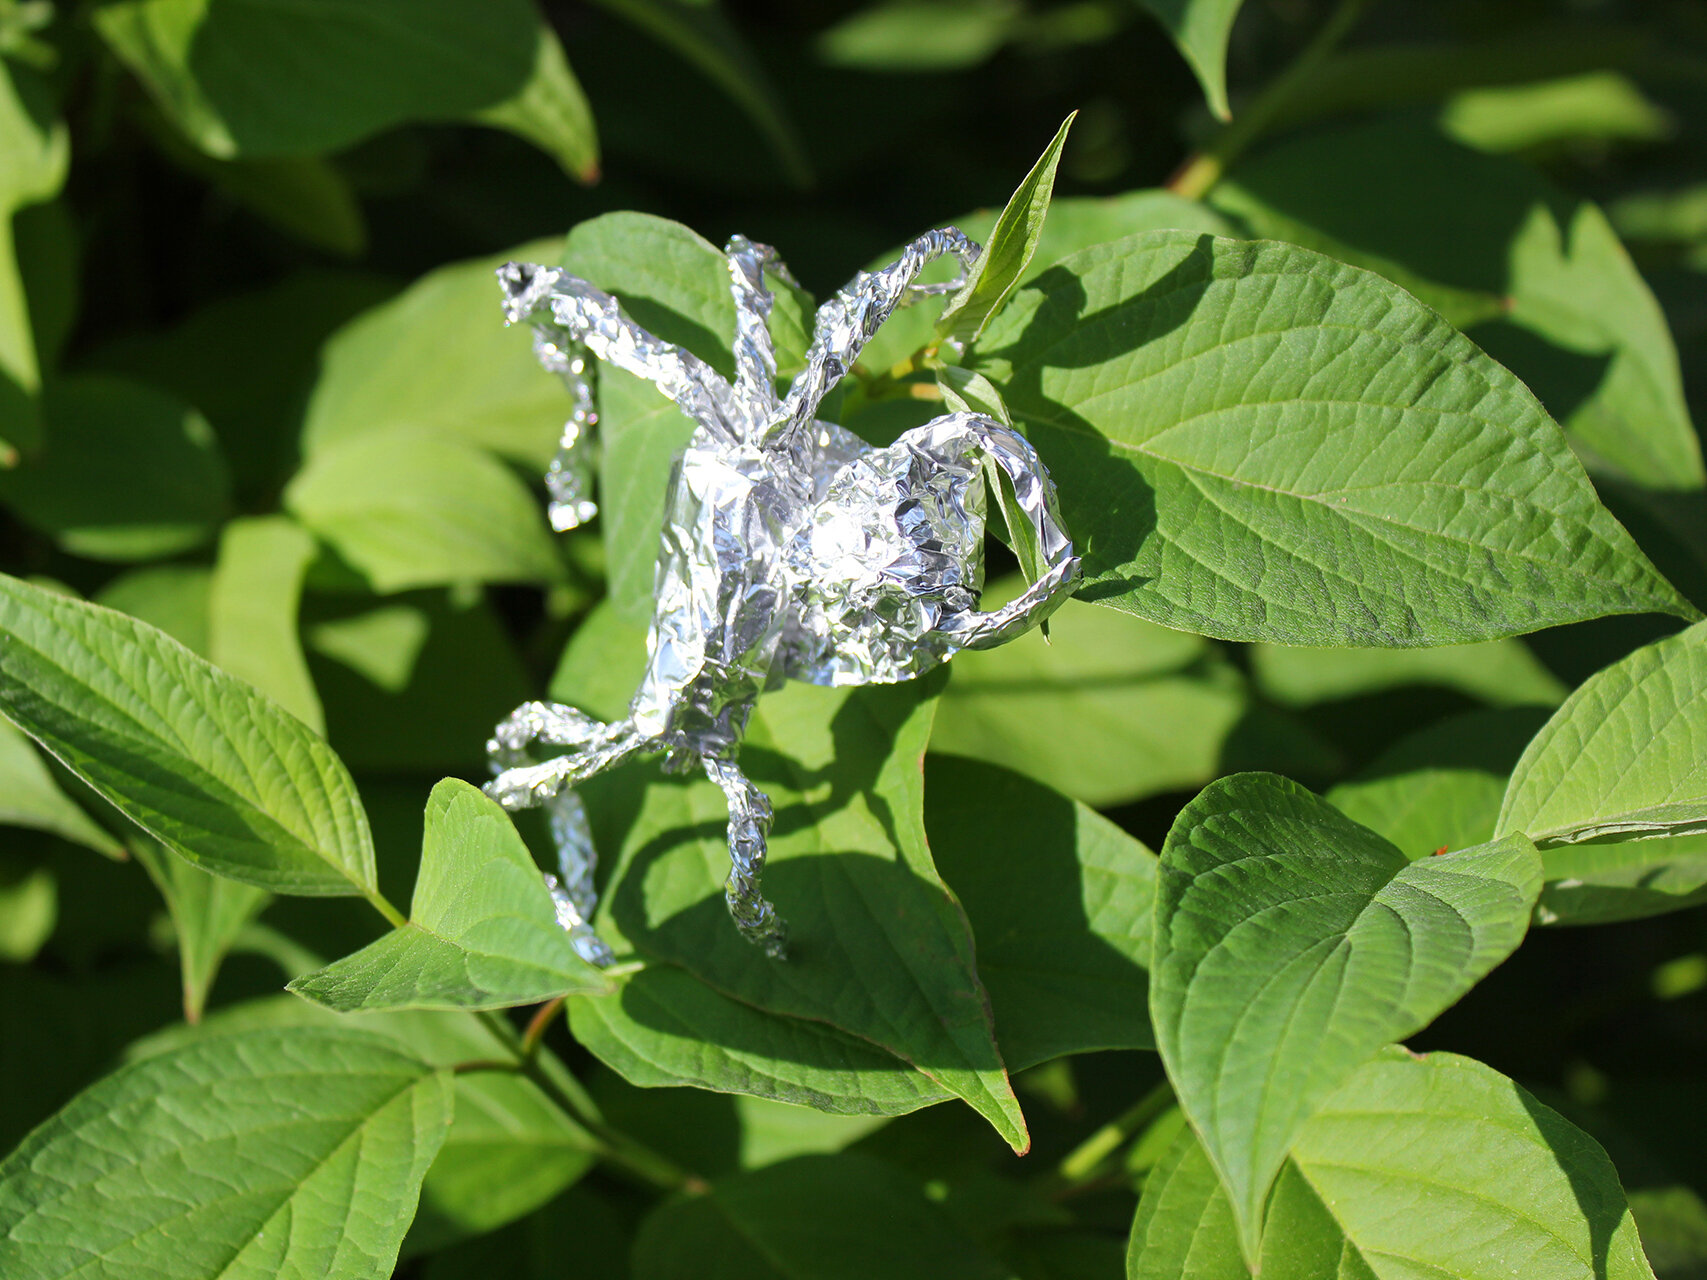
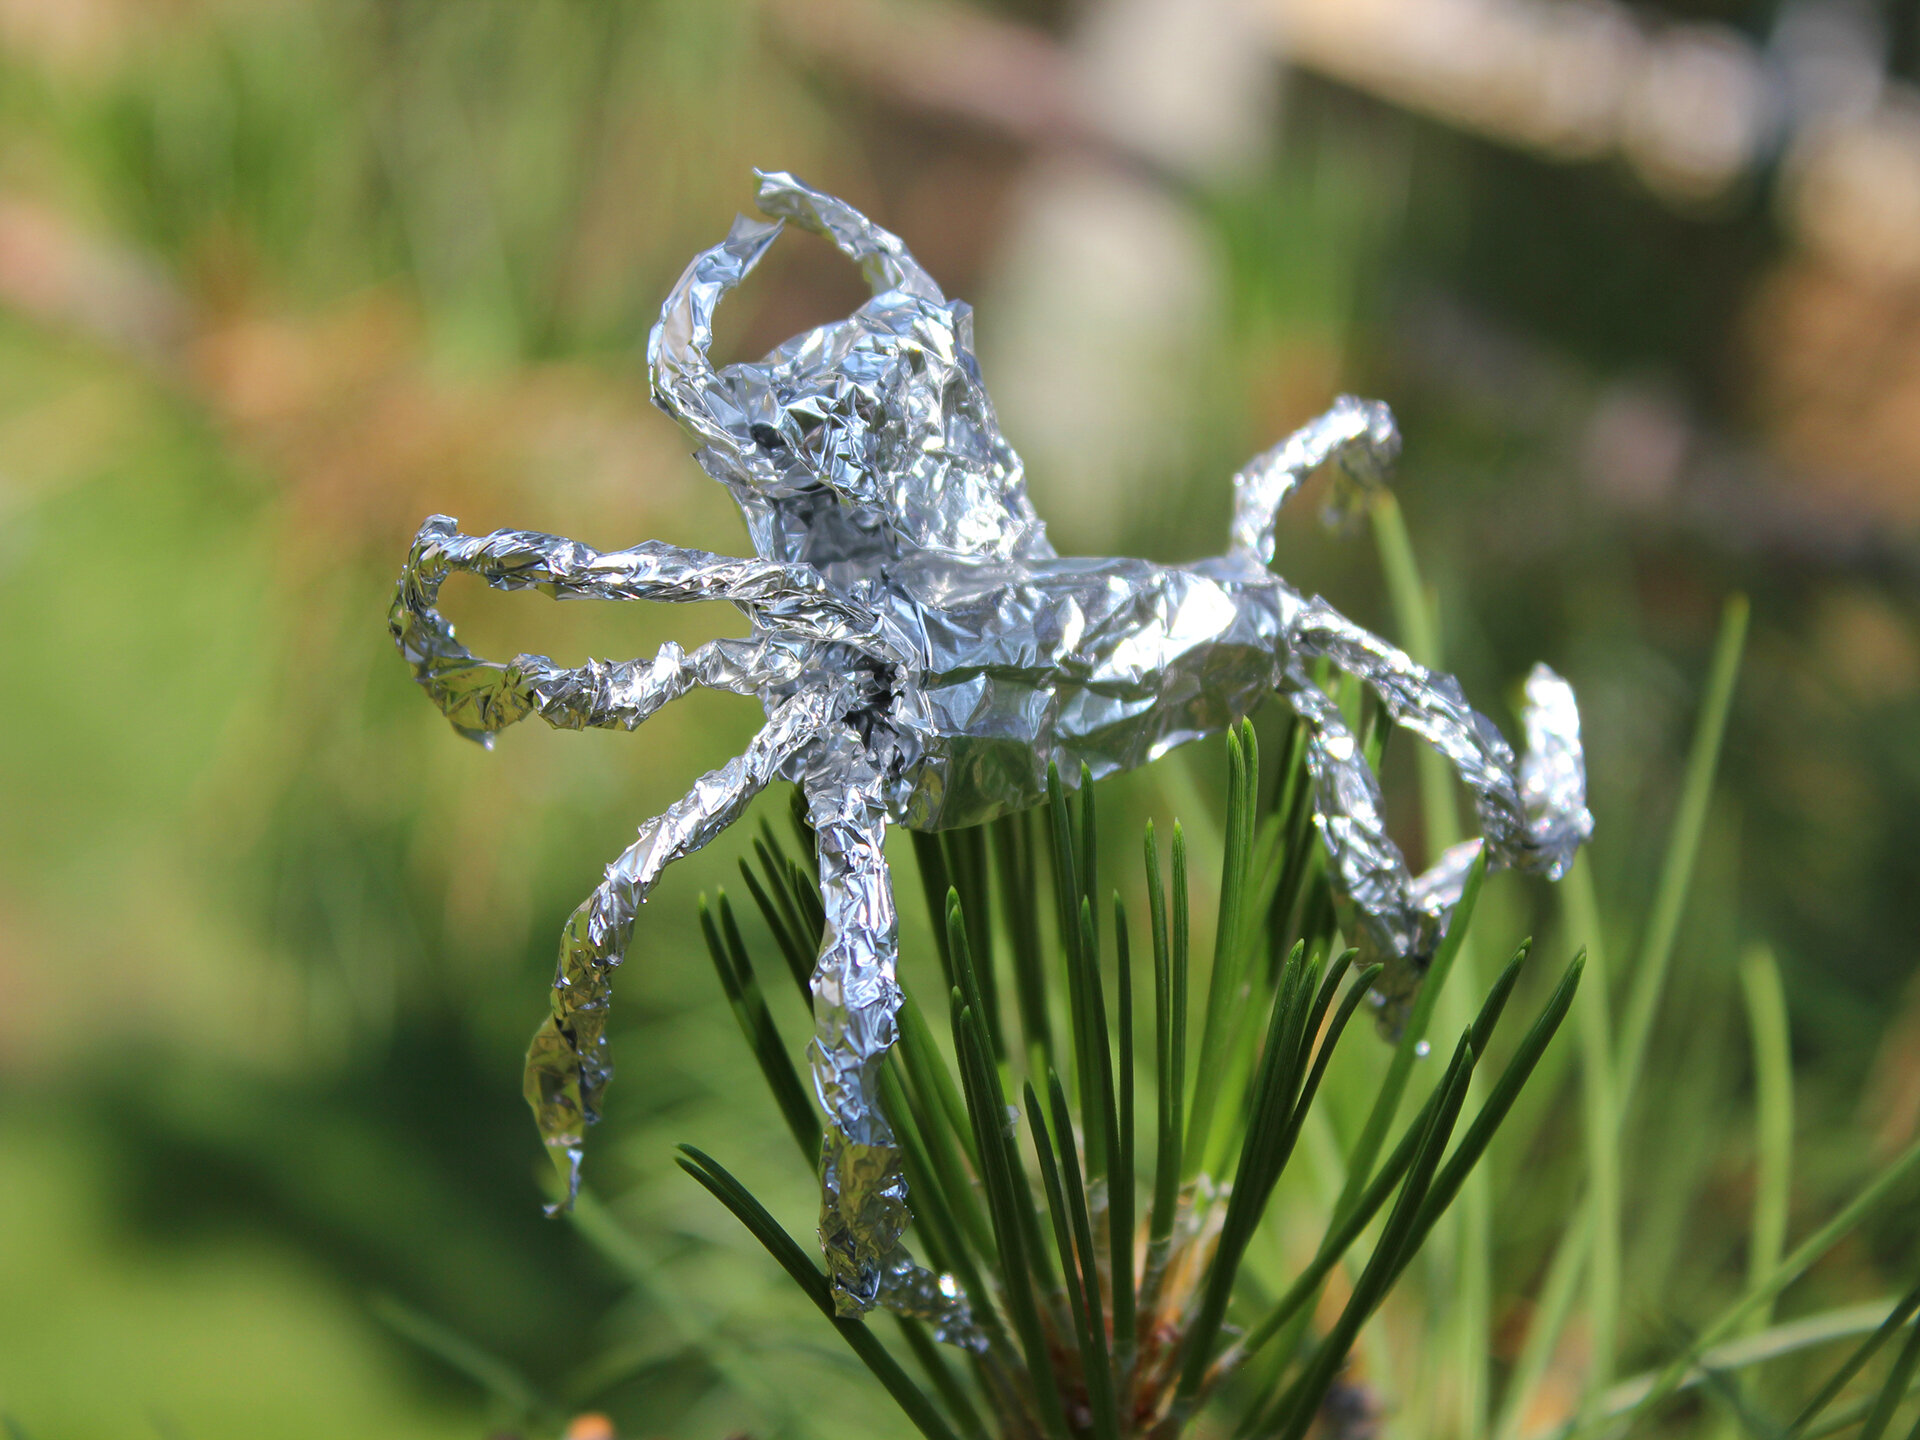
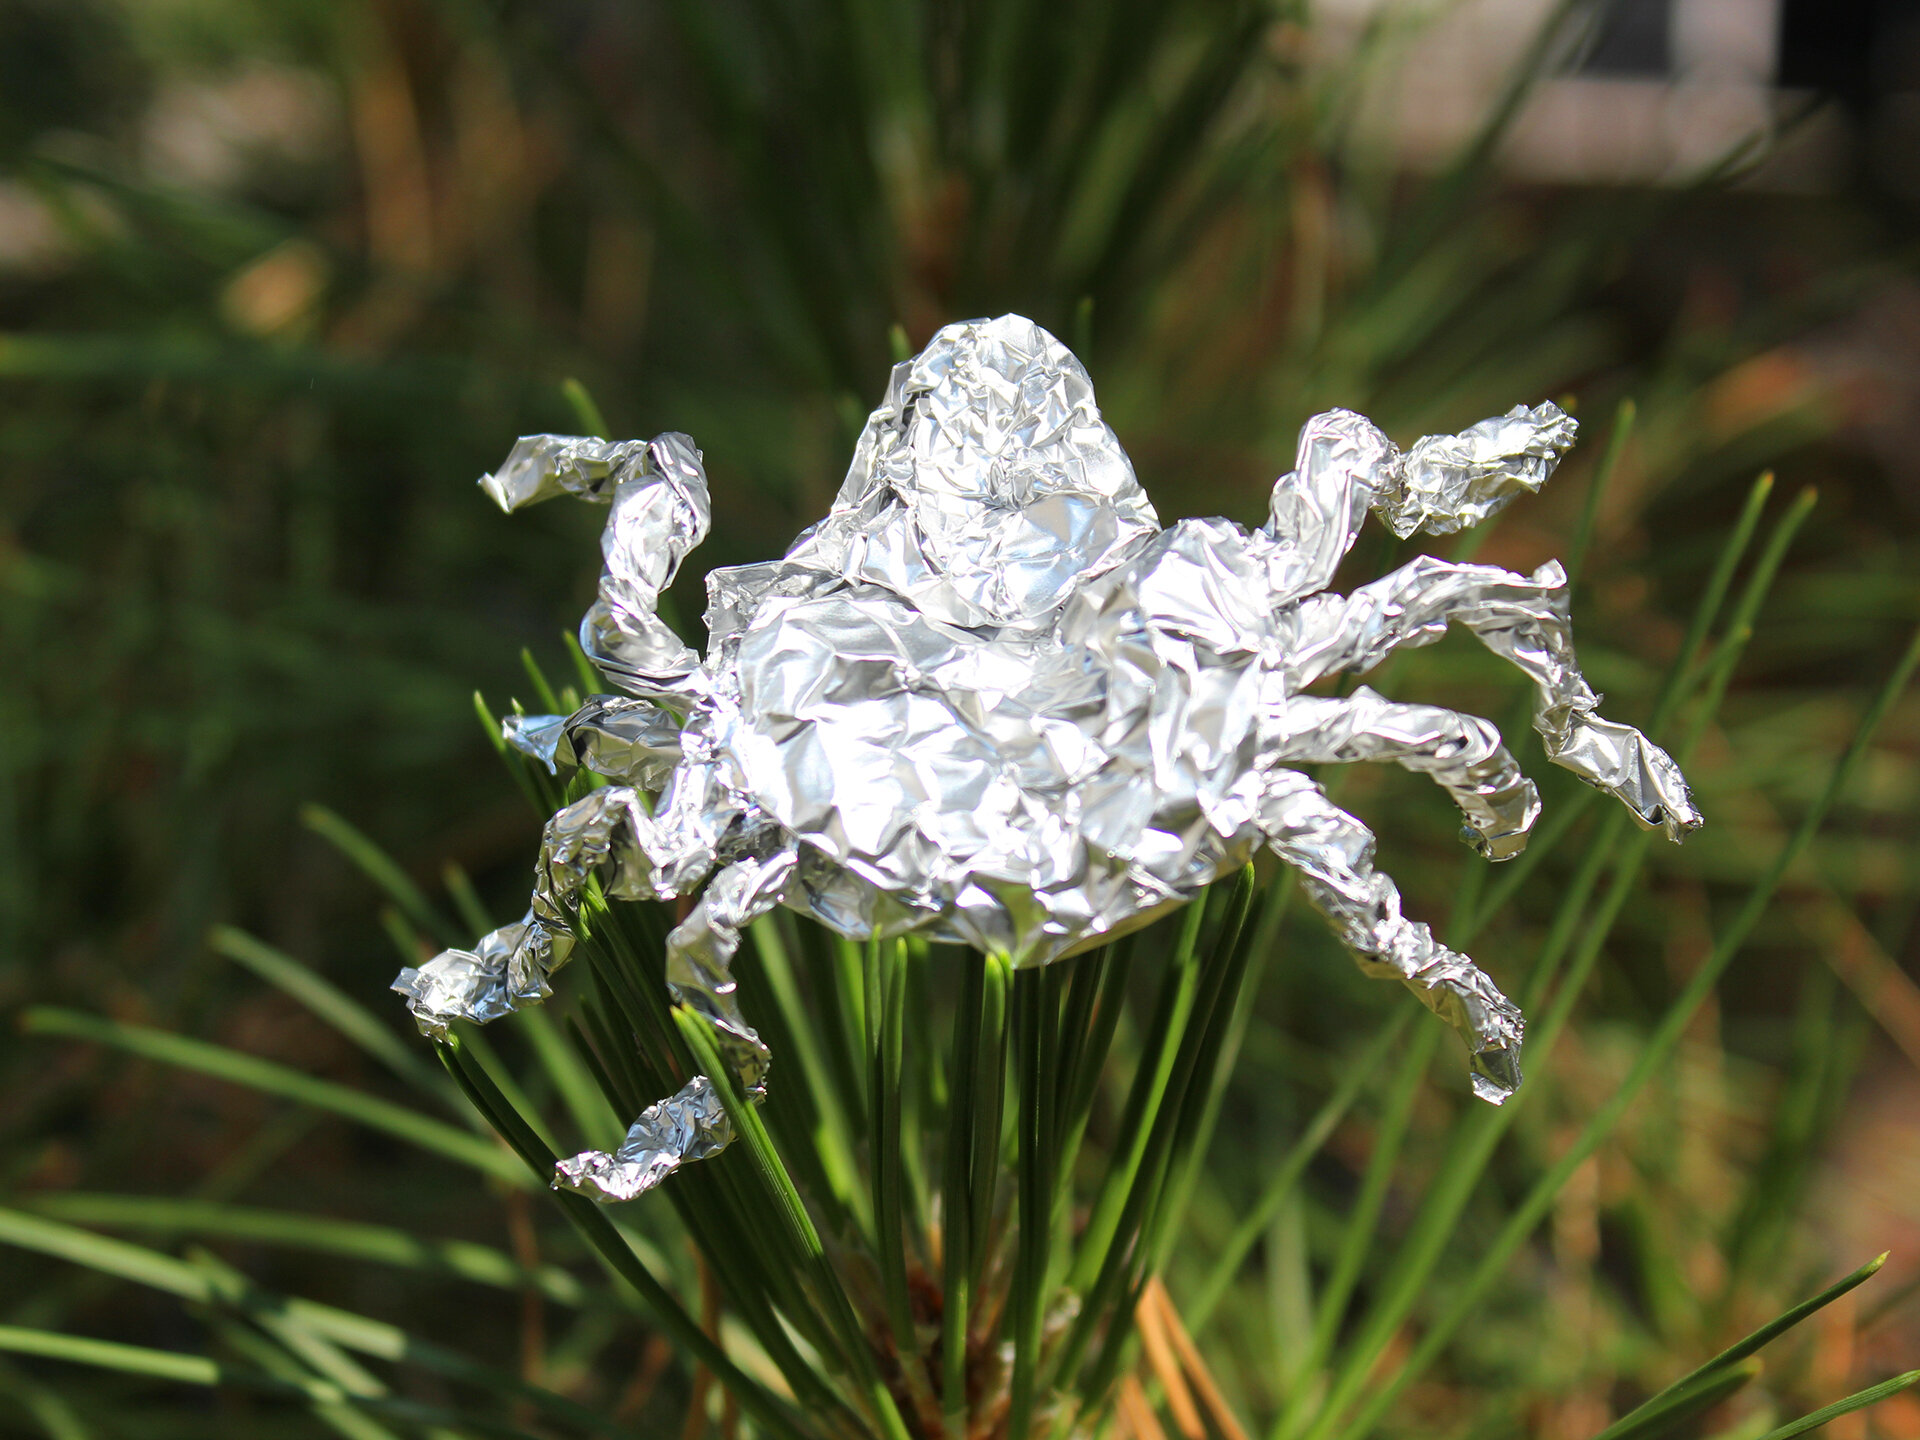
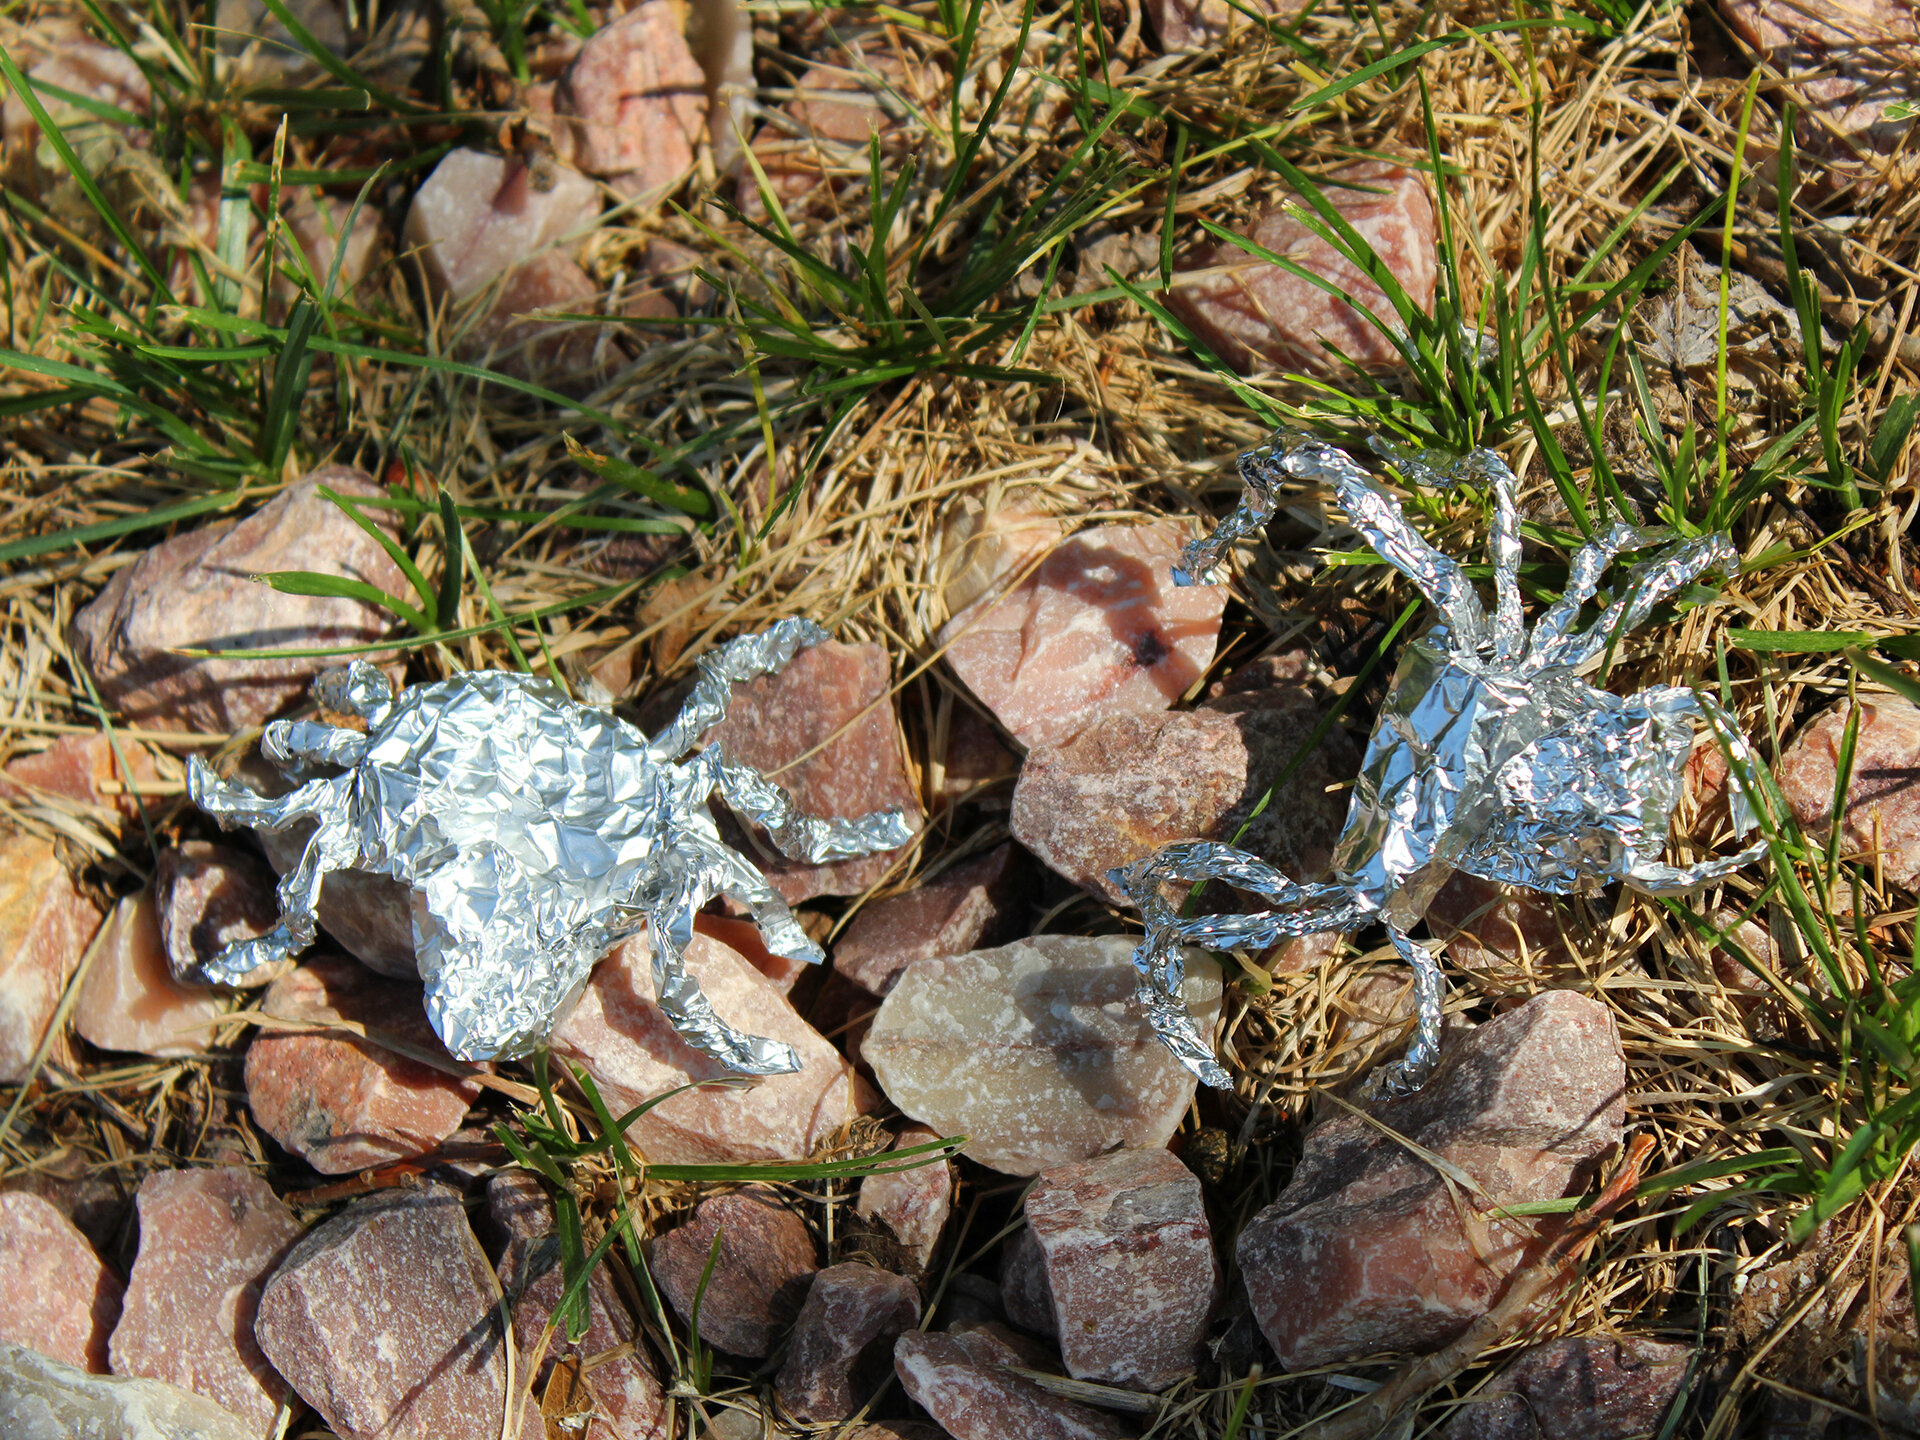
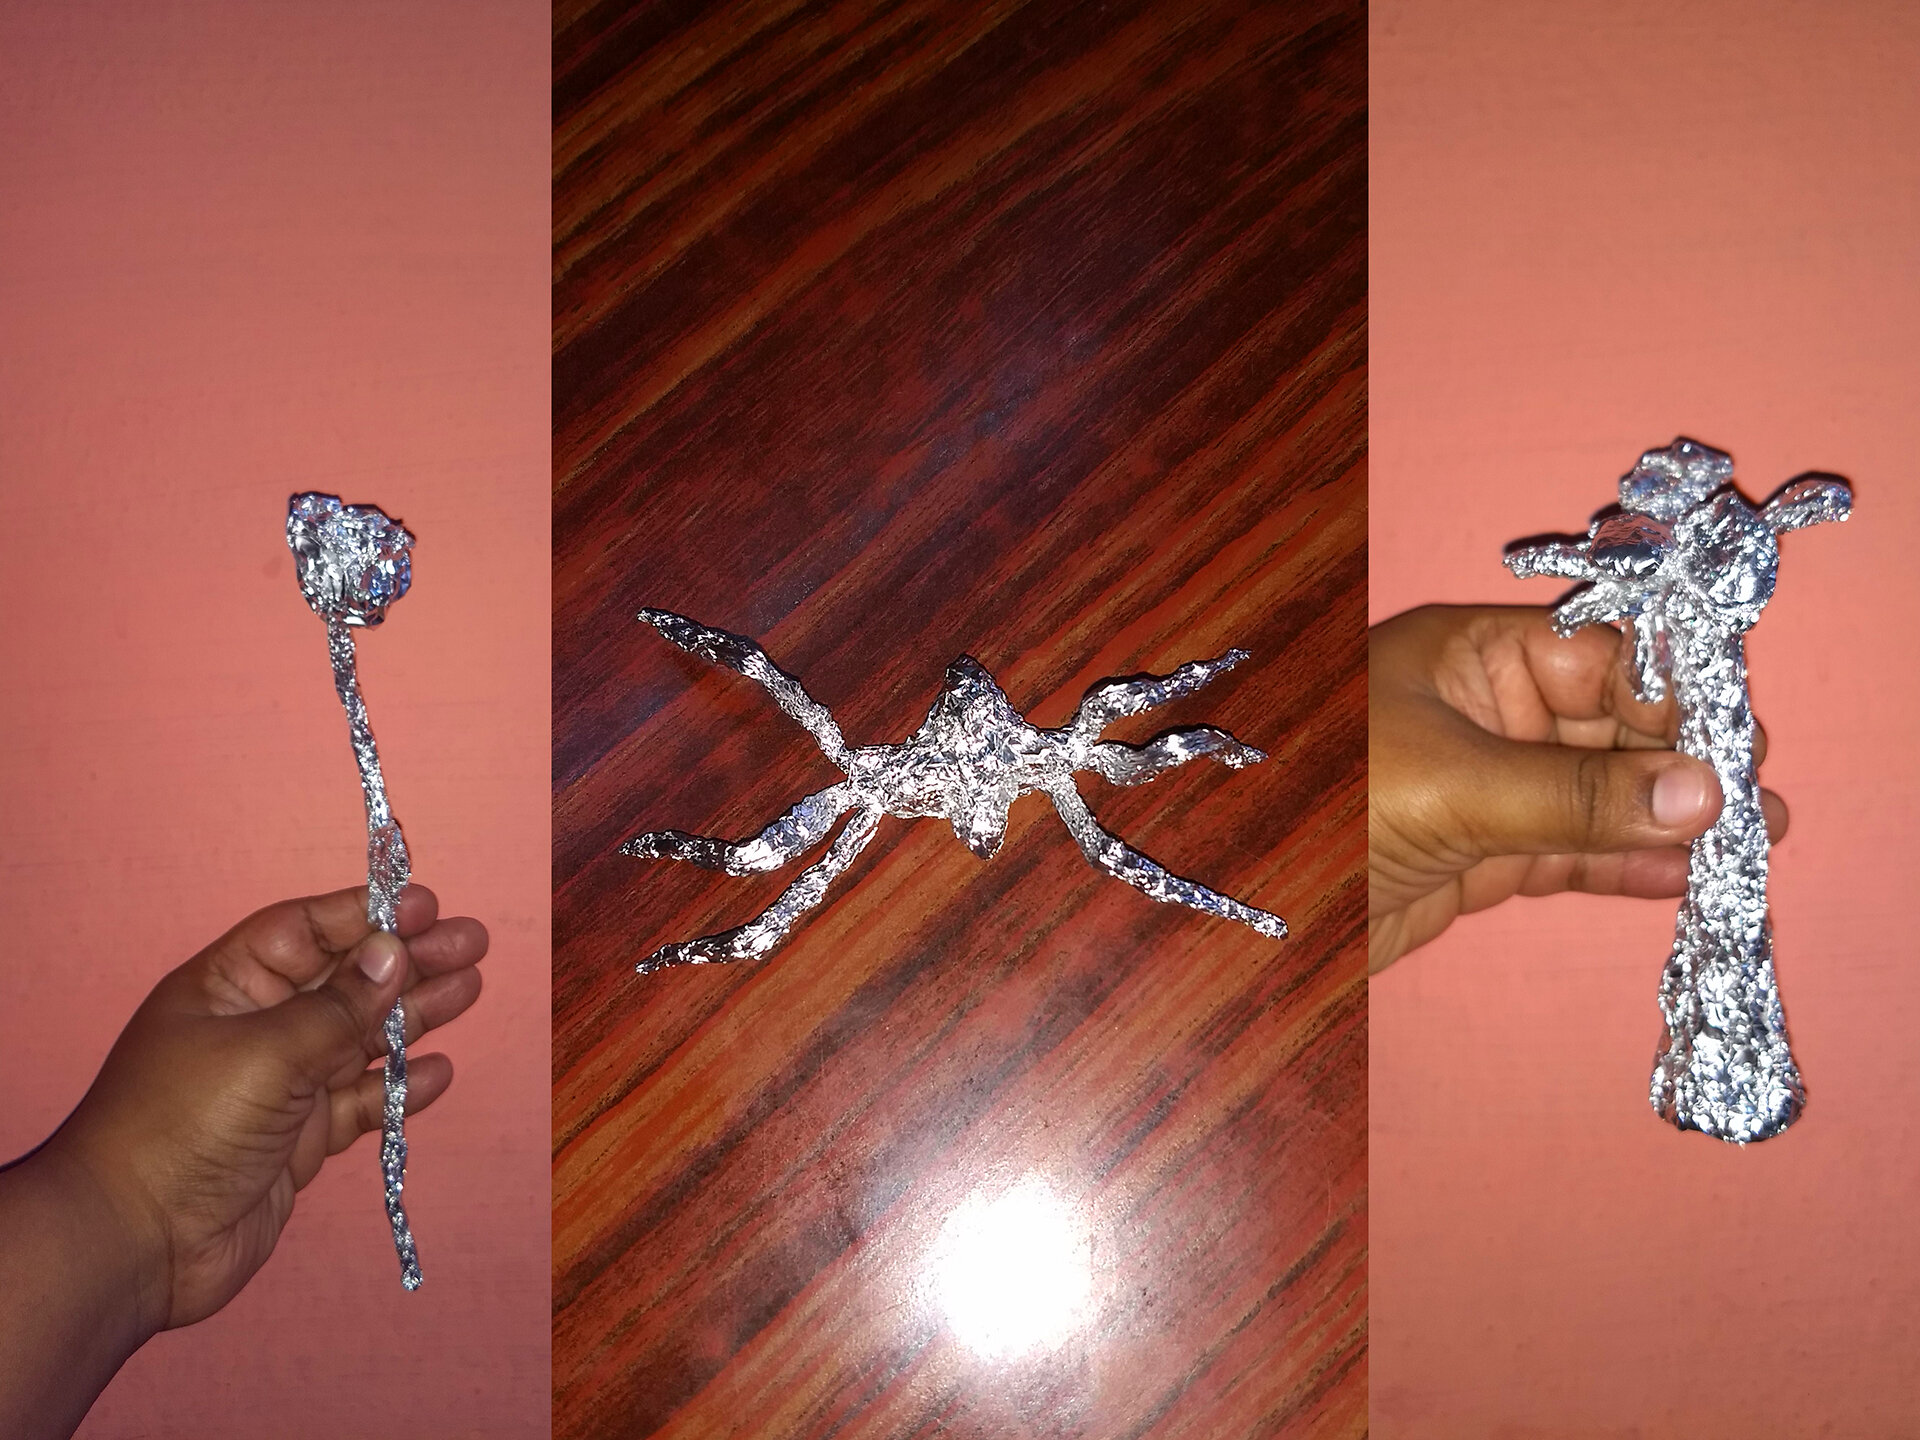
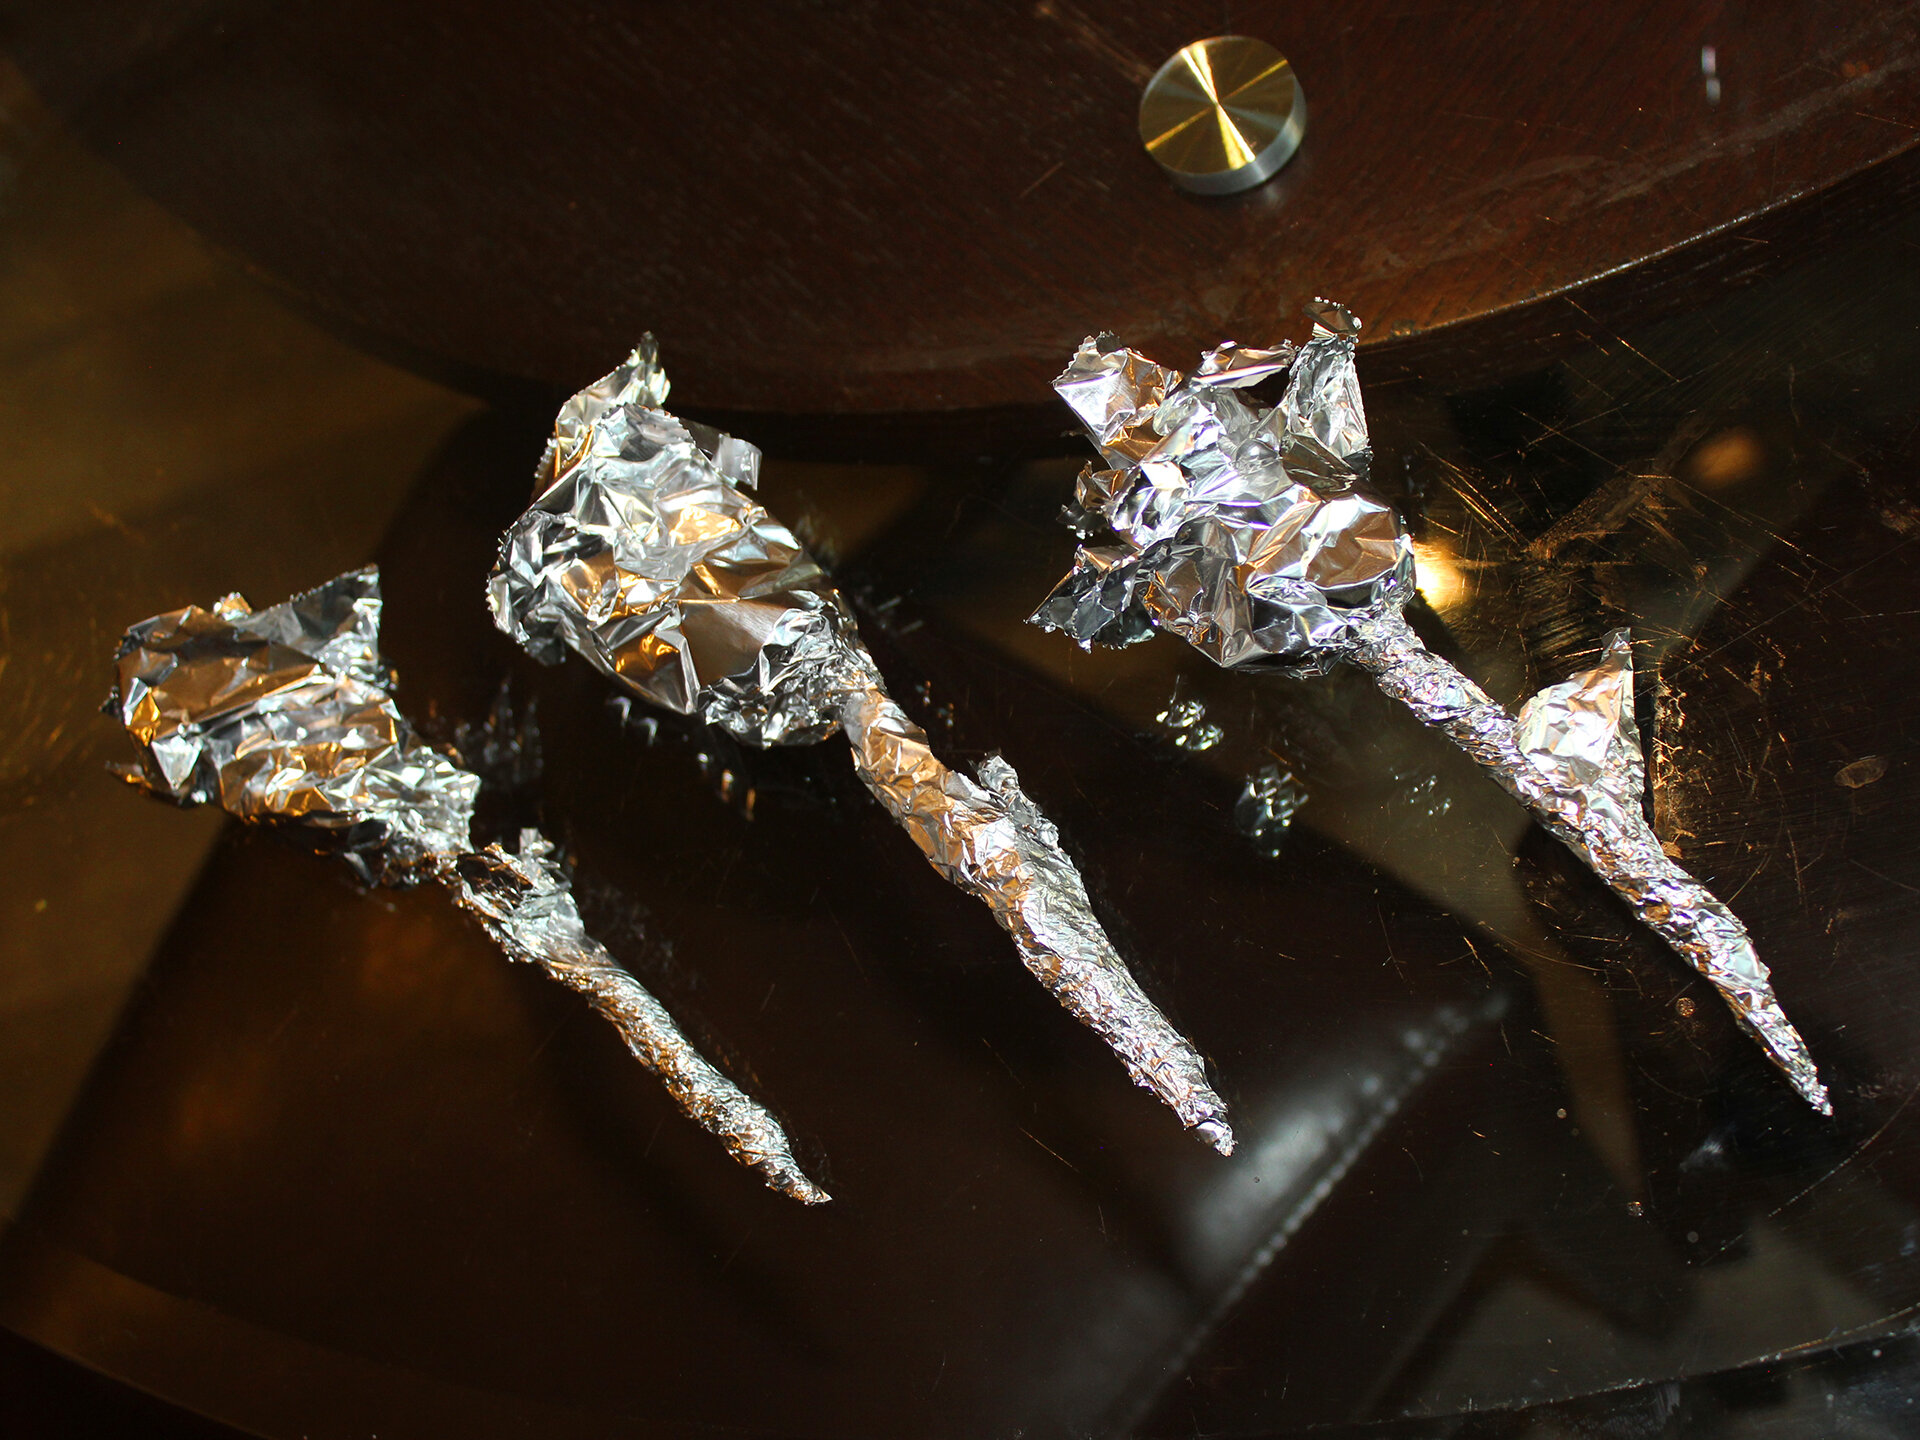
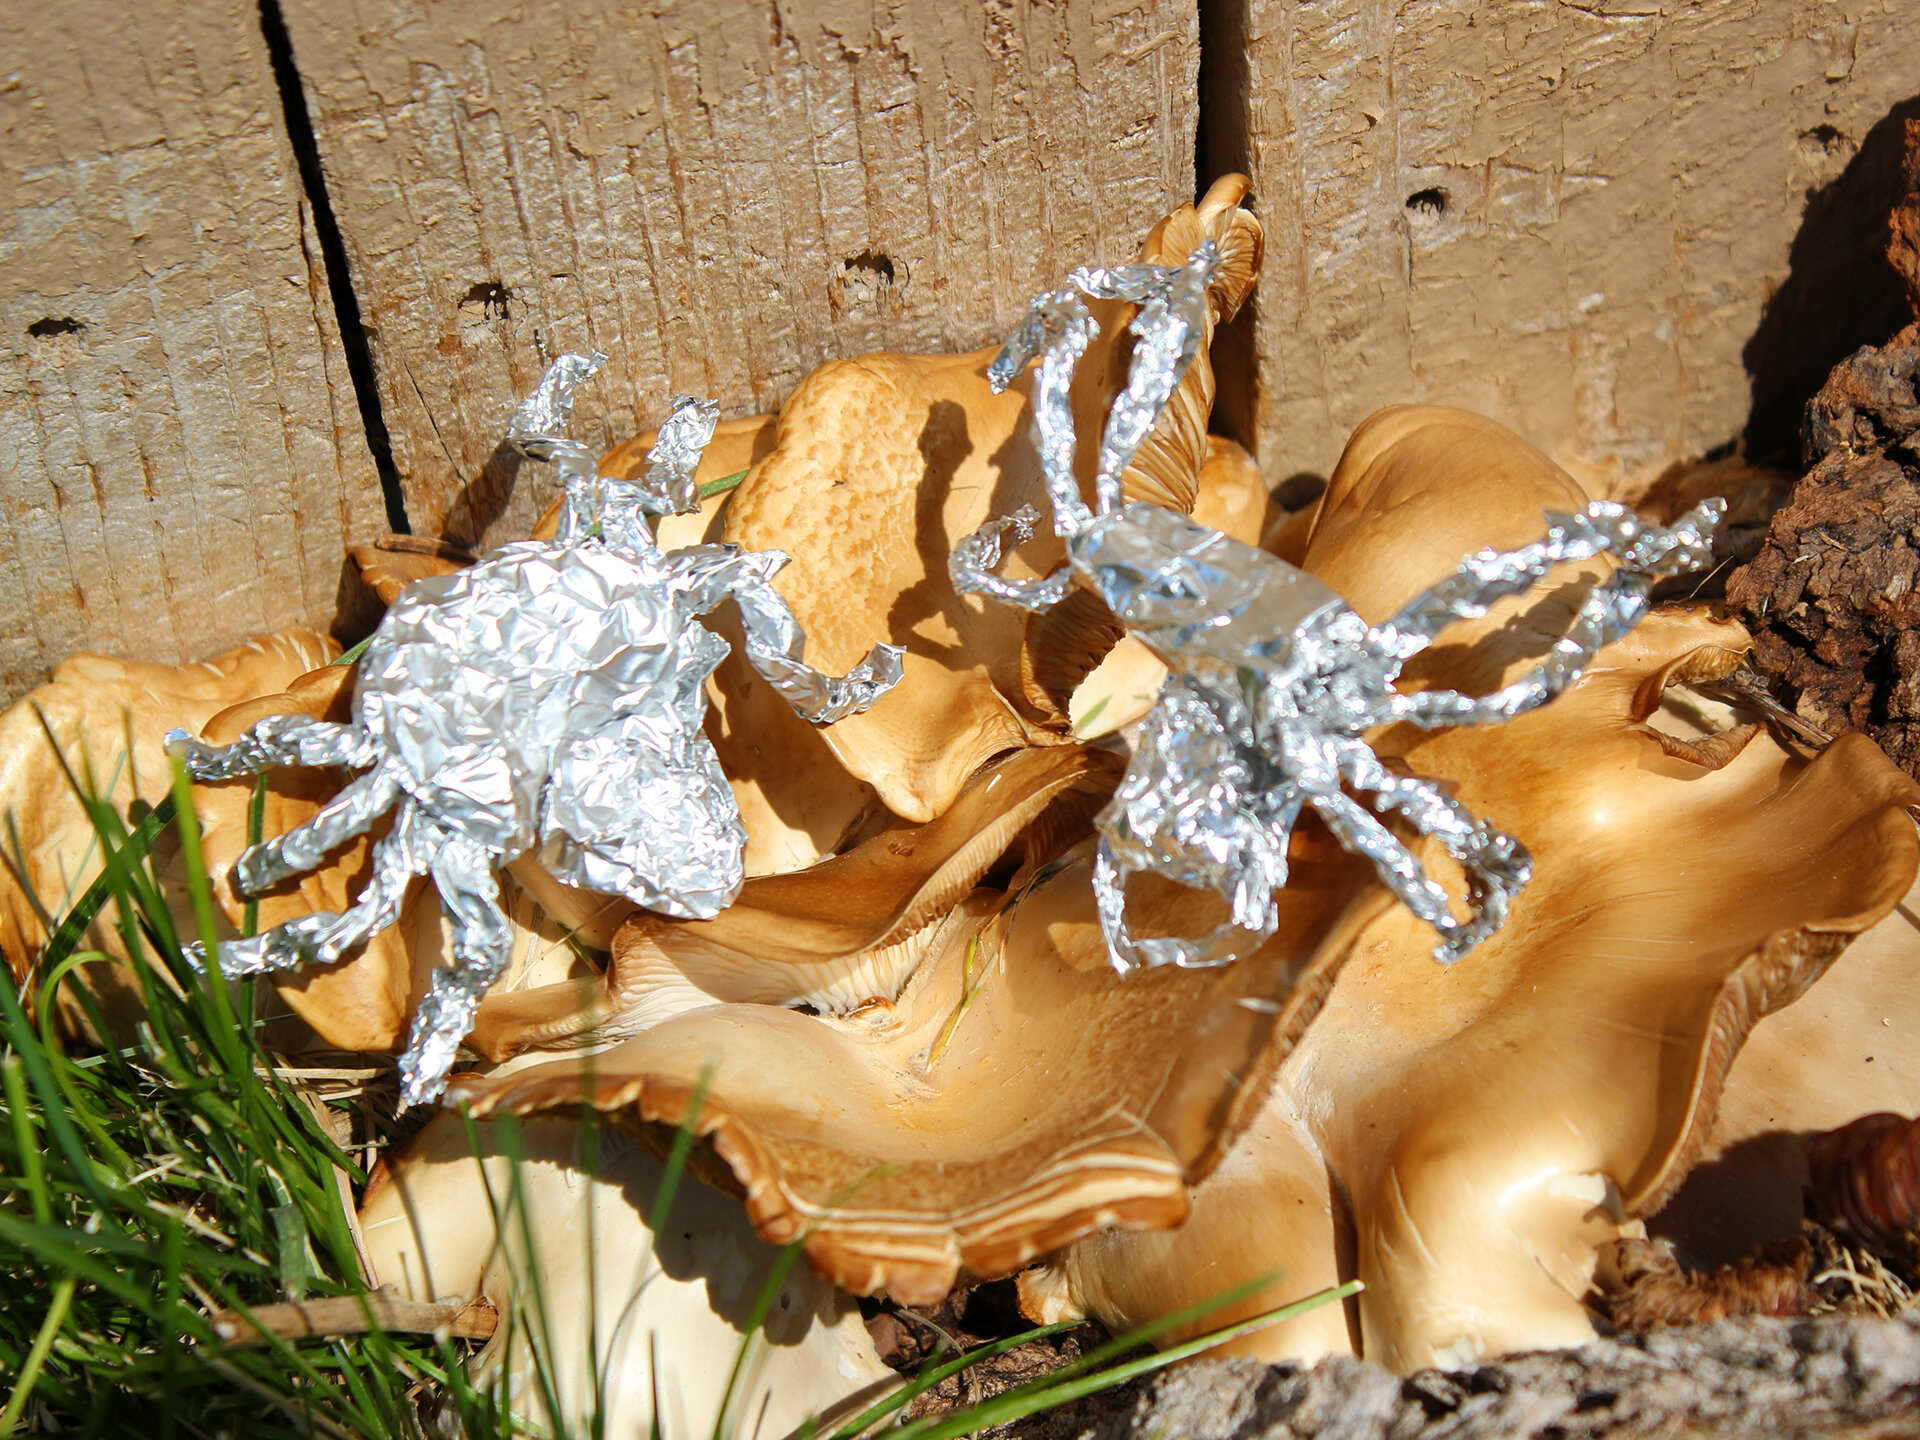
/Inspired by the success of the Tactile Art Club’s first virtual meeting in May to create tactile art with materials from our own homes, the club continued to spread positivity and community building through our second virtual meeting on June 16th. The club created many dynamic 3 dimensional sculptures, including roses, lilies, animal figures, palm trees, and spiders. The second virtual meeting continues to keep Tactile Art Club thriving, and the limitless imagination and beautiful creations remind us all about the power of self-expression and artwork during quarantine. During this meeting we expanded our reach, having participants spanning from Baltimore to India. We are excited to grow this program to continue forming a global community connected through tactile art.
Attached are pictures of what people created:

For those interested in creating the tinfoil sculptures themselves, here is a transcript of instructions:
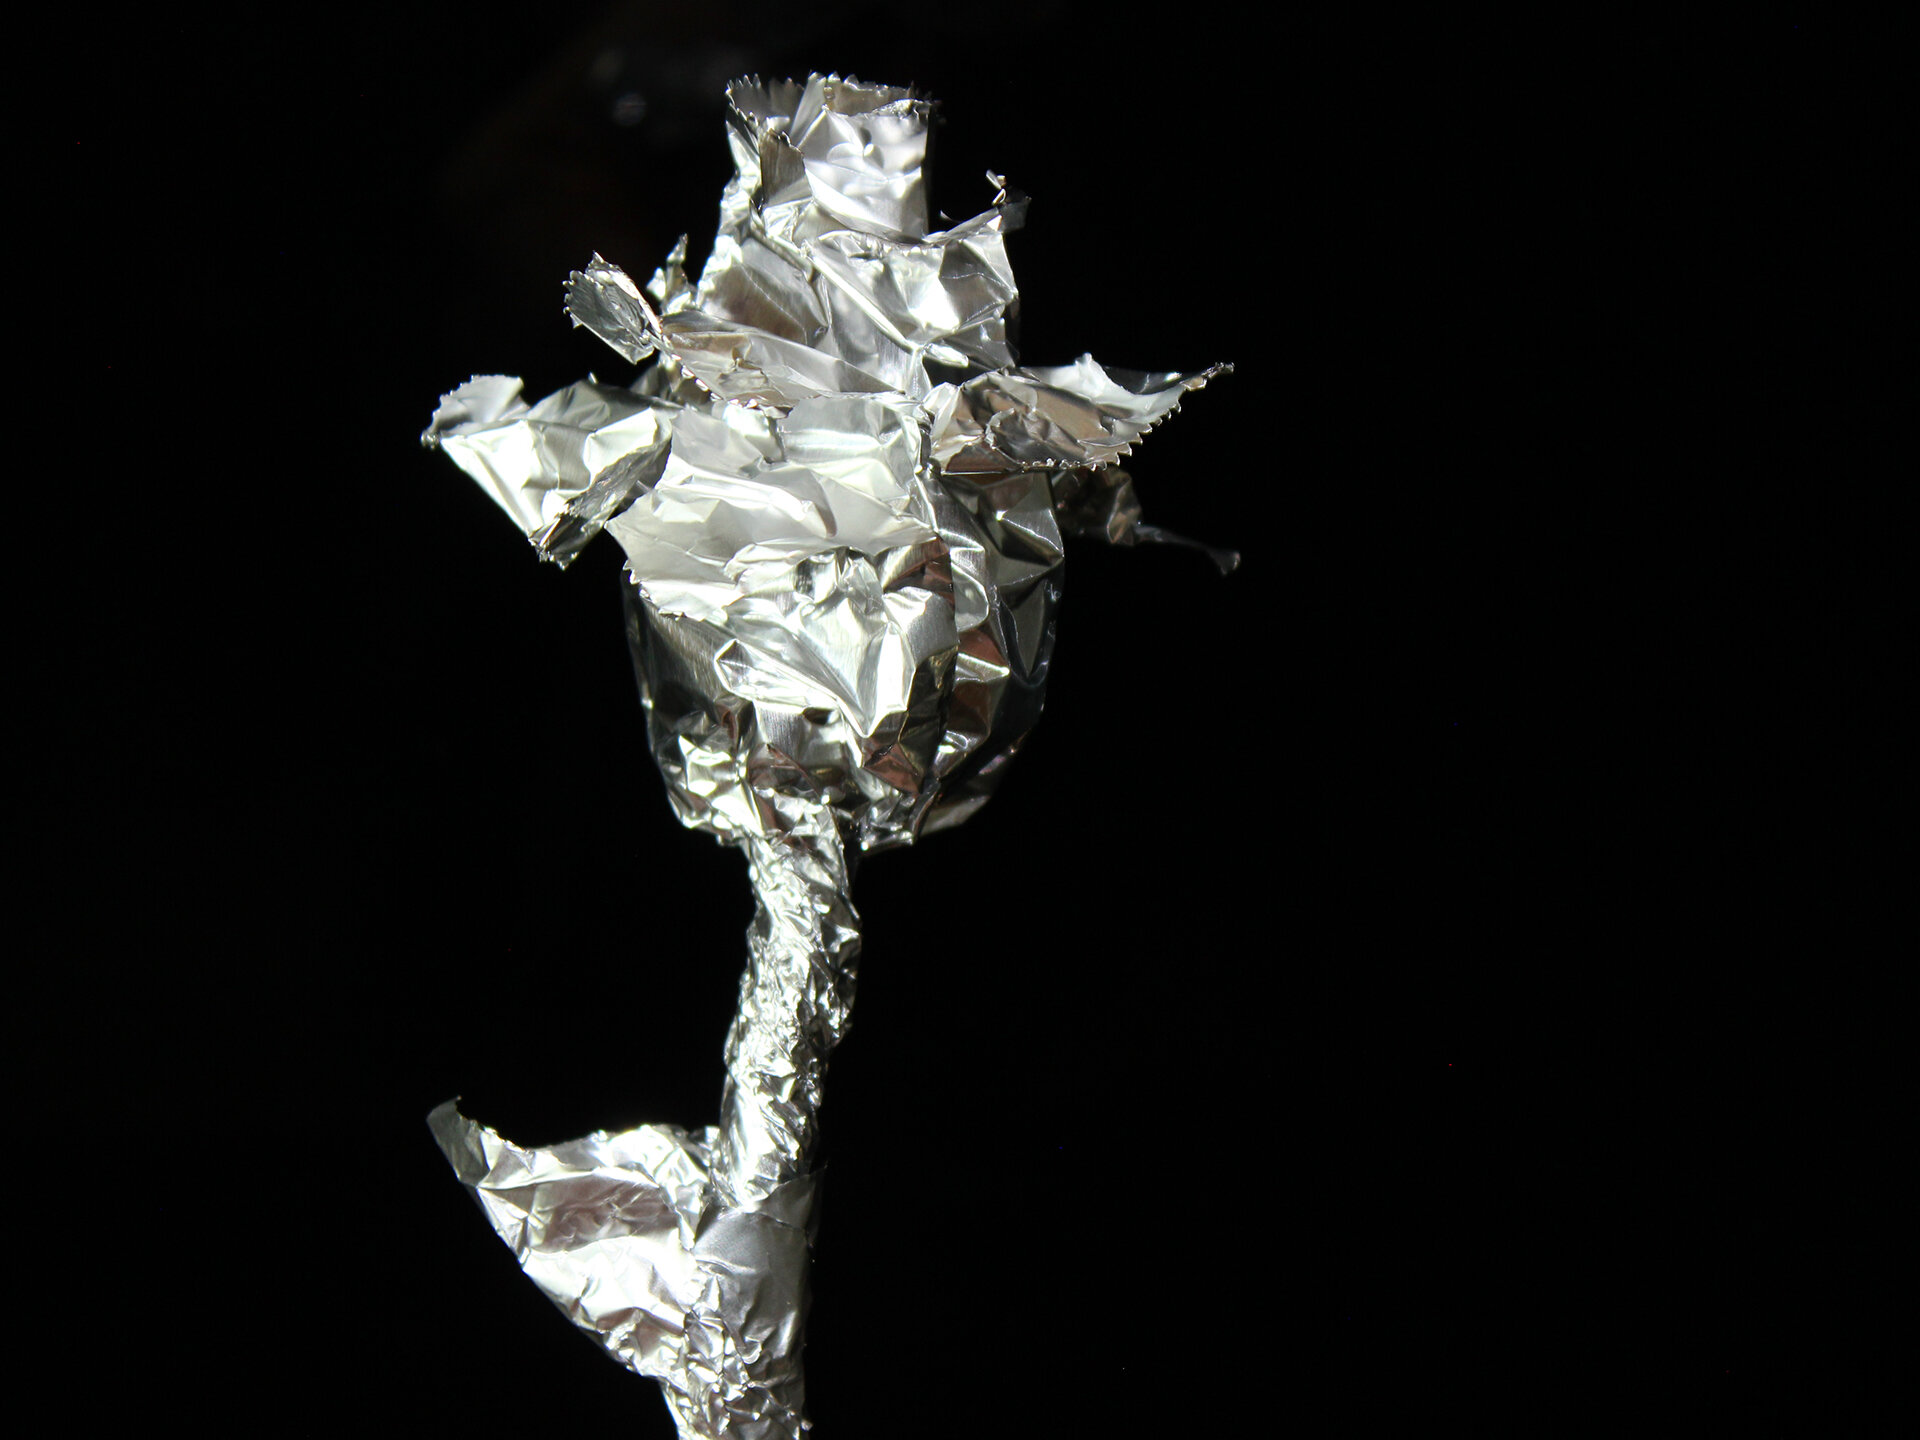
Steps to make a Rose with Aluminum Foil
Grab a rectangular sheet of tinfoil. The size does not need to be precise, but I used one that has a length and width the size of the distance between my elbow and my wrist.
Flip over your piece of foil so that the dull side facing upwards
Point your index finger of your left hand and place it by the bottom left hand corner of the foil. Your finger should be about an inch away from the leftmost side. Place your middle finger below the foil.
Wrap your foil around your index finger. It should form a tube like shape.
Wrap foil around your second finger, forming a tube again.
Do the same Third Finger.
If you have more foil left, continue wrapping around your fourth finger.
Pinch the foil at the end of your longest finger right where your fingers end. Continue pinching away from your left hand until all foil is pinched into a skinny tube except for foil around your fingers. Twist the foil for a tighter tube, which acts as your flower step
You can now take the left hand out.
Now the basic structure of the rose with the bud and the stem is done. The wide part where you removed your fingers serves as the petals and bud. If you like, open each layer of foil inside the bud to give your rose a more open and full shape. The foil may rip as petals come out, but make sure to be gentle so the foil does not tear badly.
Now we are going to make the leaf. Take another small piece foil; I chose a square piece with the length and width of four fingers but this need not be exact.
Take the stem and place it diagonally going from the top left corner of the foil and the bottom right
Fold the foil in half around the stem.
In the place where you made the fold, put your finger inside the foil on the side of the step so the small piece of foil wraps around your finger.
Holding your finger still in the leaf, twist the remaining foil around the stem. Now take out your finger
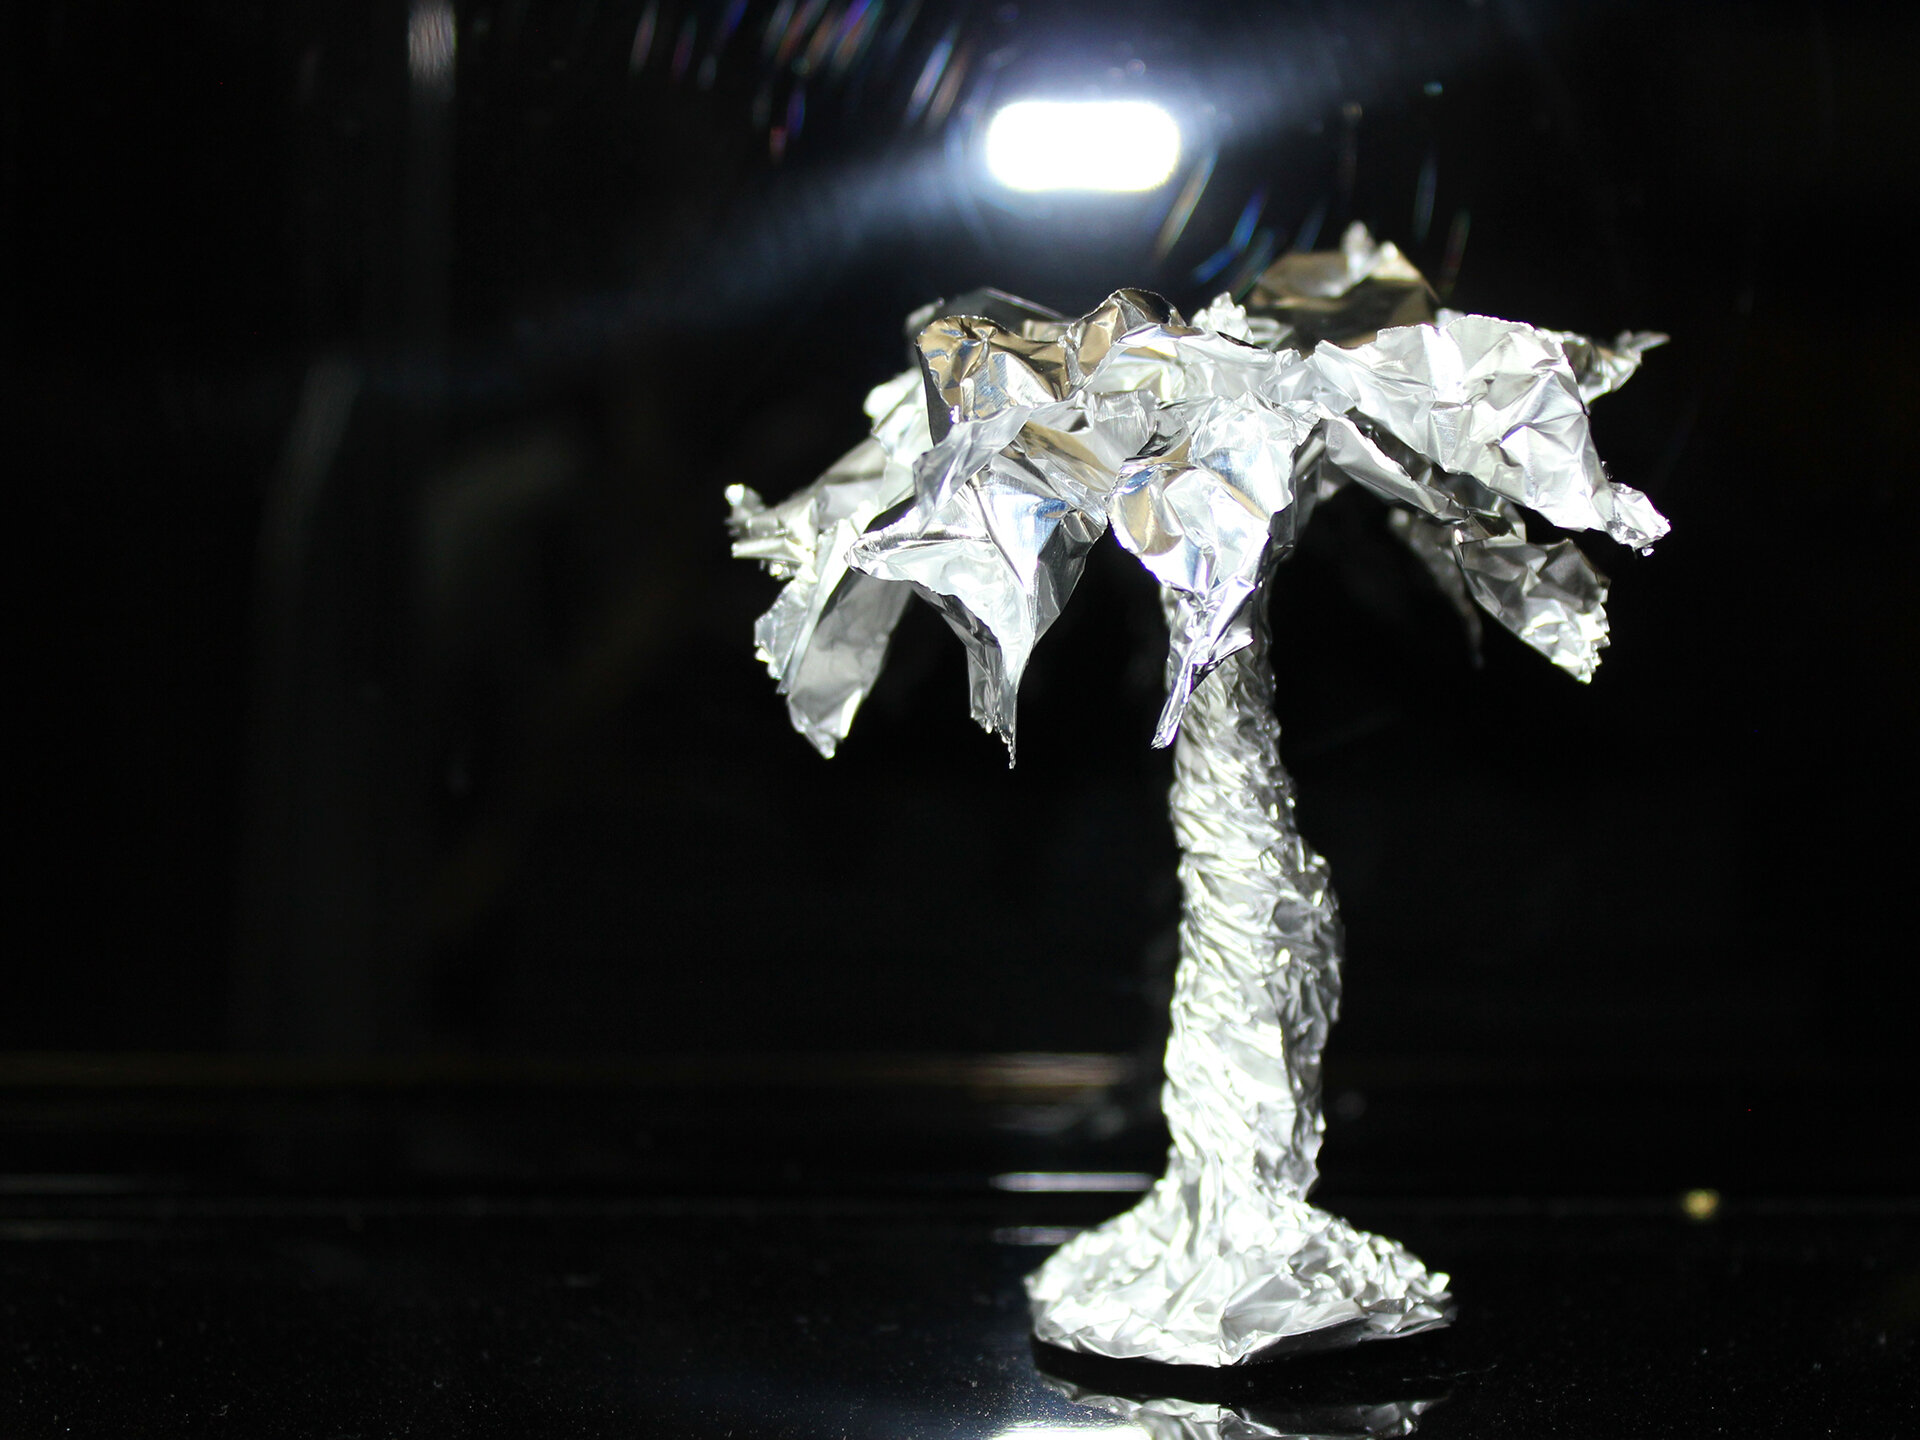
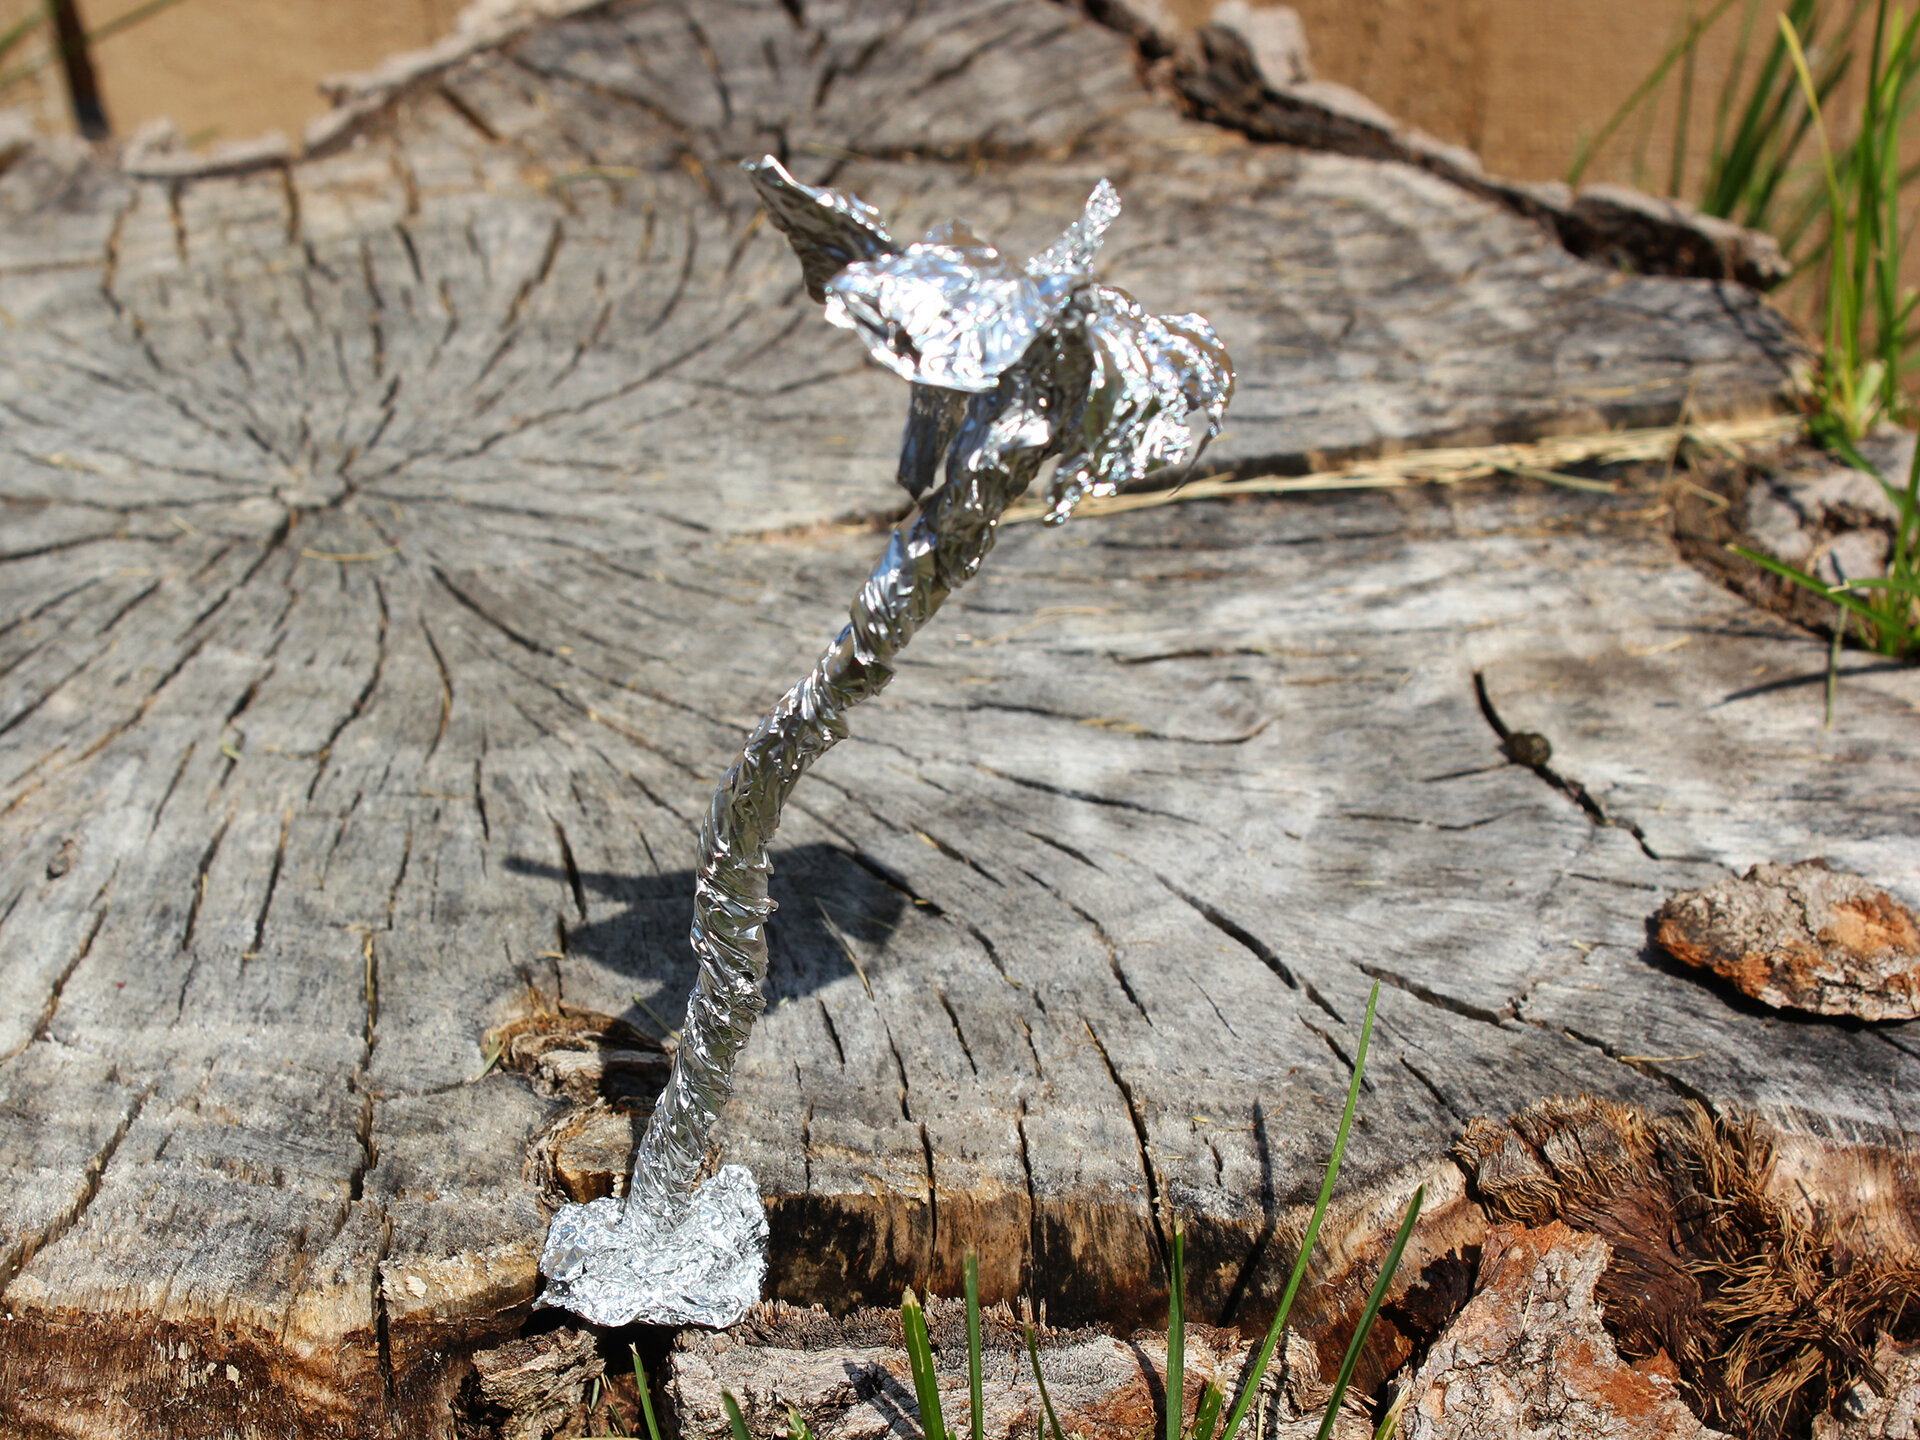
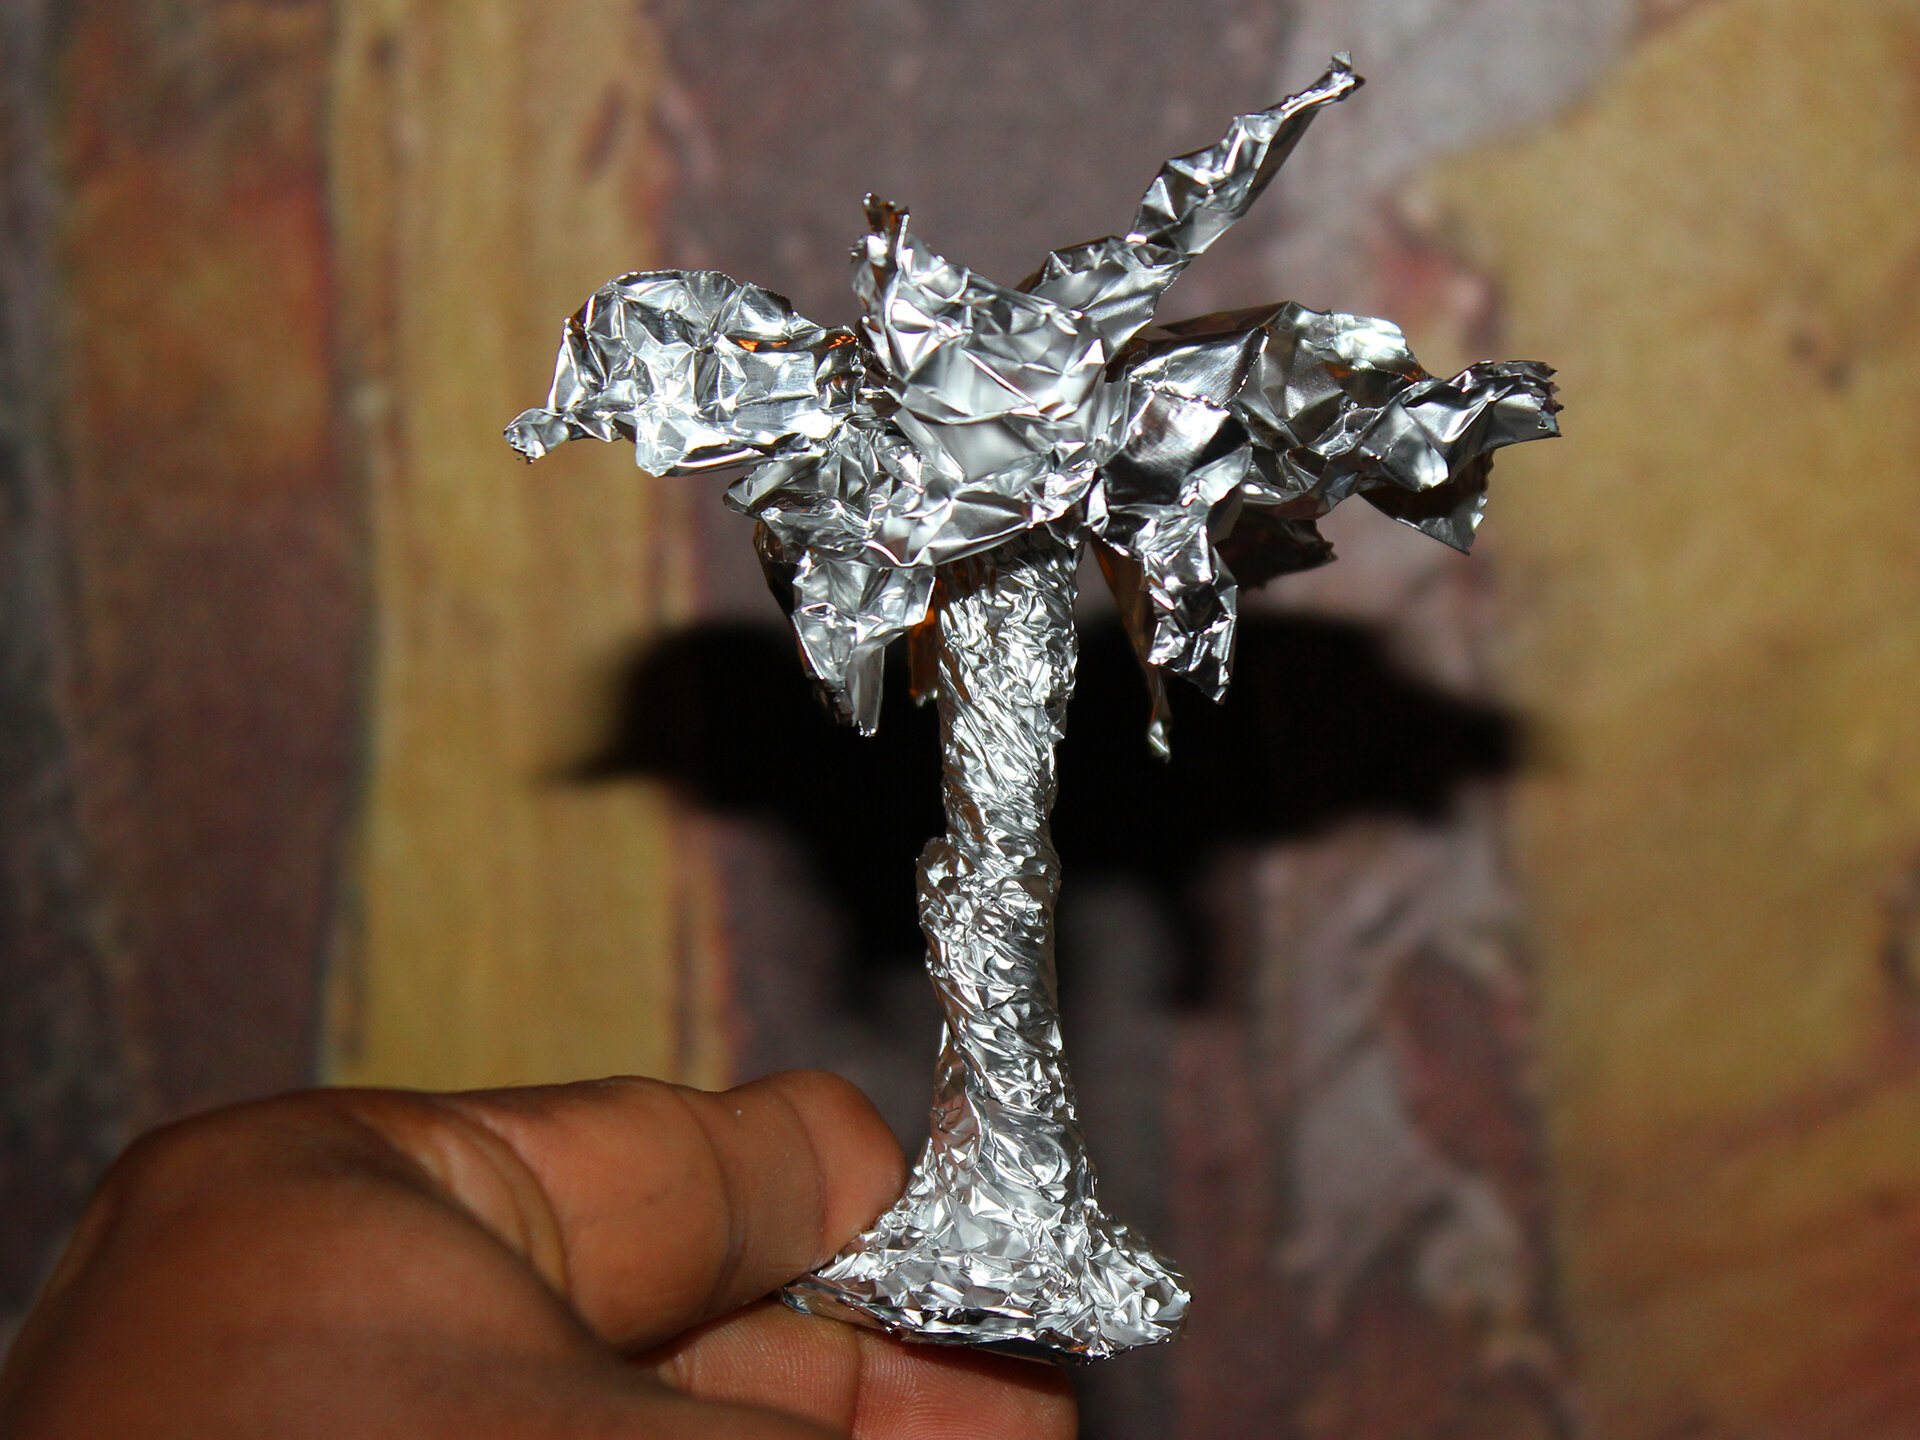
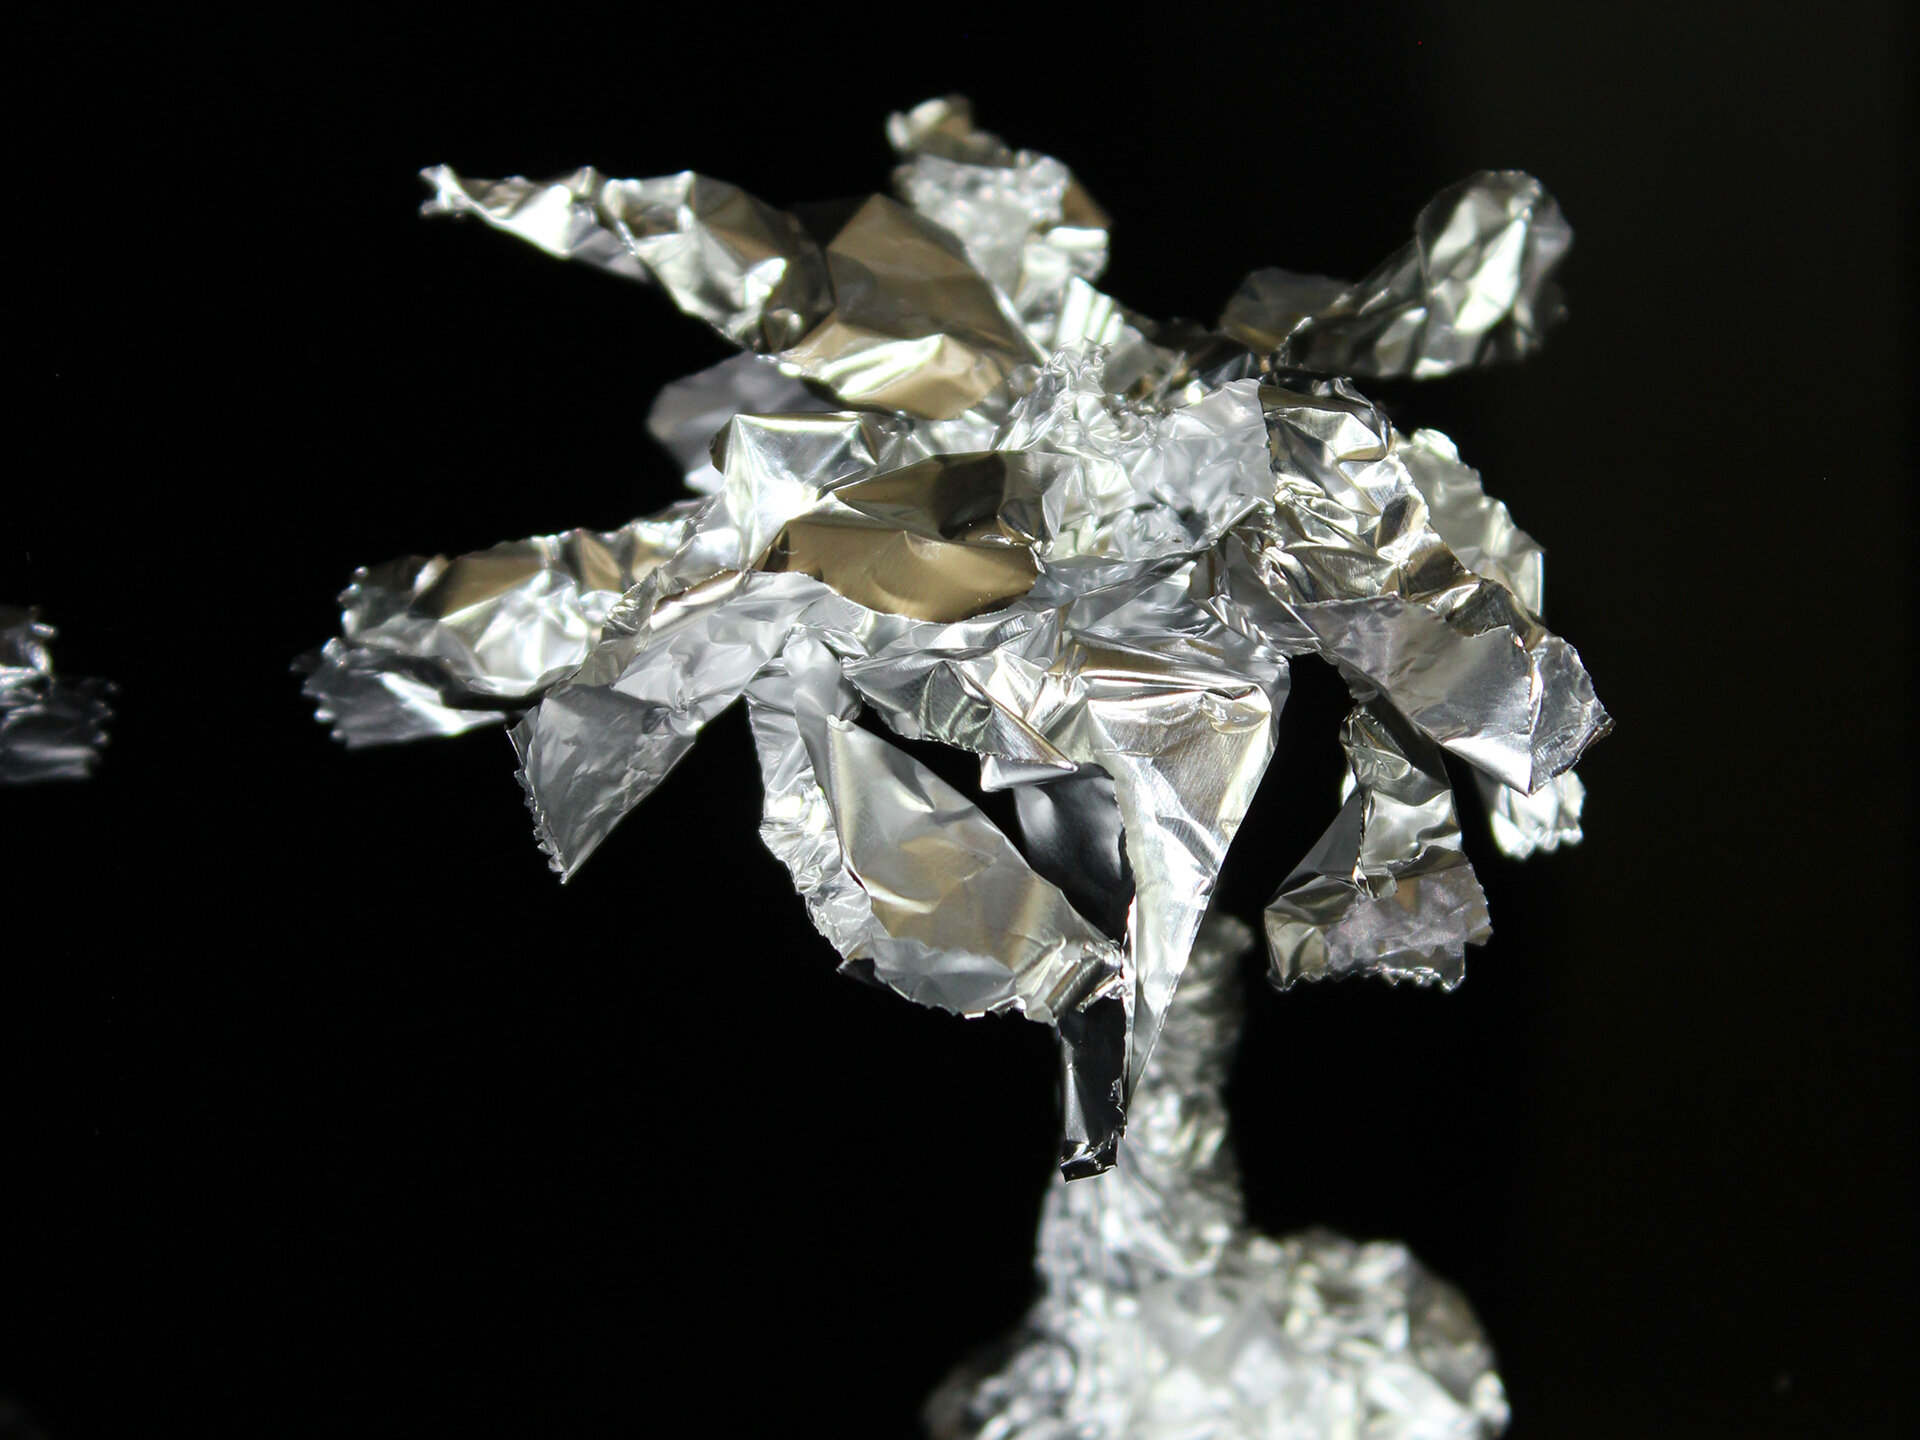
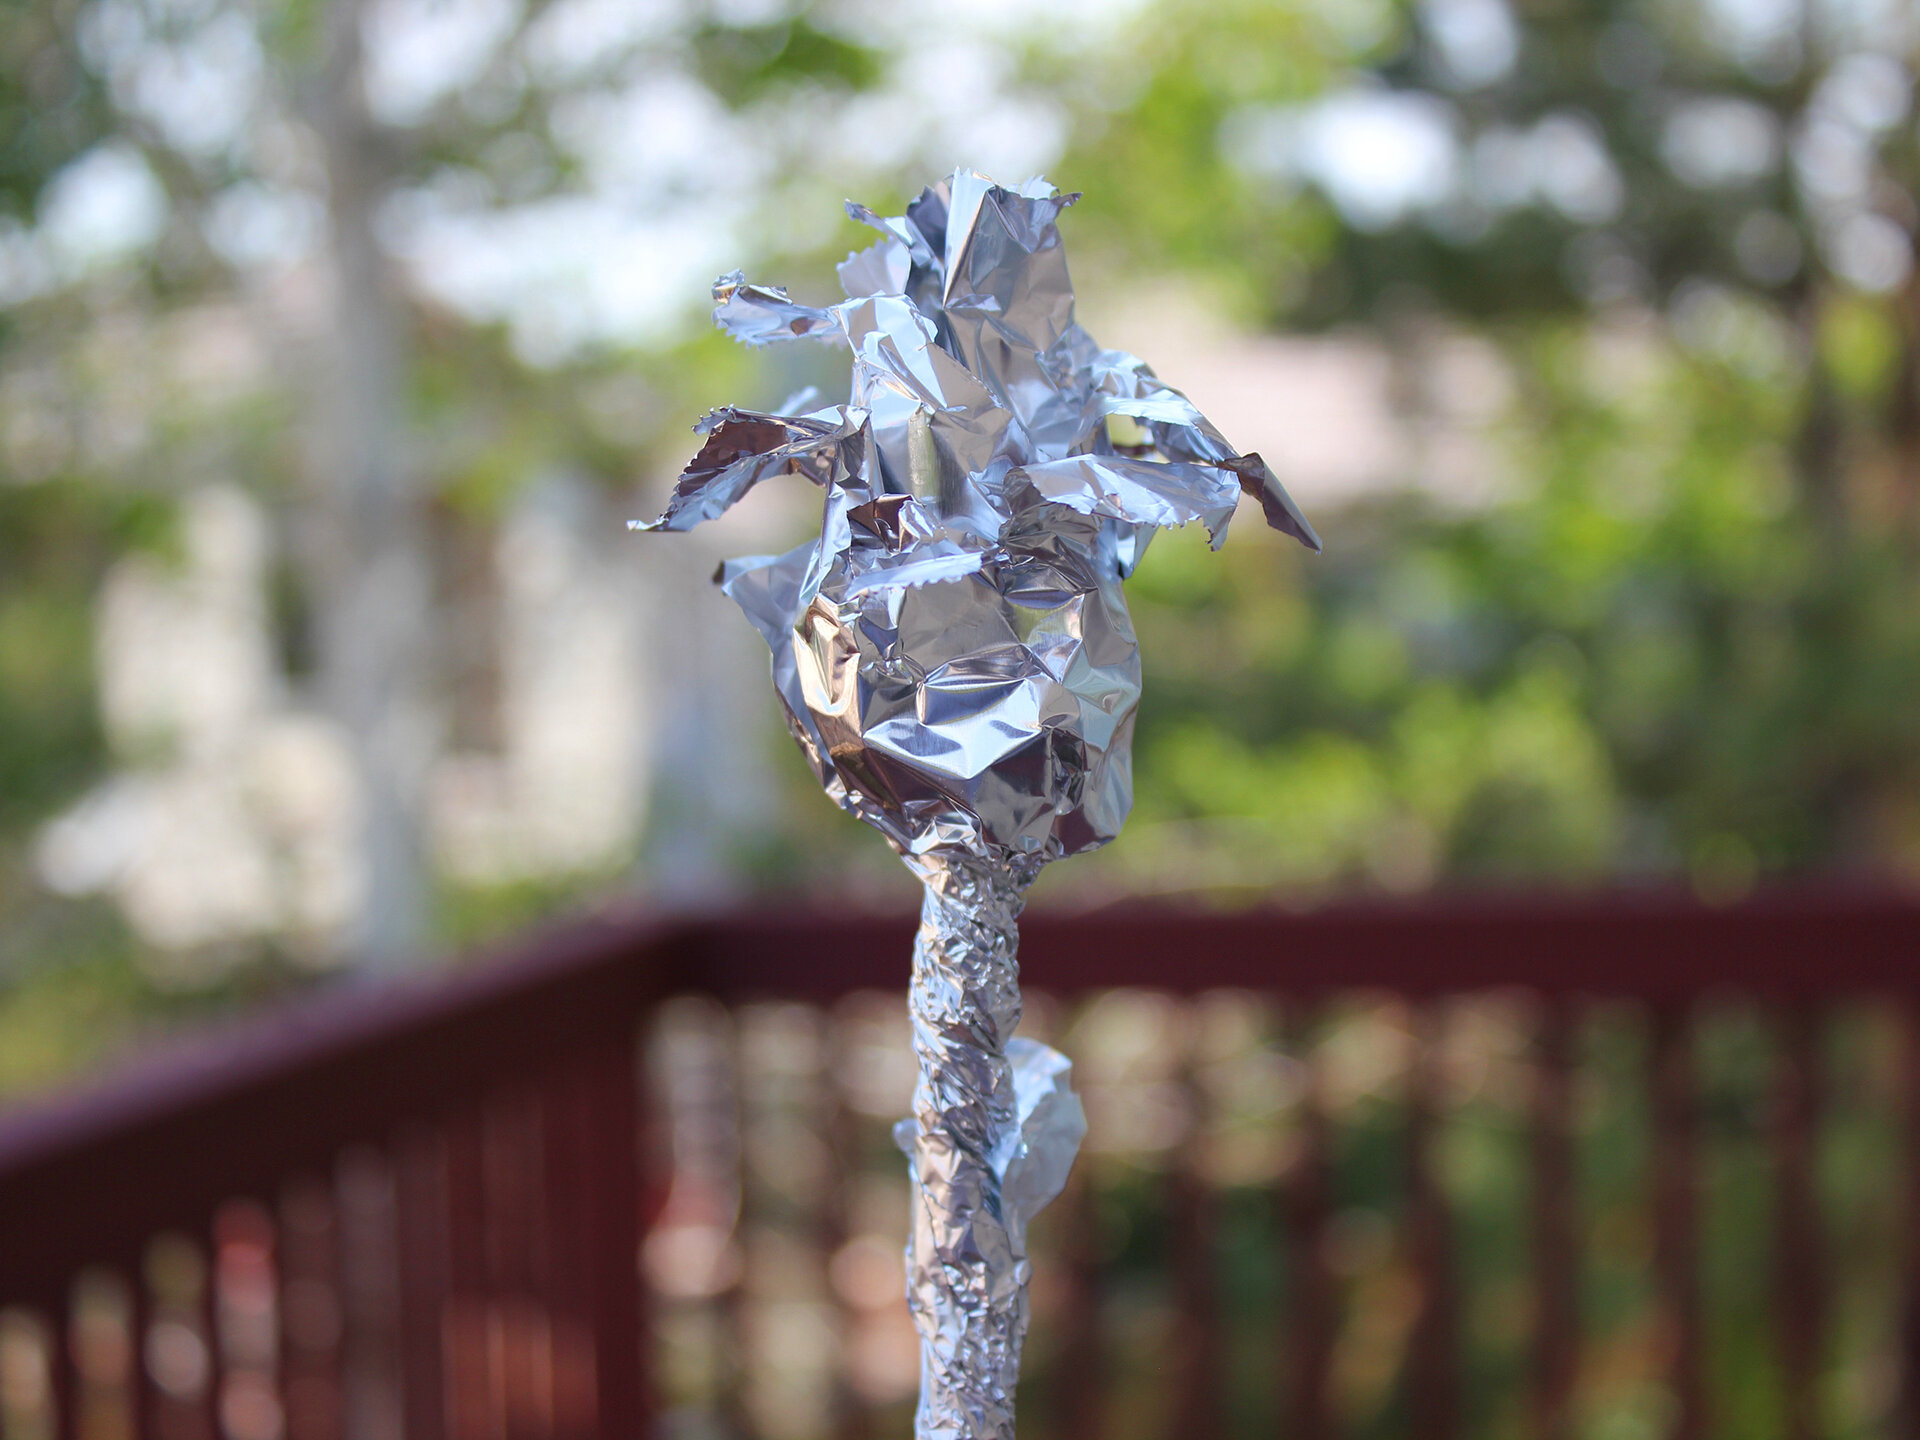
Steps to make a Palm Tree/Lily with Aluminum Foil
Take a sheet of aluminum foil. The should be roughly the same size as the one you used for your rose
The length of the left side of the foil is how tall your tree is, so position it accordingly. Put the longer side to the left side if you want a taller palm tree, or the shorter side if you want a shorter one
Roll it into a loose cylinder. Then, slowly start pinching loosely it to make a stick. Twist it tightly, but not too tight that the aluminum rips. As you twist, leave at least an inch and a half on the bottom and the top untwisted.
If you are making a LILY, go ahead and twist the bottom. If not, take your palm tree and make it perpendicular to your table facing UP towards your eyes. Gently smush the bottom onto your table to create a base. Then, fiddle around with it until it stands upright. This takes a bit of trial and error, so it's okay if it doesn’t work at first. Now you have made the trunk of the tree or the stem of the flower
Now, take the top and starting from to middle, unravel the foil. Rip the foil away from the center to create leaves. Then, curl the leaves around your finger to create a more dynamic shape and play around with placement and direction. Finally, pull and squish foil upwards from the center to create the center of the tree or lily. If it is a lily, you can use the same leaf technique from the rose to add extra detail.
Congratulations, you are done!
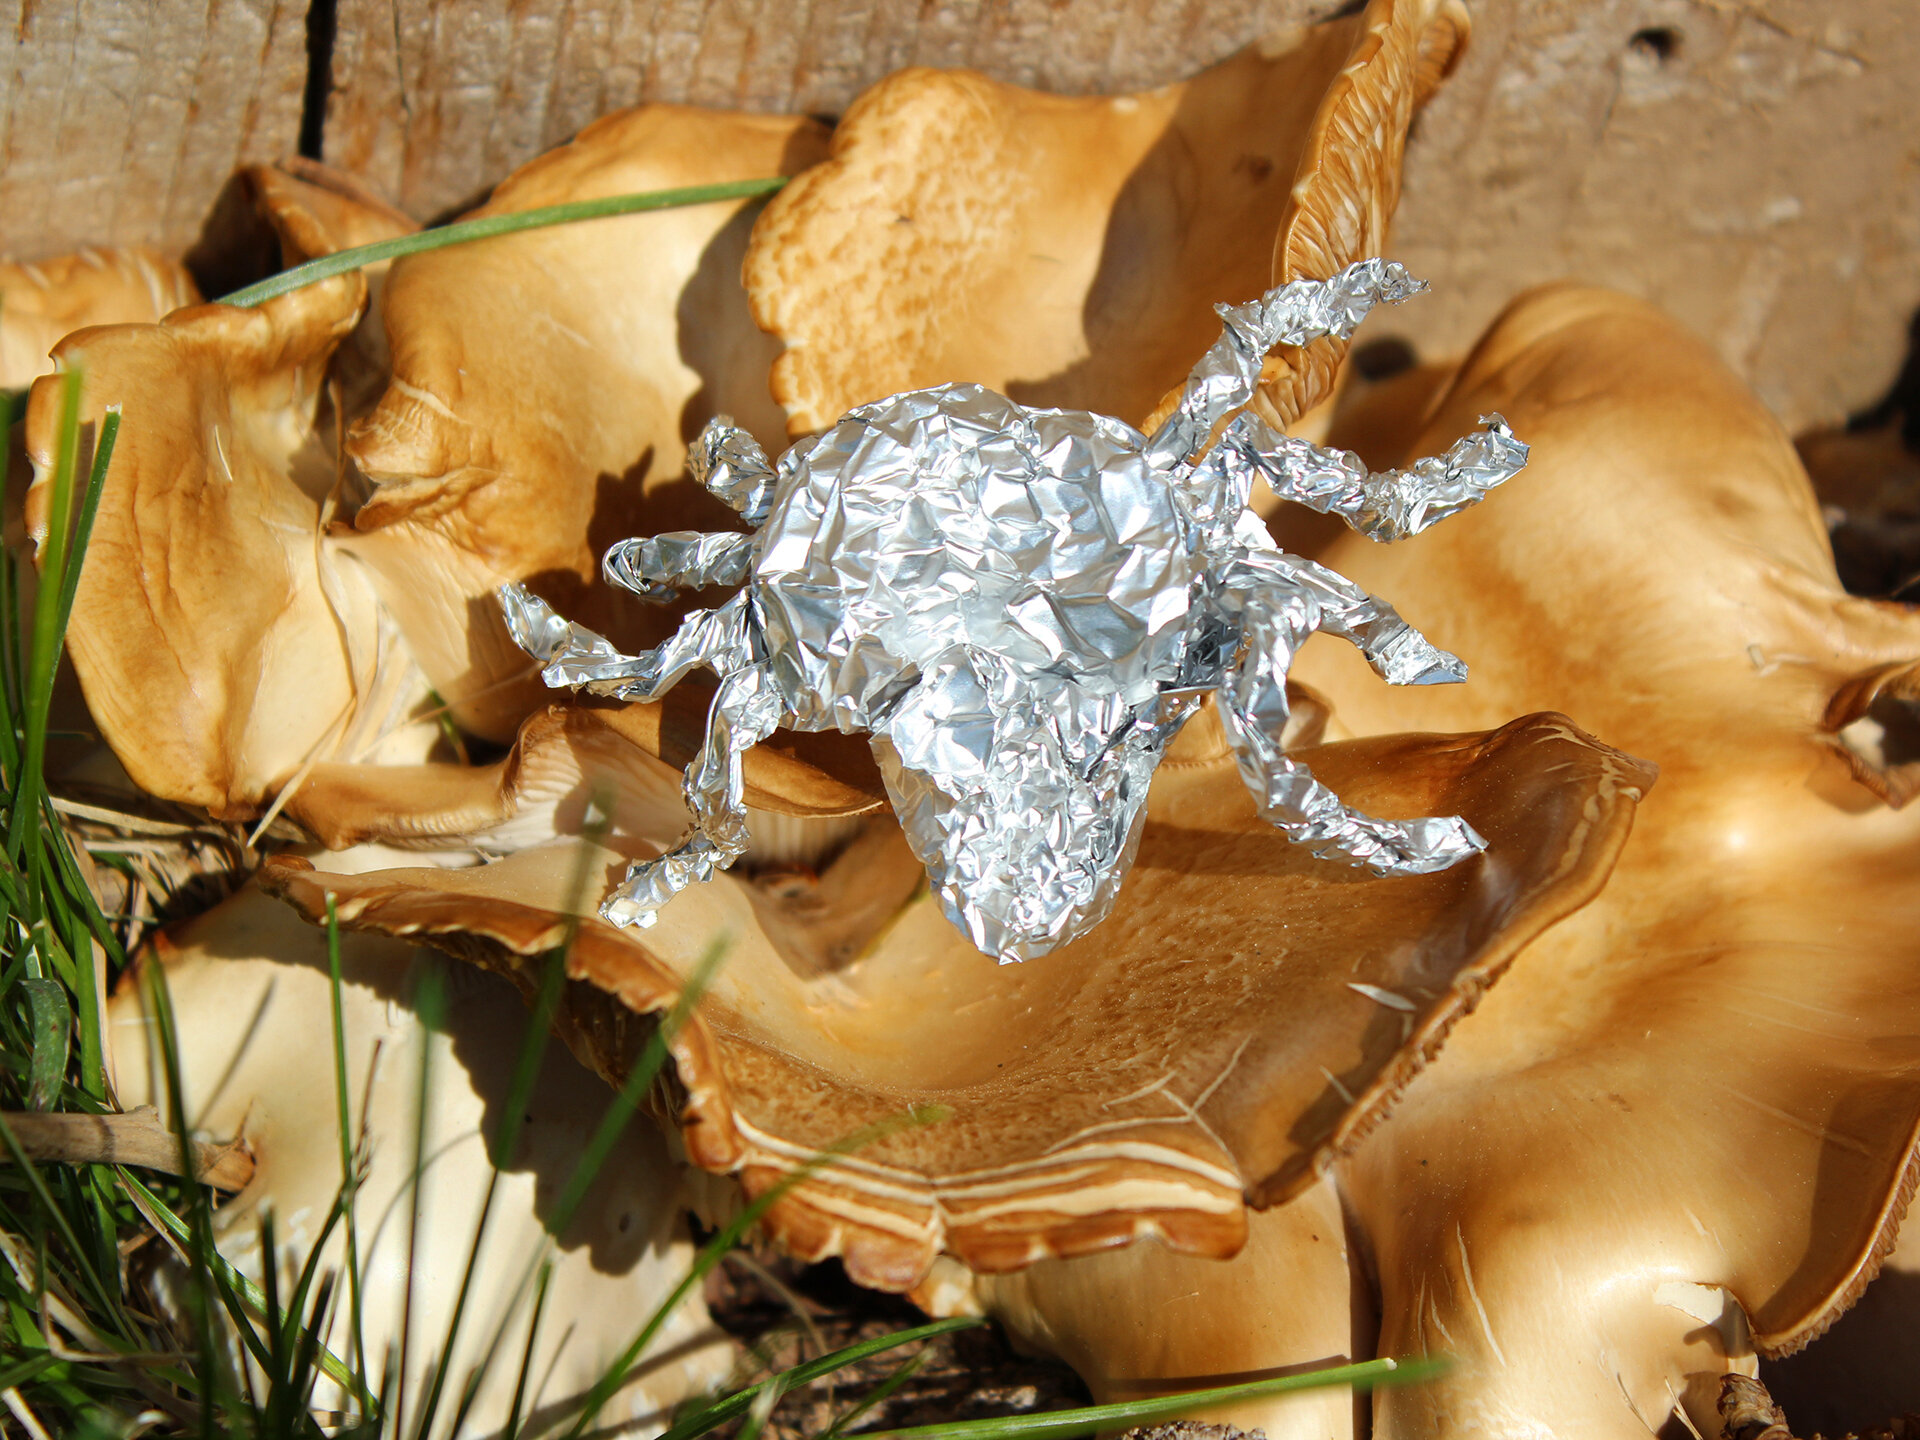
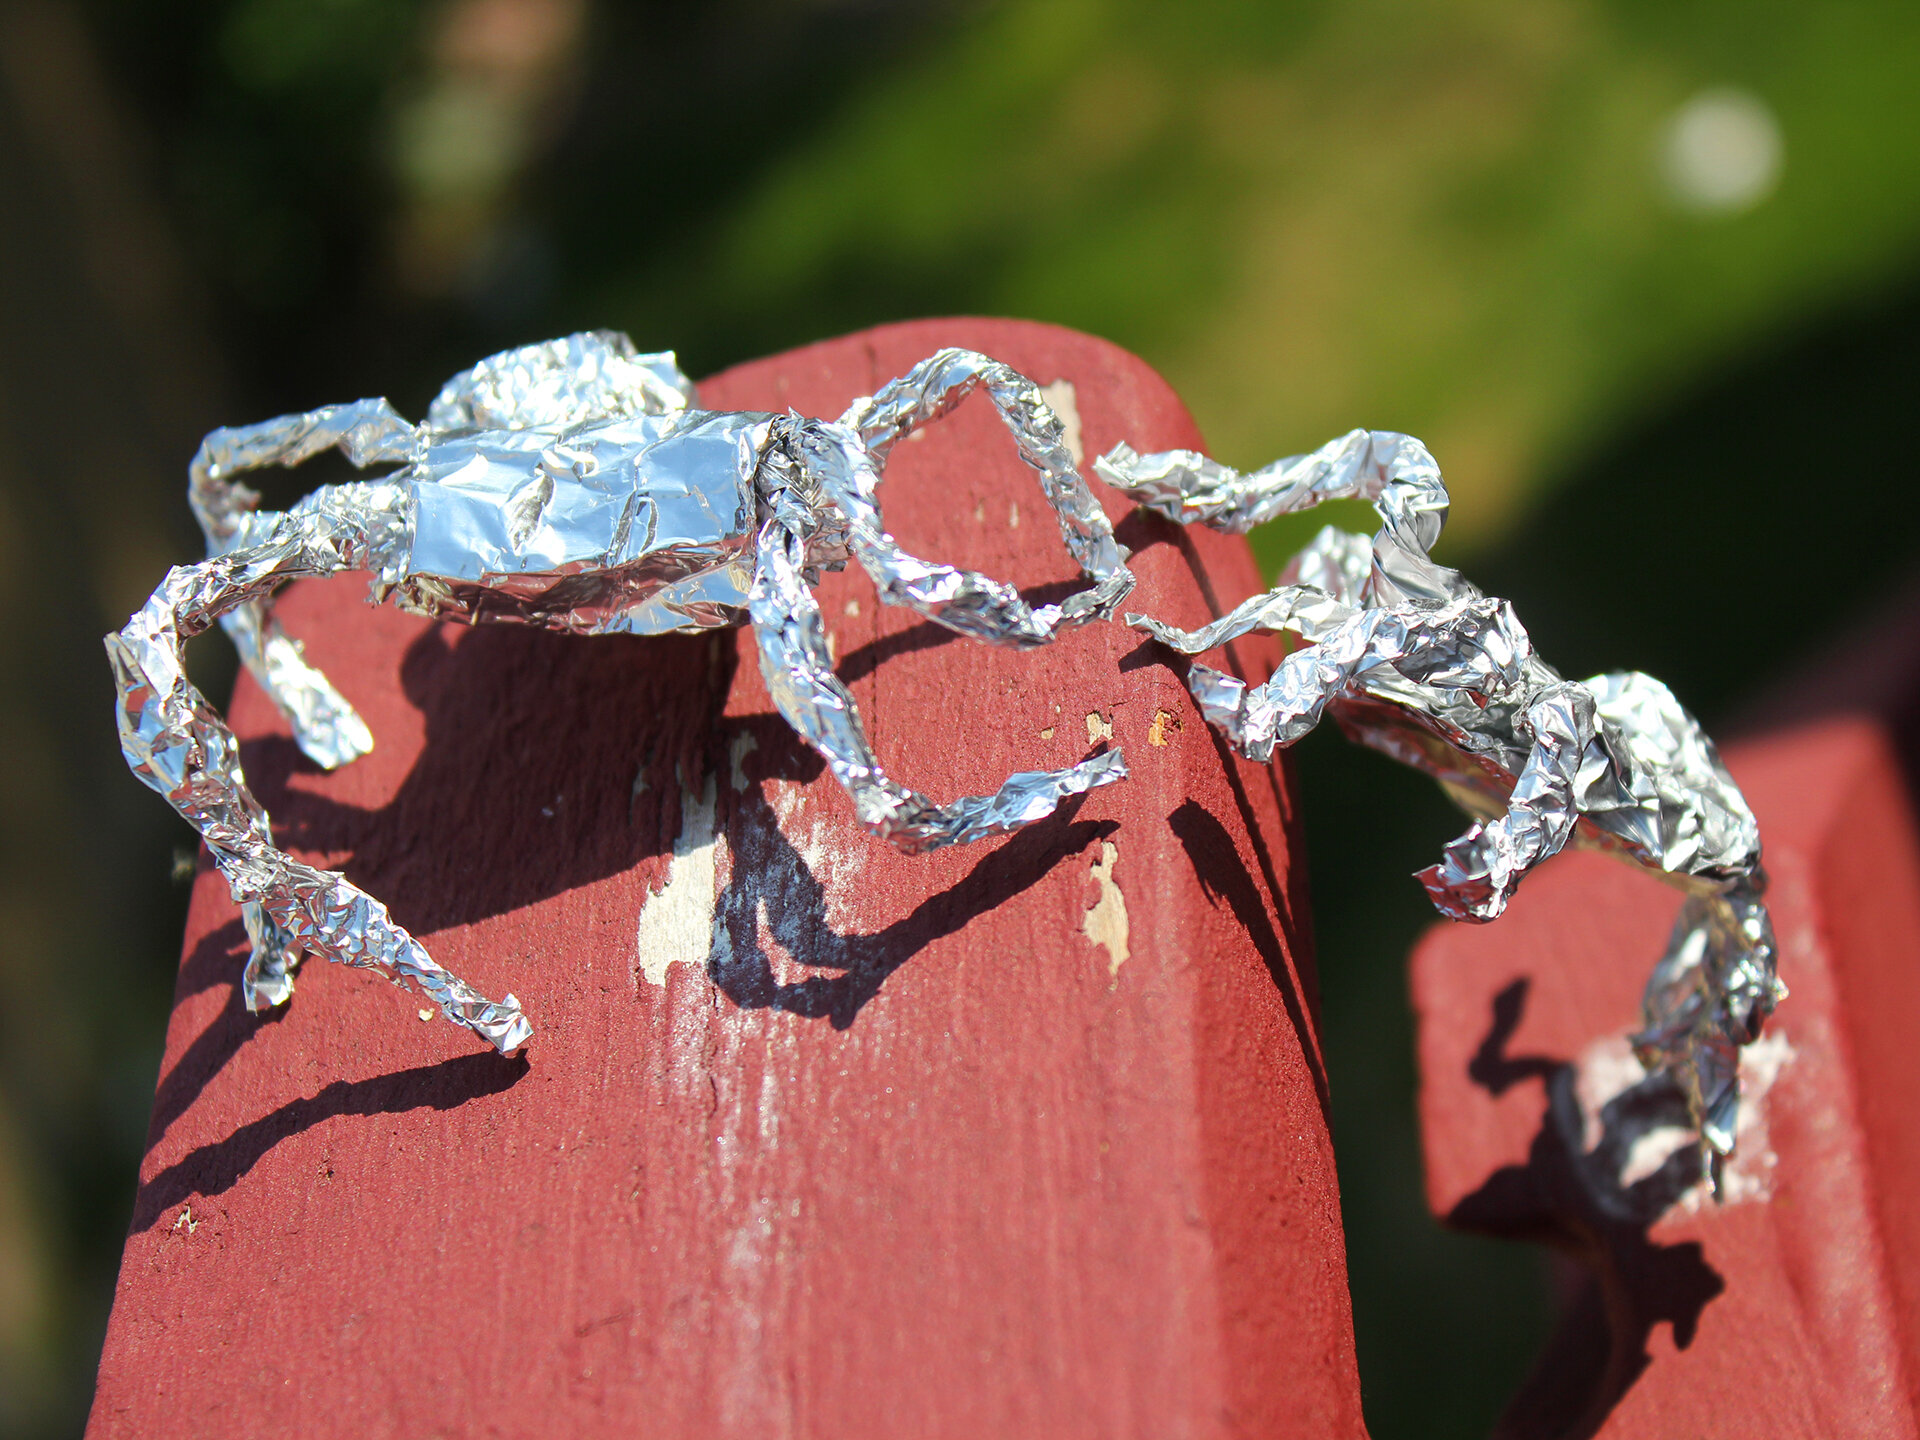
Steps to make a Spider
Take a piece of foil. This piece of foil can be smaller than the previous creations if you like. I used a piece as long as the distance from the tip of my middle to the joint of my wrist.
Fold the foil in half by taking your top and bottom right corners and aligning them with your left corners, slowly start pinching and then crease the fold with your fingernail firmly. Once opening, use this line as a guide to gently rip the foil in half
Take one half sheet of foil and do the Exact same thing to it. Fold this piece in half and tear it to make two smaller sheets of foil.
Repeat this step again for both of the 2 small sheets of foil. Now you should have four tiny strips of foil and one larger half-sheet.
Take each tiny strip of foil and twist it tightly to form small tubes. It is the same process you used to make the rose-bud stem.
With your half sheet of foil remaining, place your left index, ring, and middle finger in the bottom left corner. Now, fold the foil. Take the right side and move it over to the left to make a crease by your left index finger. Make sure you make these creases firm and defined using your fingernail
Open the foil, keeping your finger on the foil. Then, make another fold. Take the topmost side facing farthest from you and bring it downwards towards you. When you hit your middle finger, make a crease there. Now, open it up. You should have a half sheet with two folds forming a rectangle in the bottom left hand corner. If you cannot feel the rectangle, flip the foil around.
Now, follow the ridges forming the rectangle. Slowly rip along those lines so that the rectangle is cut out.
Twist the rectangle into another skinny tube, identical to the others but shorter
Using the same technique we used for the palm tree, slowly roll and pinch the half sheet of foil until you make a compressed cylinder.
Place the four tubes in a row on the right side of the tube. Leave about an inch of distance from the right. Try to make the tubes centered so that there is the same length above the cylinder and below it.
Take the smaller tube and place it on the left side. Follow the same rules with spacing and centering.
Starting from the right, roll the cylinder going left so that the four tubes are now wrapped within. Stop at the center. Then, do the same thing to the left side by rolling it to the right until the rolls meet the center.
The short tube is now the antenna of the spider. Now, take top of the tube and curve it to the left around your finger. Do the same to the bottom. Now, the tube should look like a U that is facing right.
The four longer tubes on the right are the legs of the spider. Separate them from each other and curl each one downwards around your finger until the spider can stade up on its own. Each leg should have a bit of a question mark shape when looking at it from the left. Congrats, your spider is complete!
