
Virtual Tactile Art Club - Coil Pots with Clay
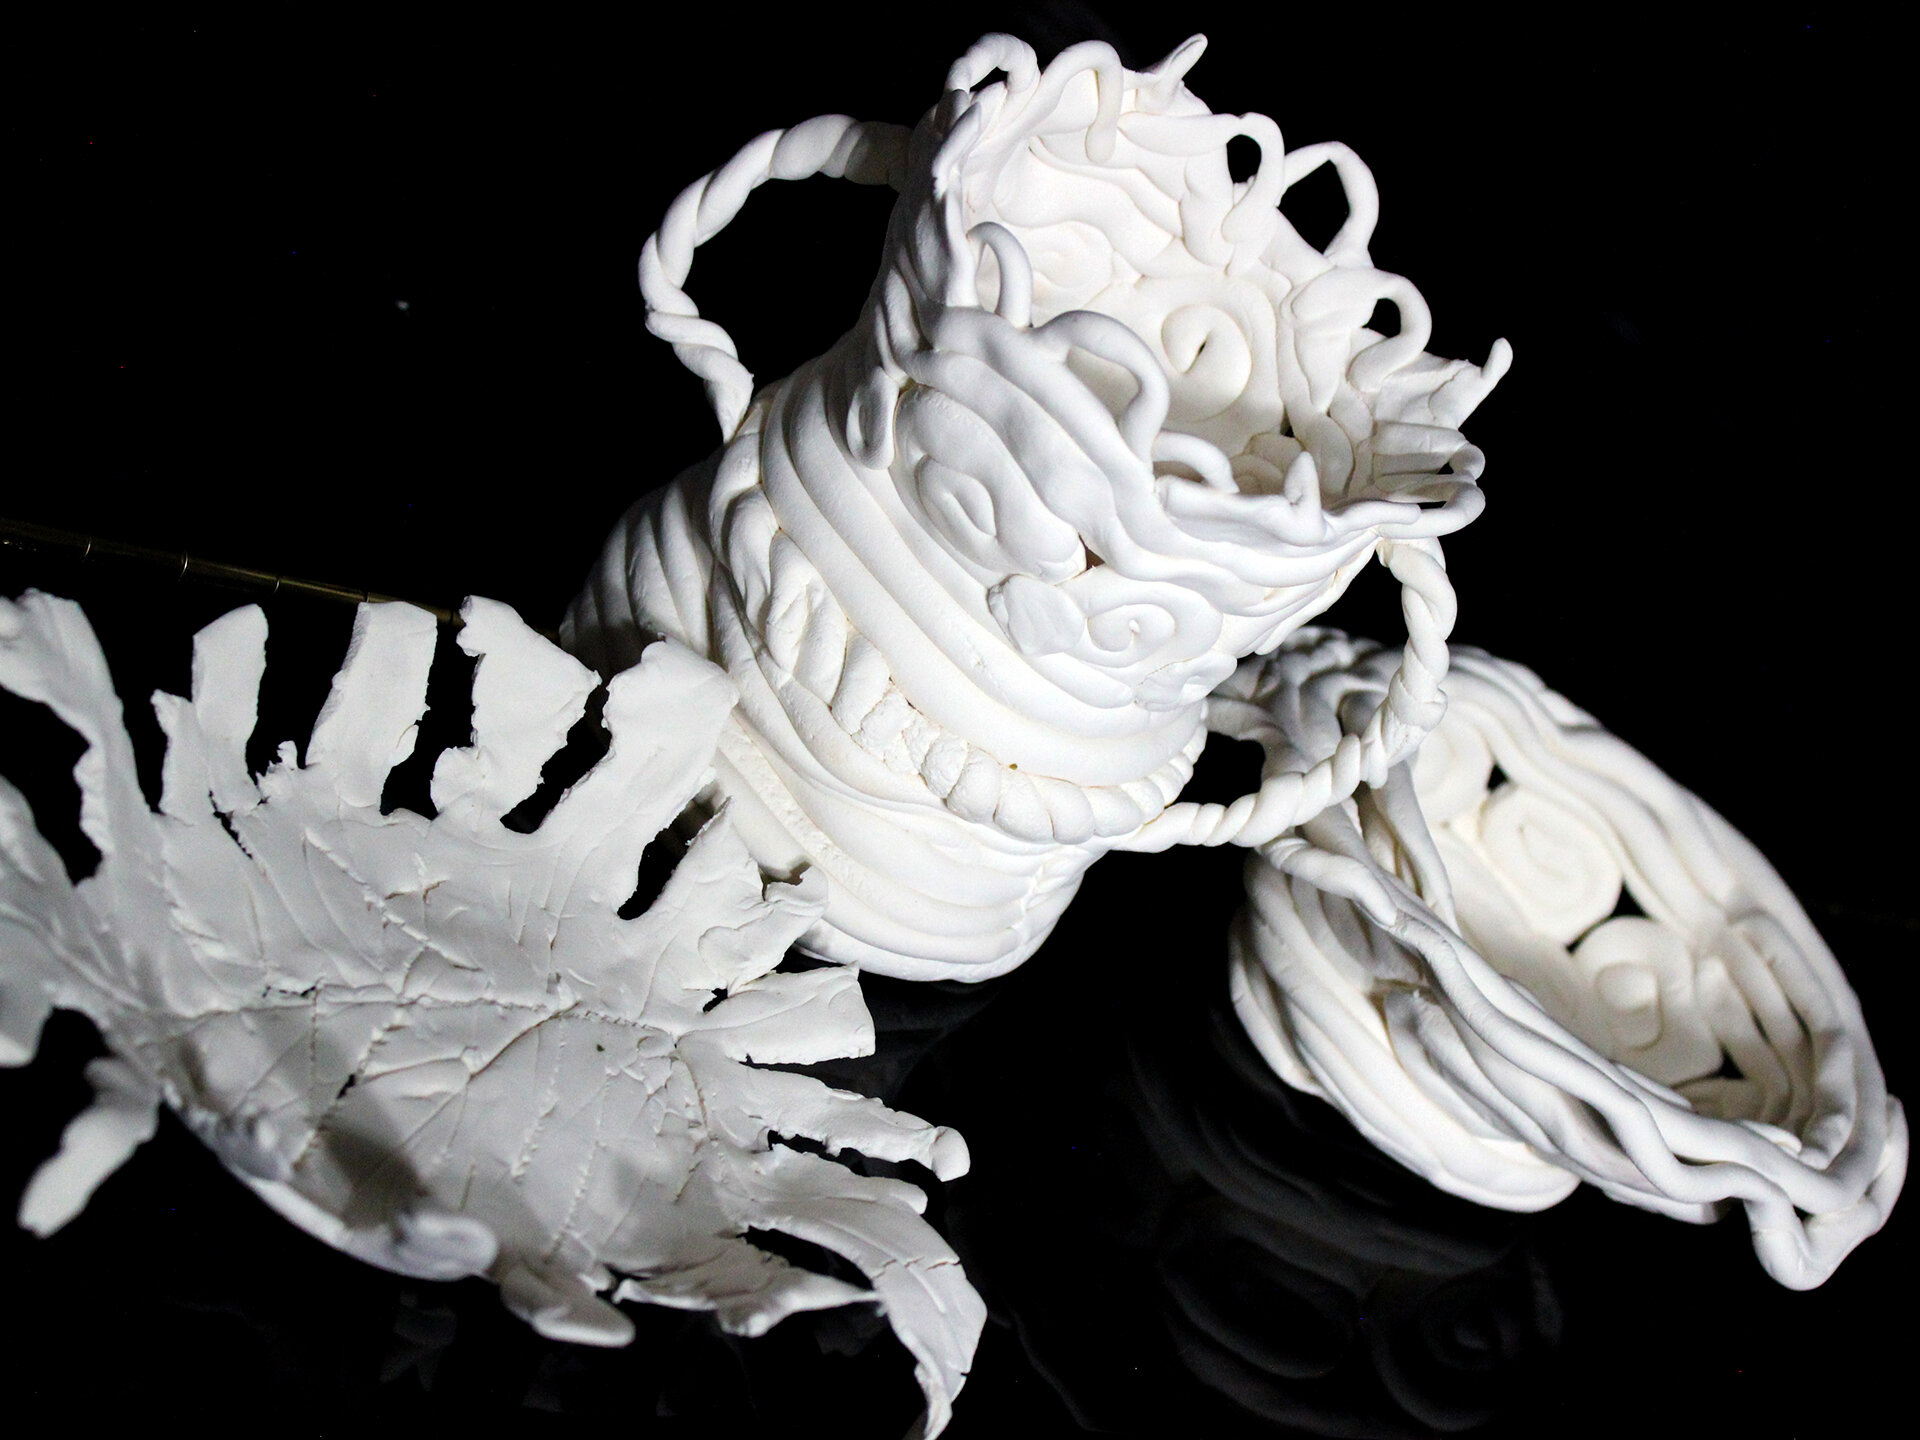
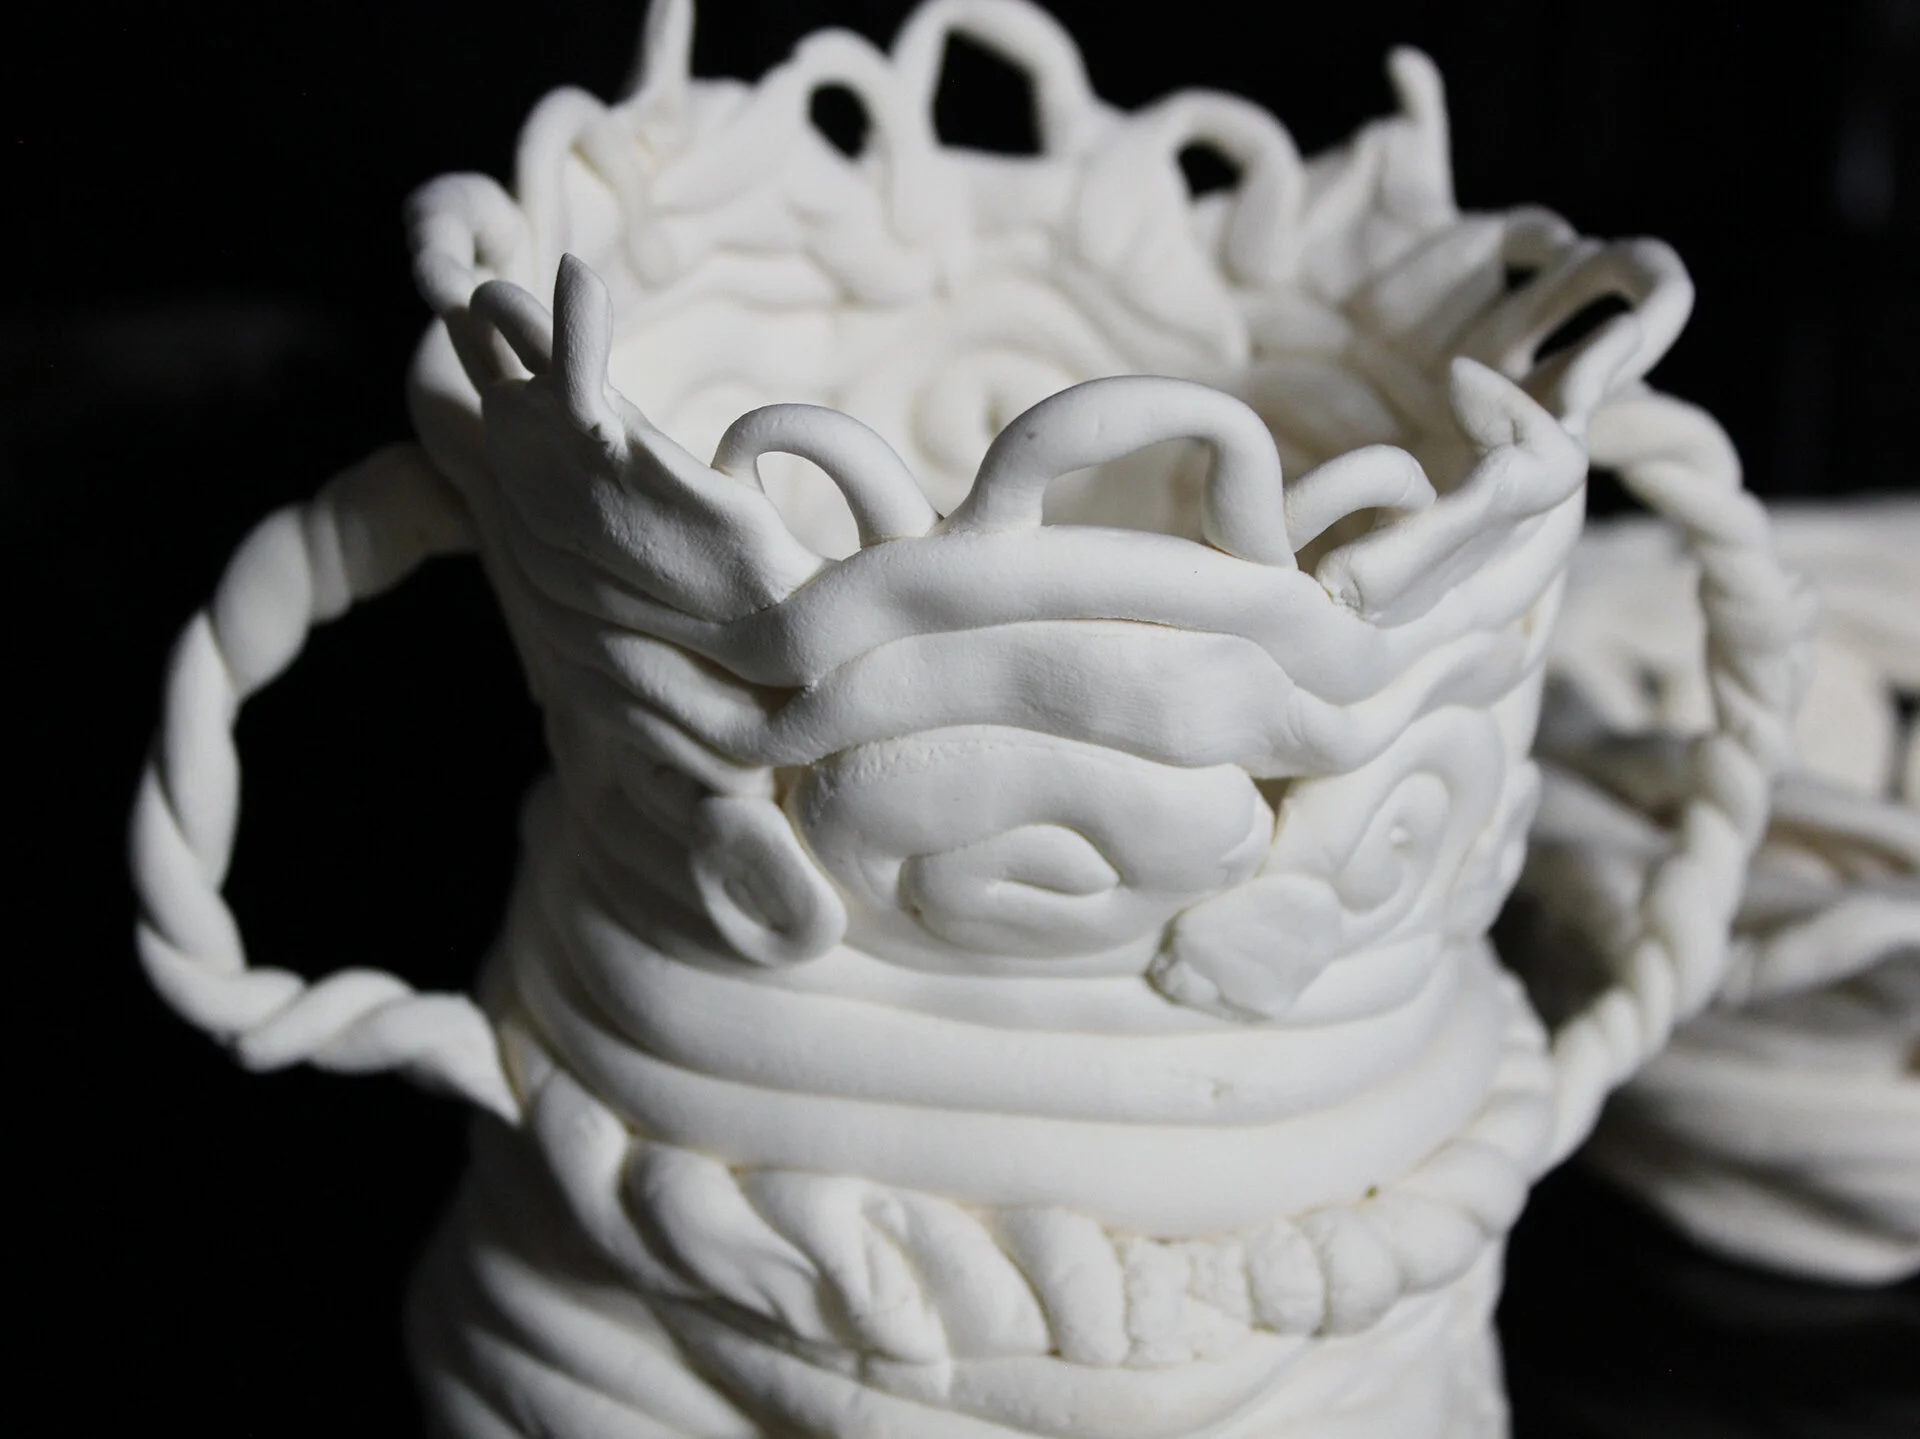
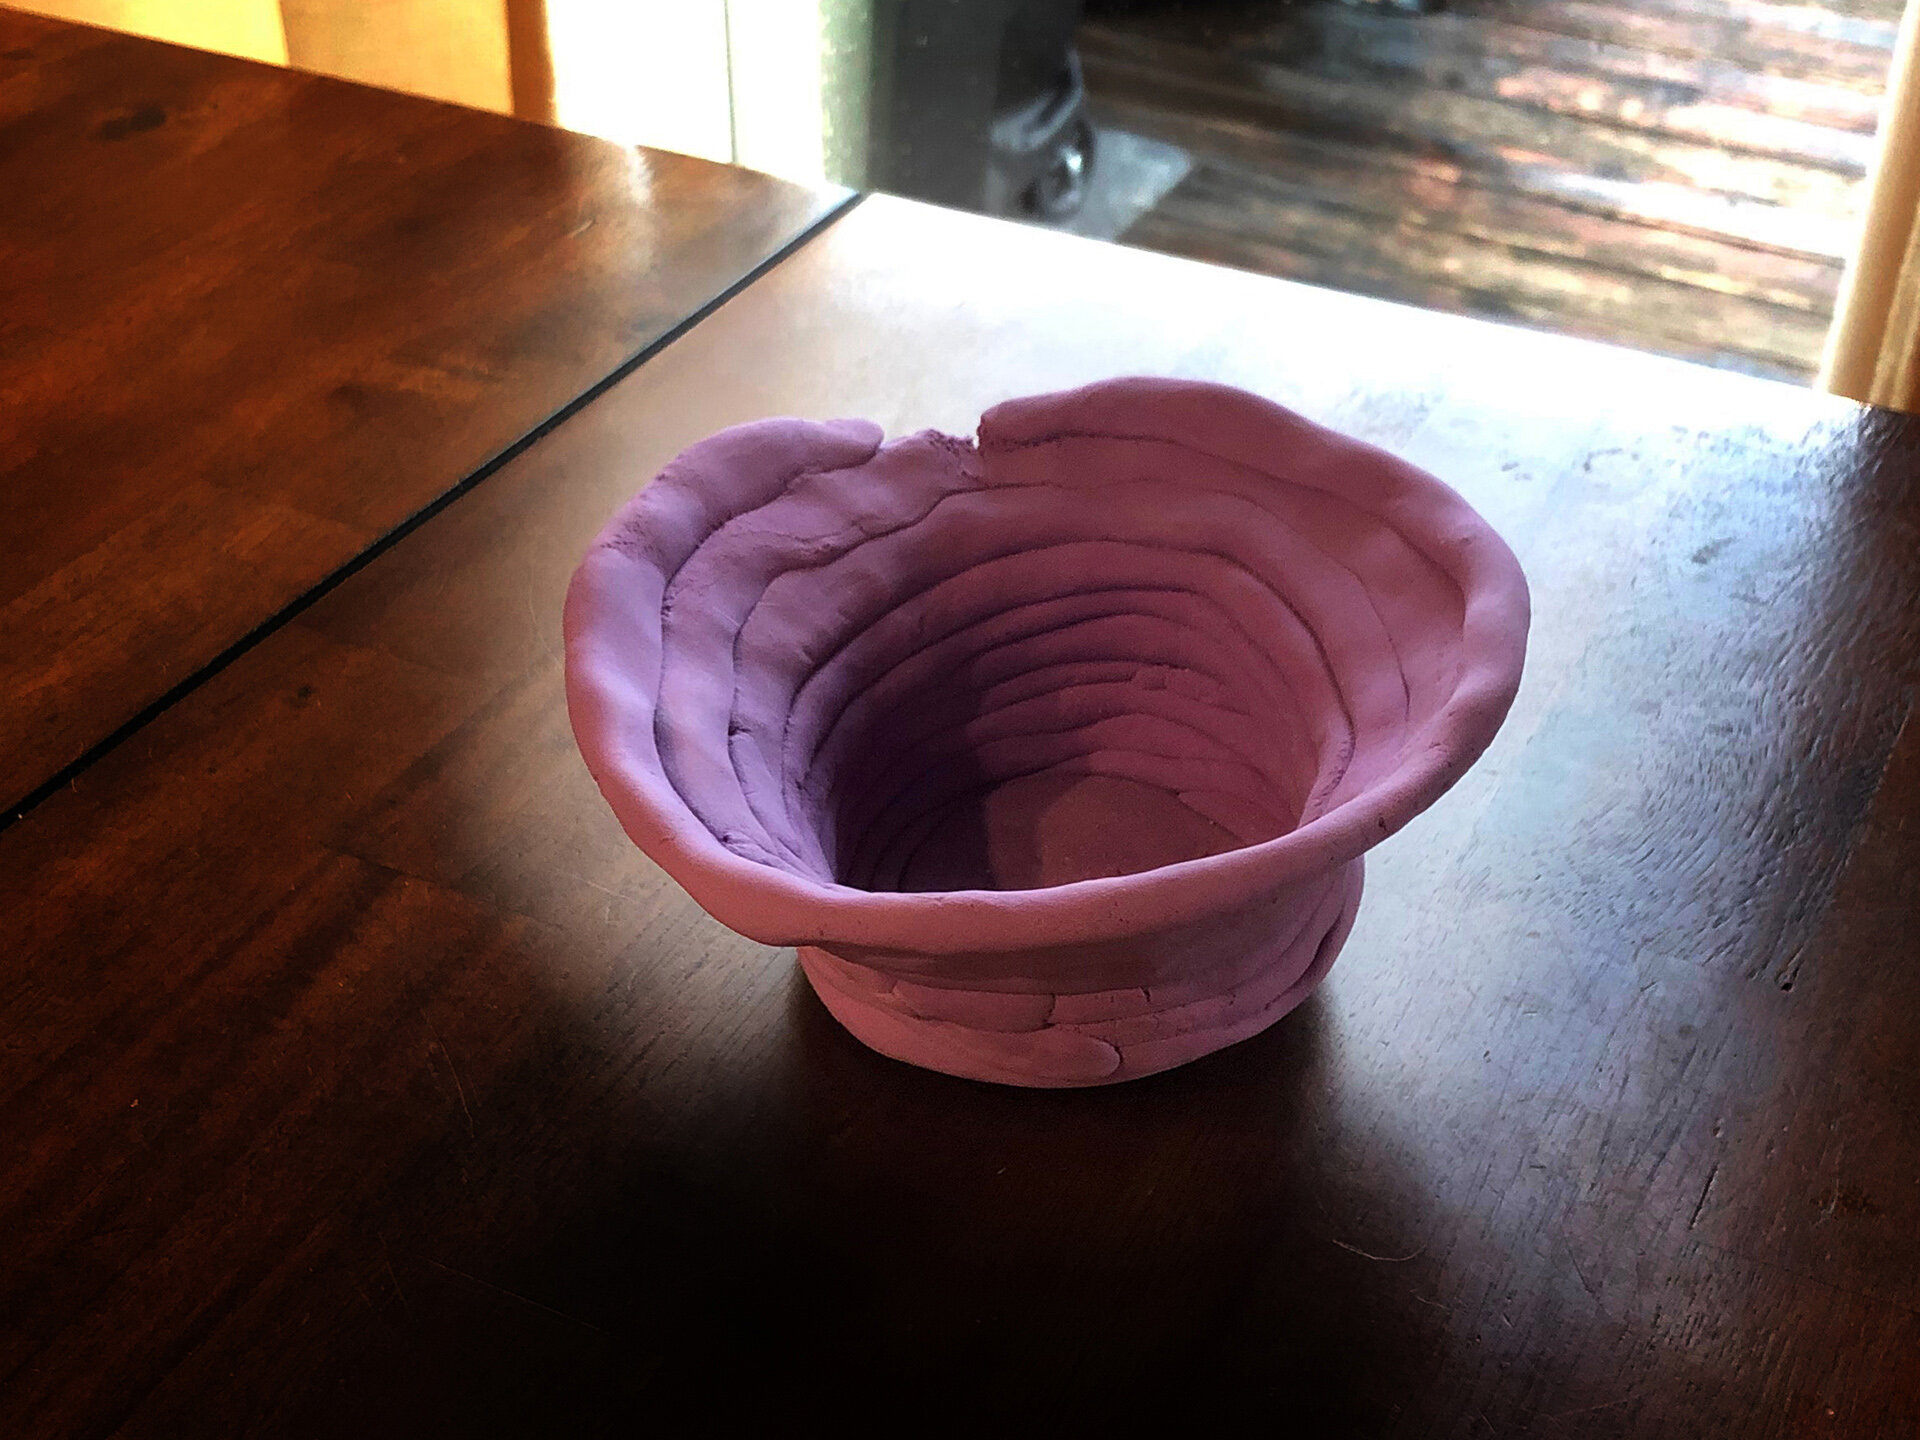
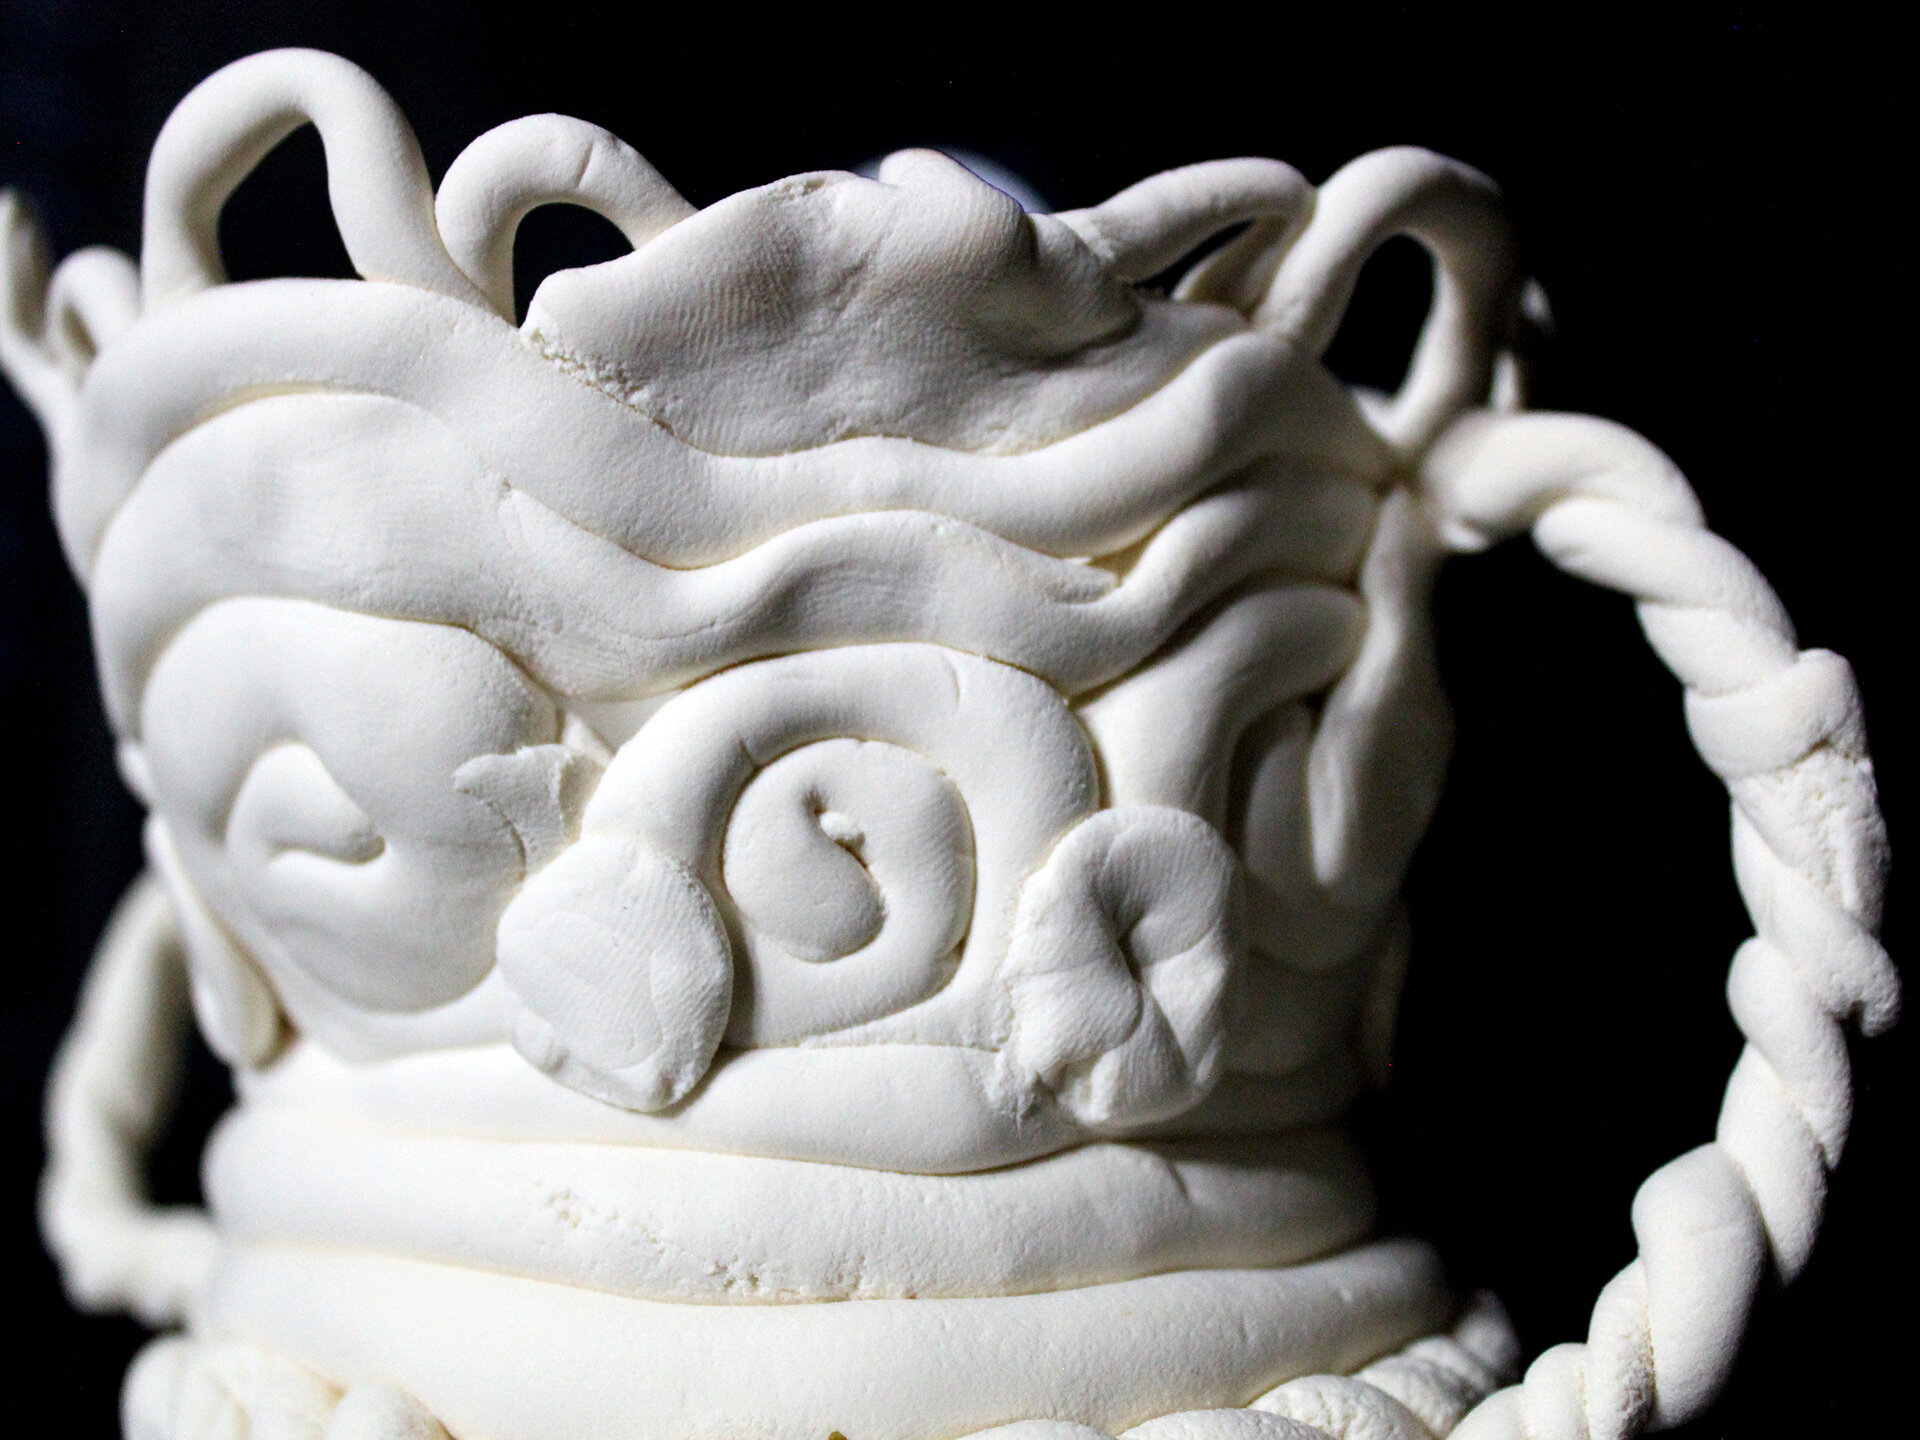
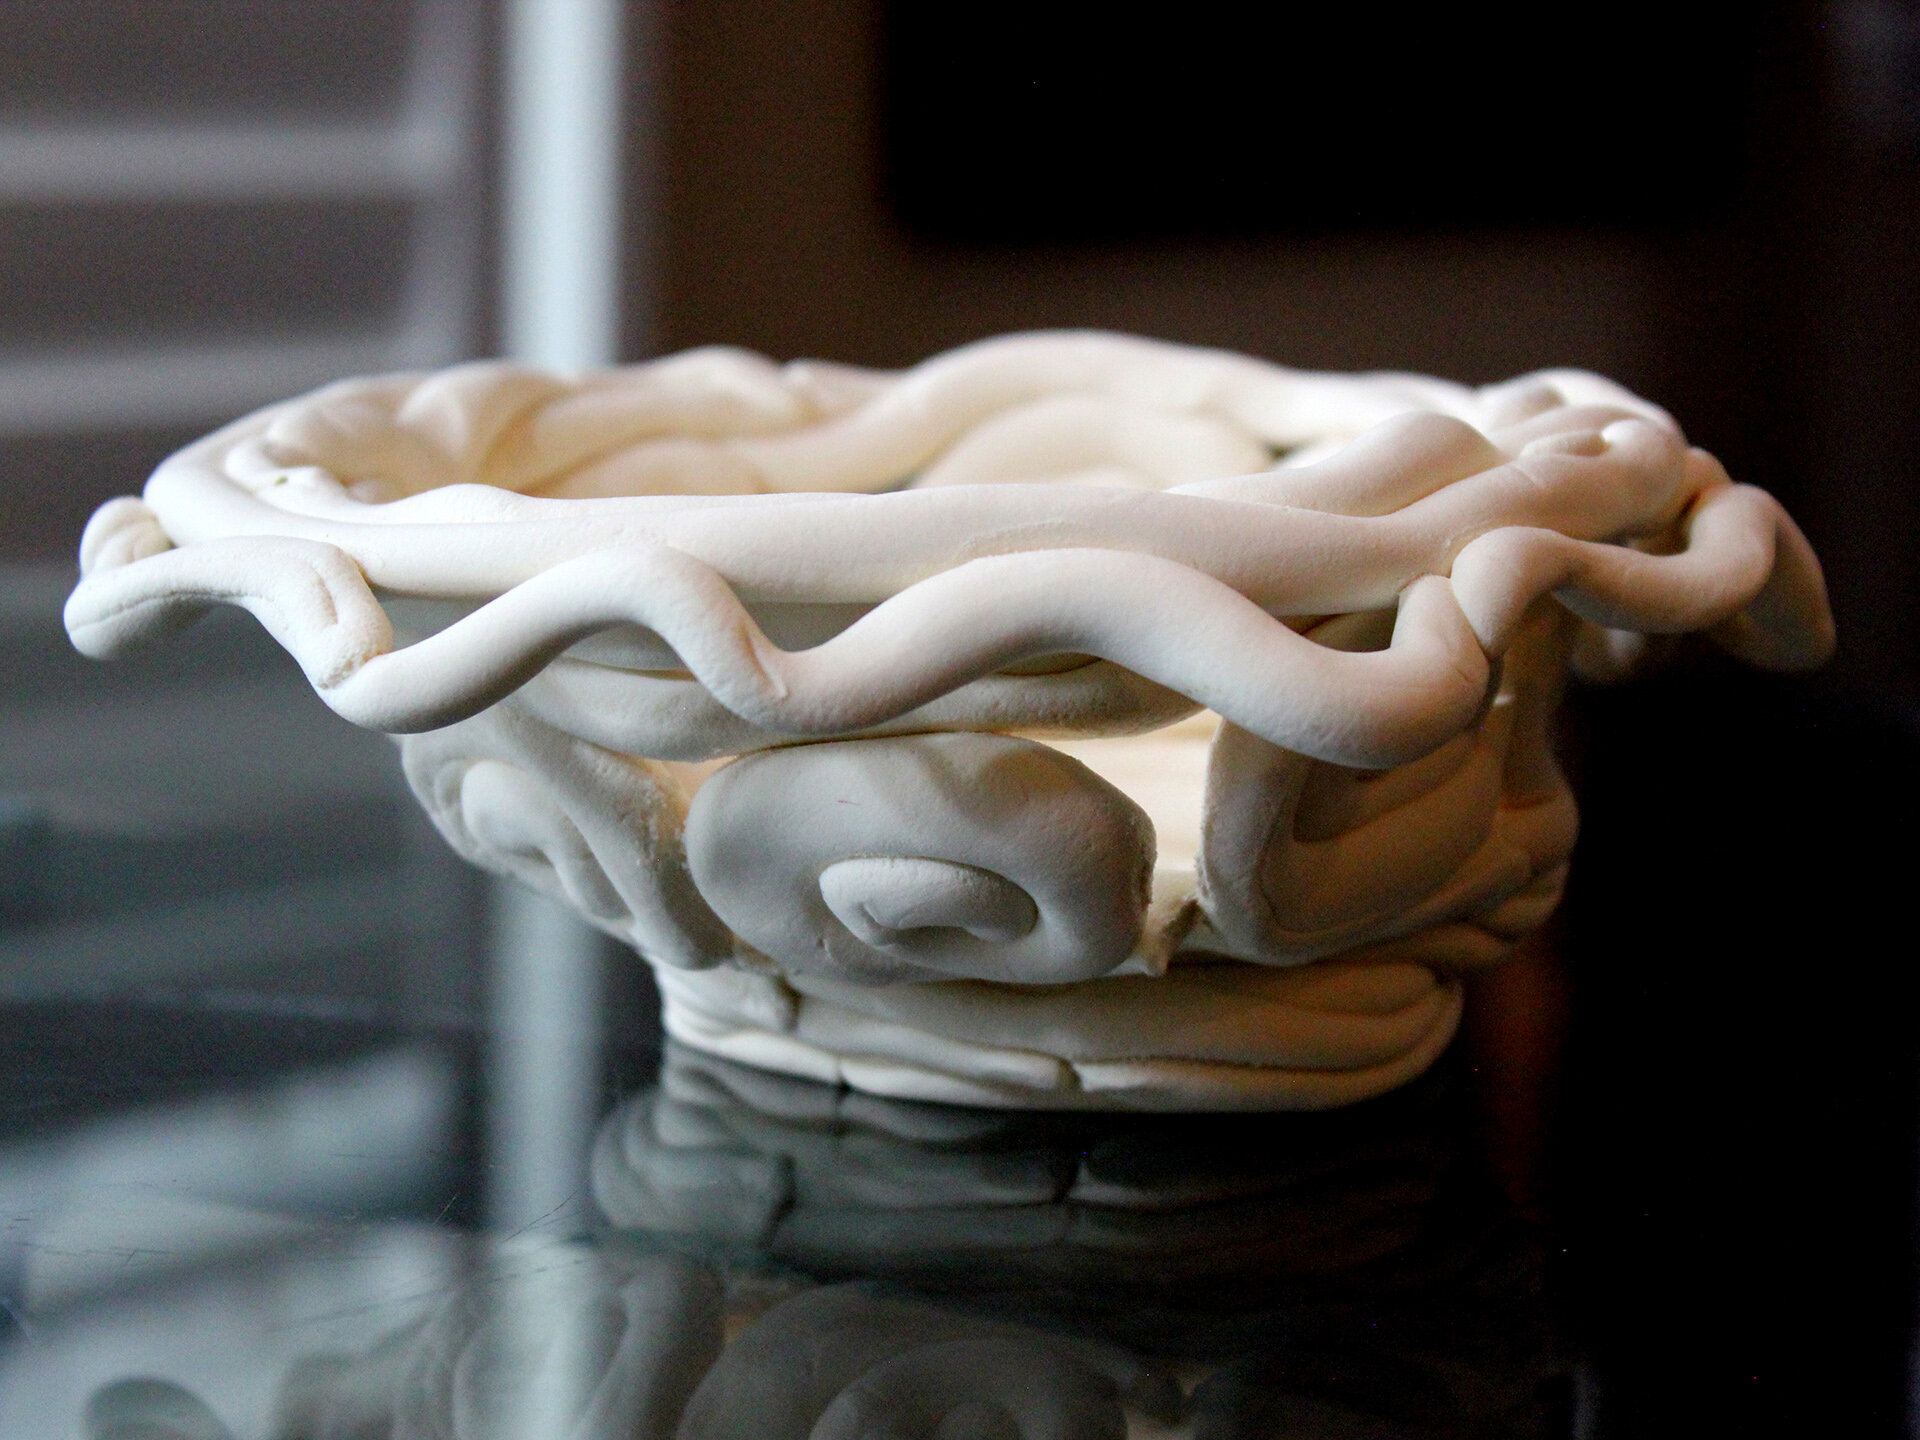
/We had another successful Tactile Art Club meeting on August 18. With each coming month, we continue to be thrilled by the interest from students and individuals joining across the country. After introductions, getting to know each other, and discussing personal tactile art, we all worked on a fun project making coil pots. During the process, we discussed different types of sculpting clay, such as water-based clay, air dry clay, oil-based clay, dough clay, polymer clay, and firing clay. We then talked about adding patterns and design details using the coil technique like Twist, braid, spiral, chain link, and wave to the pot. Overall, we had a great time working together.
Additionally, we were delighted to welcome Debbie Stein to the Tactile Art Club. Debbie is the writer of many young-adult novels and works of nonfiction for children. Most of us are familiar with Debbie through her outstanding work as editor of Future Reflections, a magazine which is used as a source of information and encouragement by parents of blind children in the United States and beyond. Thank you Debbie for your amazing work and inspiring us.
Finally, we were joined by journalist Mr. Michael Abeyta from CBS4 News Denver to cover the Tactile Art Club and spread awareness about our work. Here is the link to the news story about Tactile Art Club that aired on Thursday, August, 20.
Tactile Art Club helps people who are blind experience Art
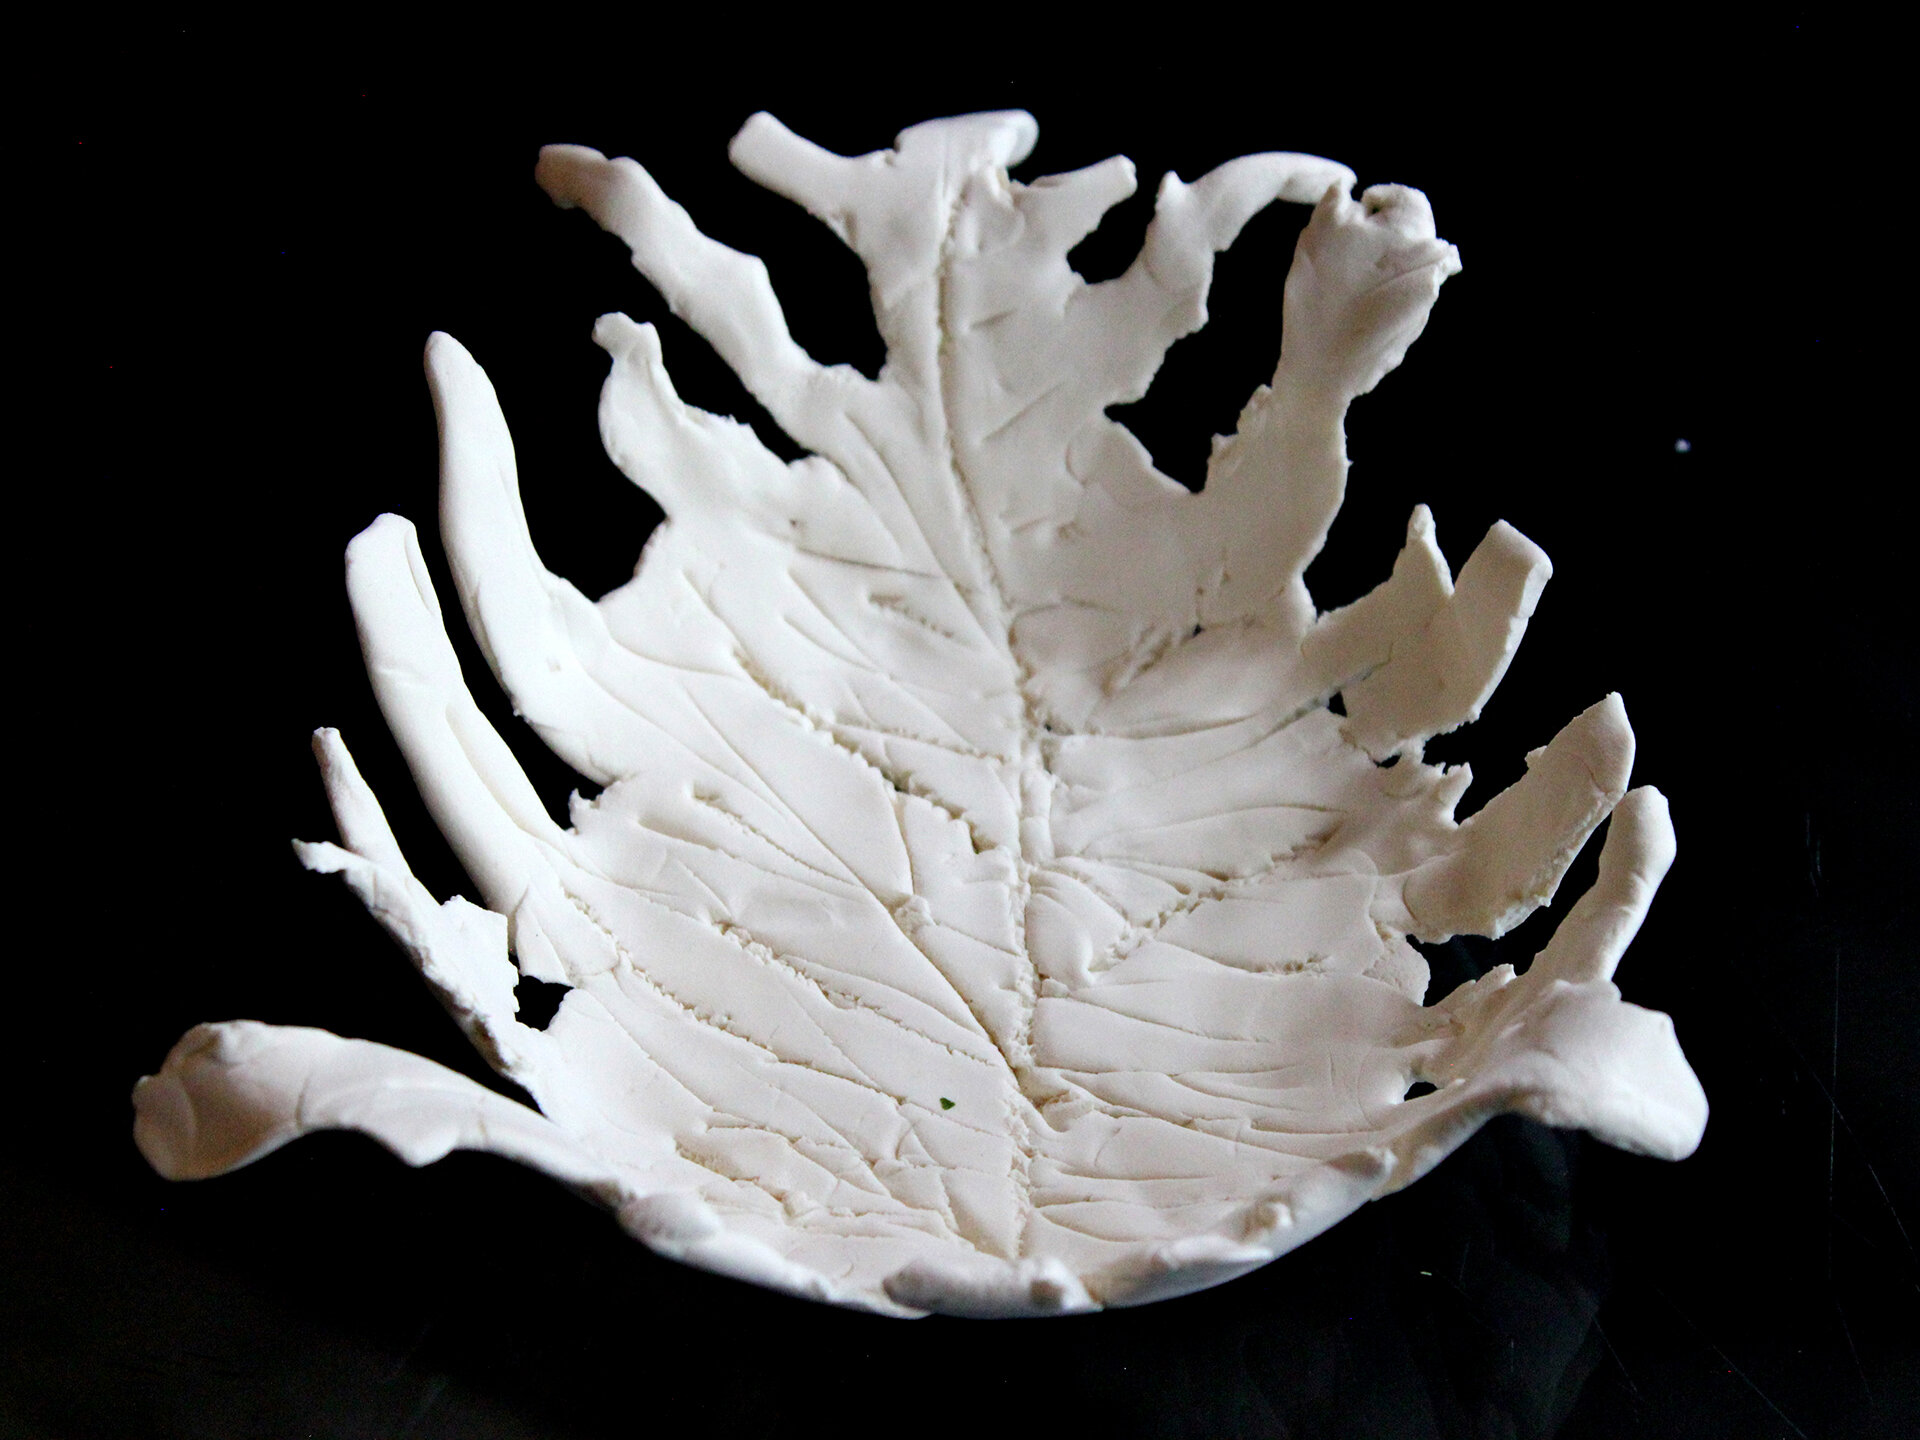
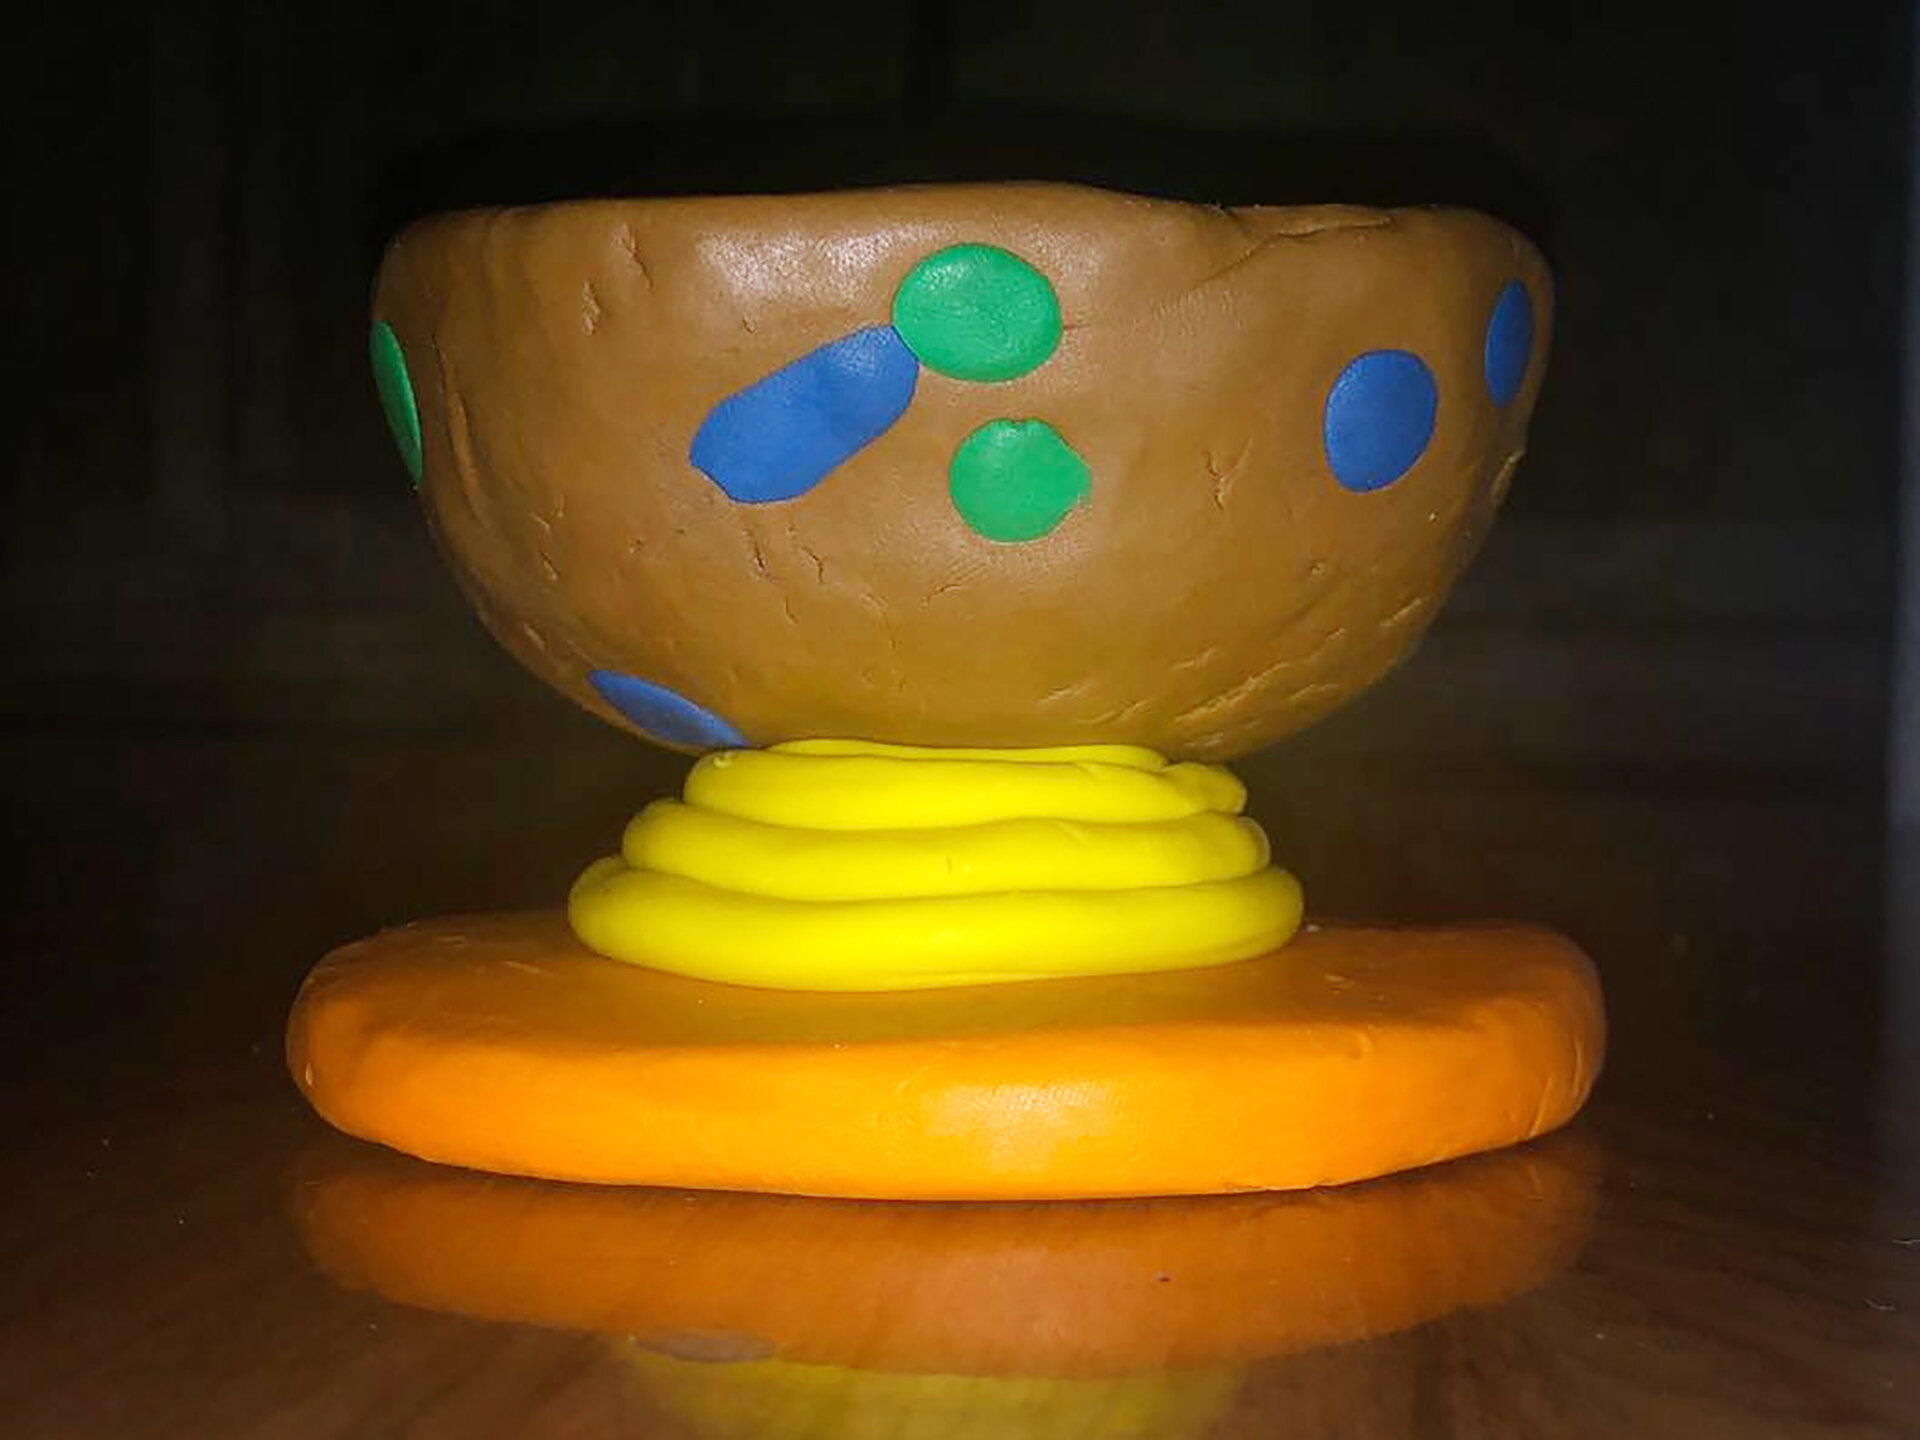
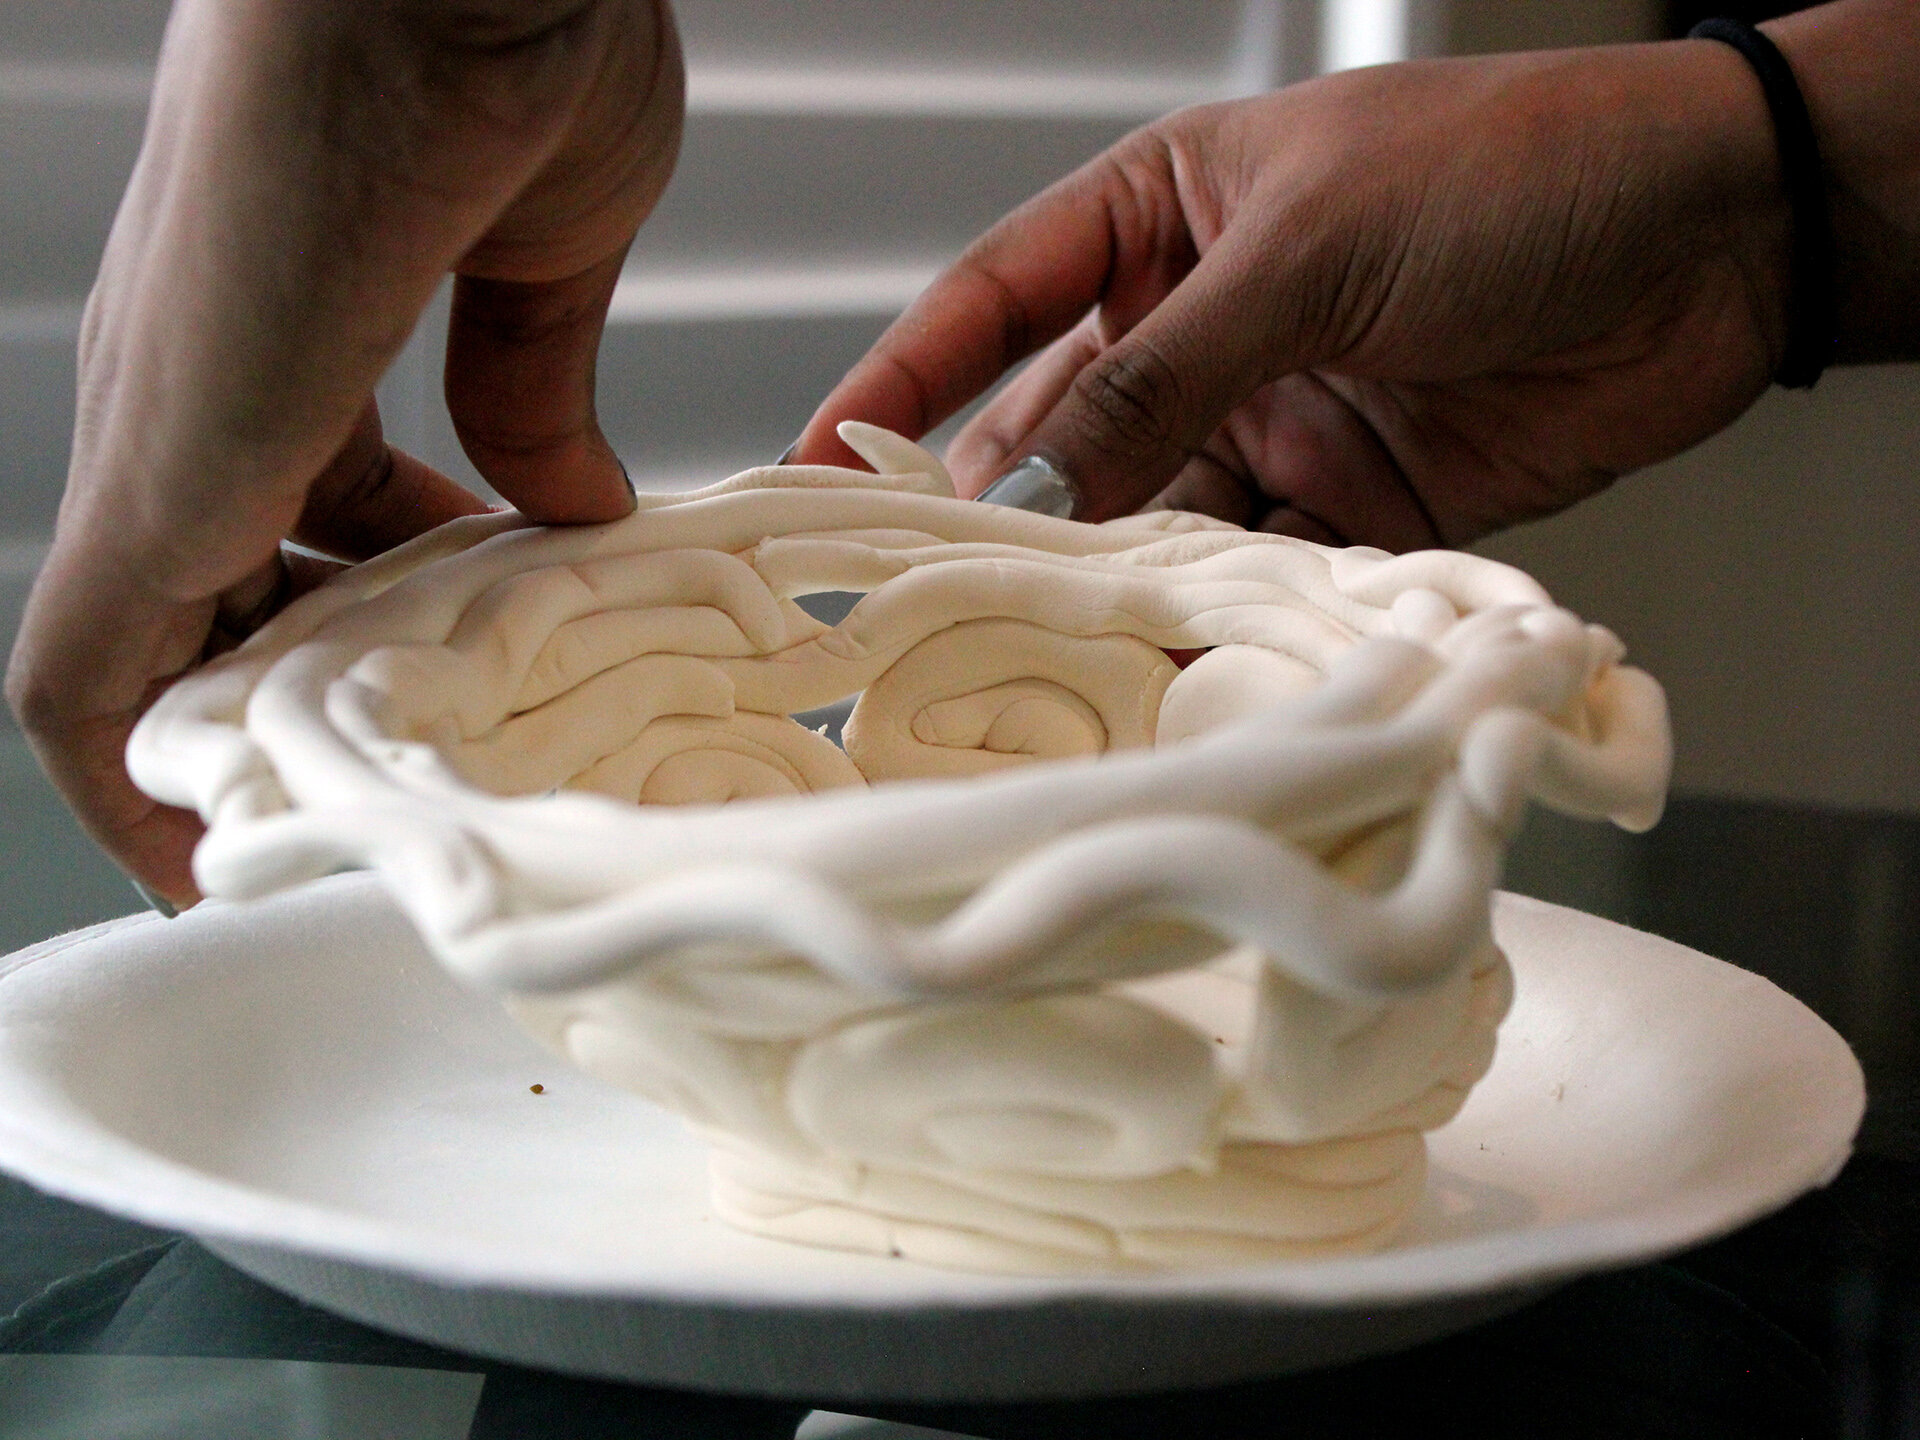
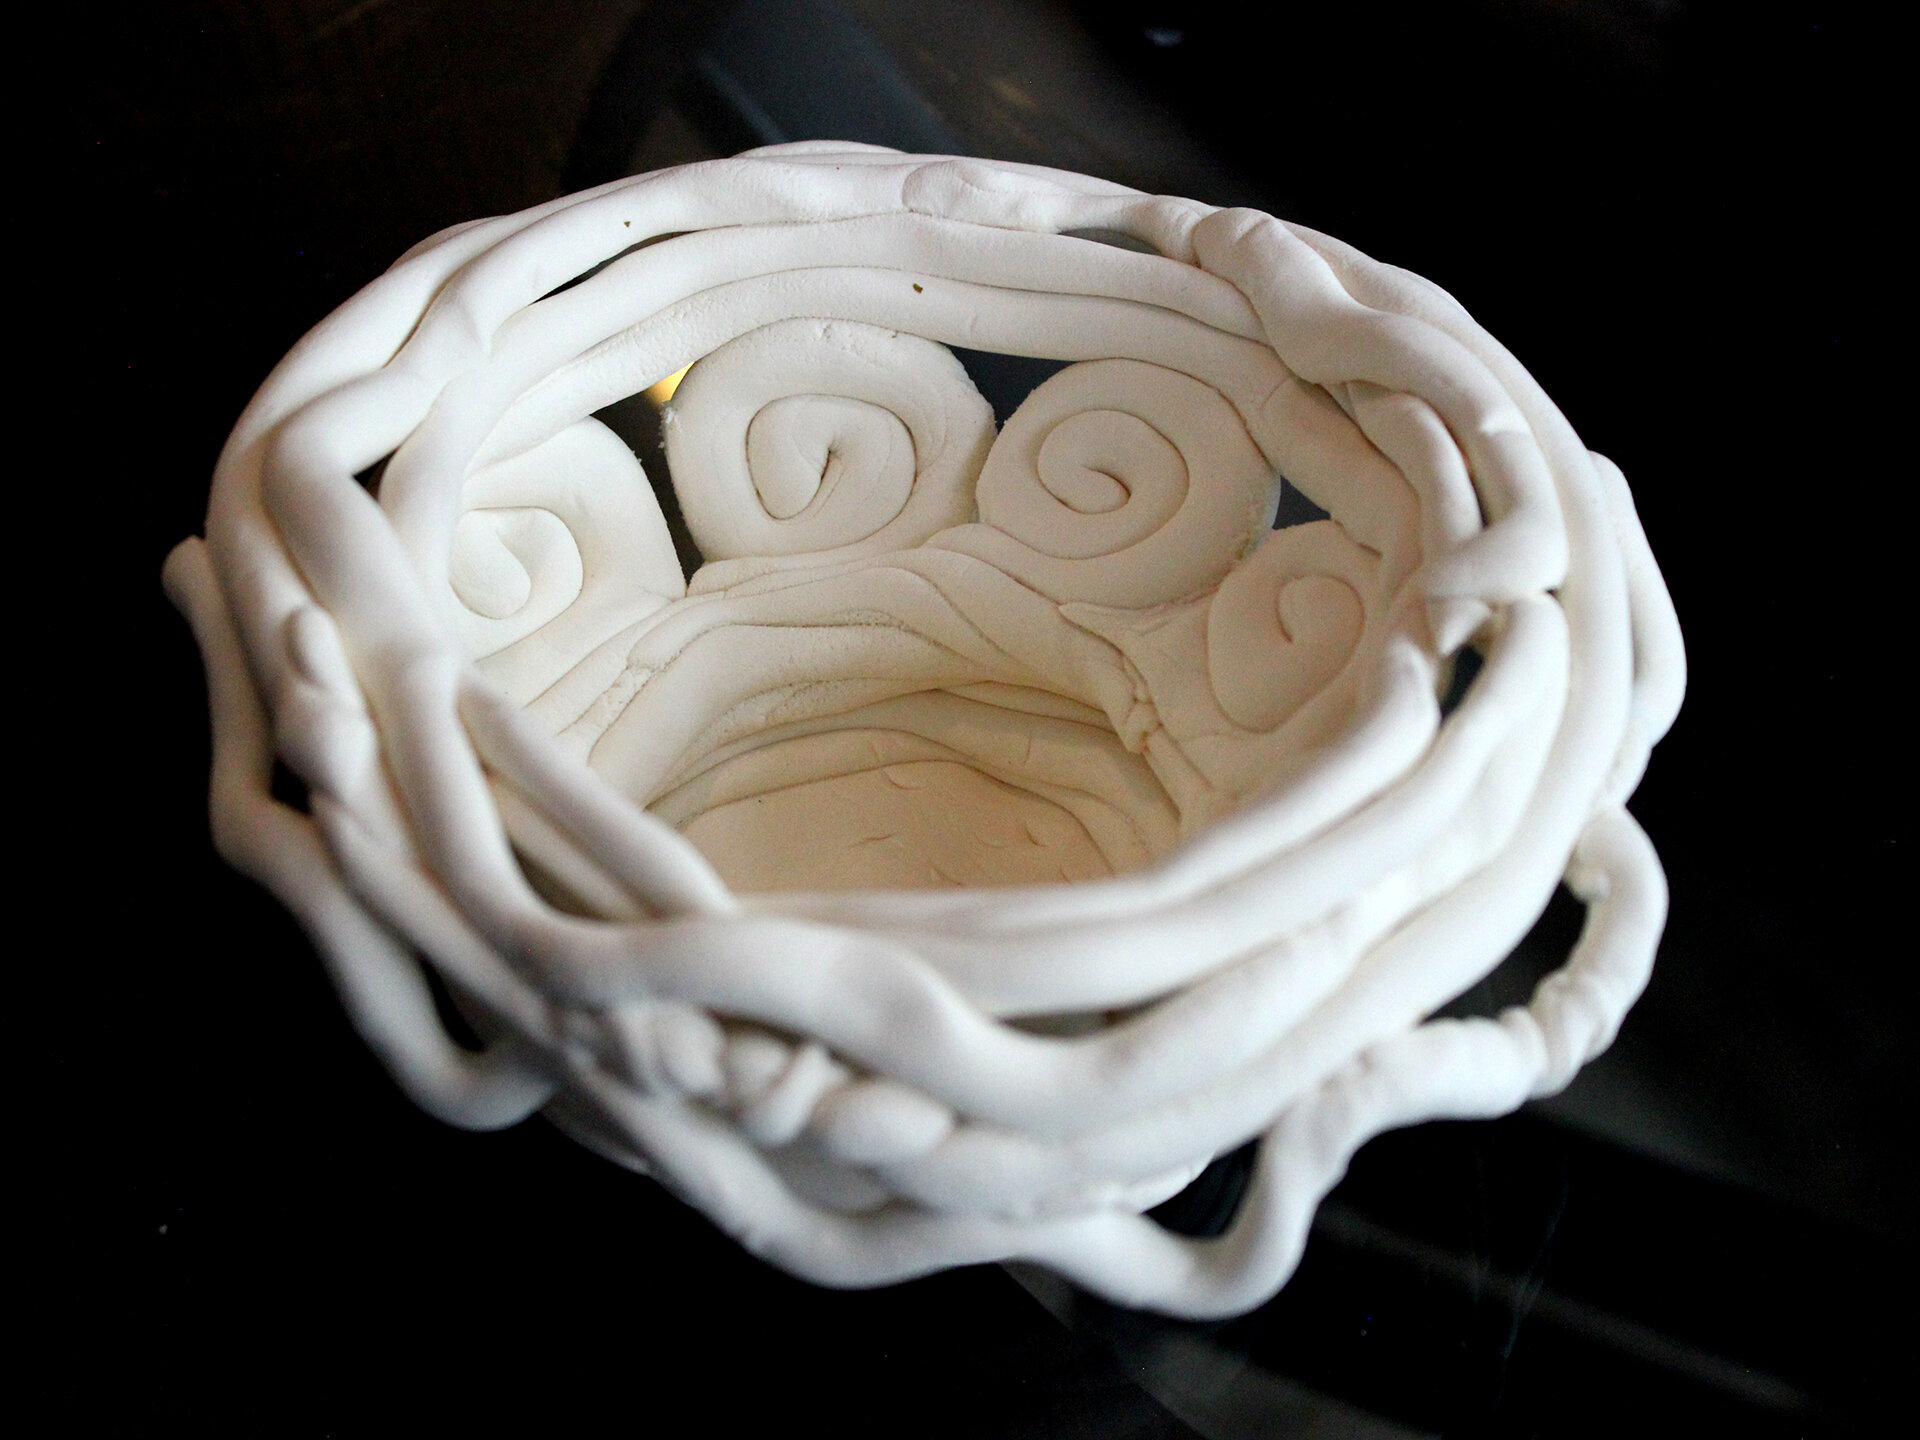
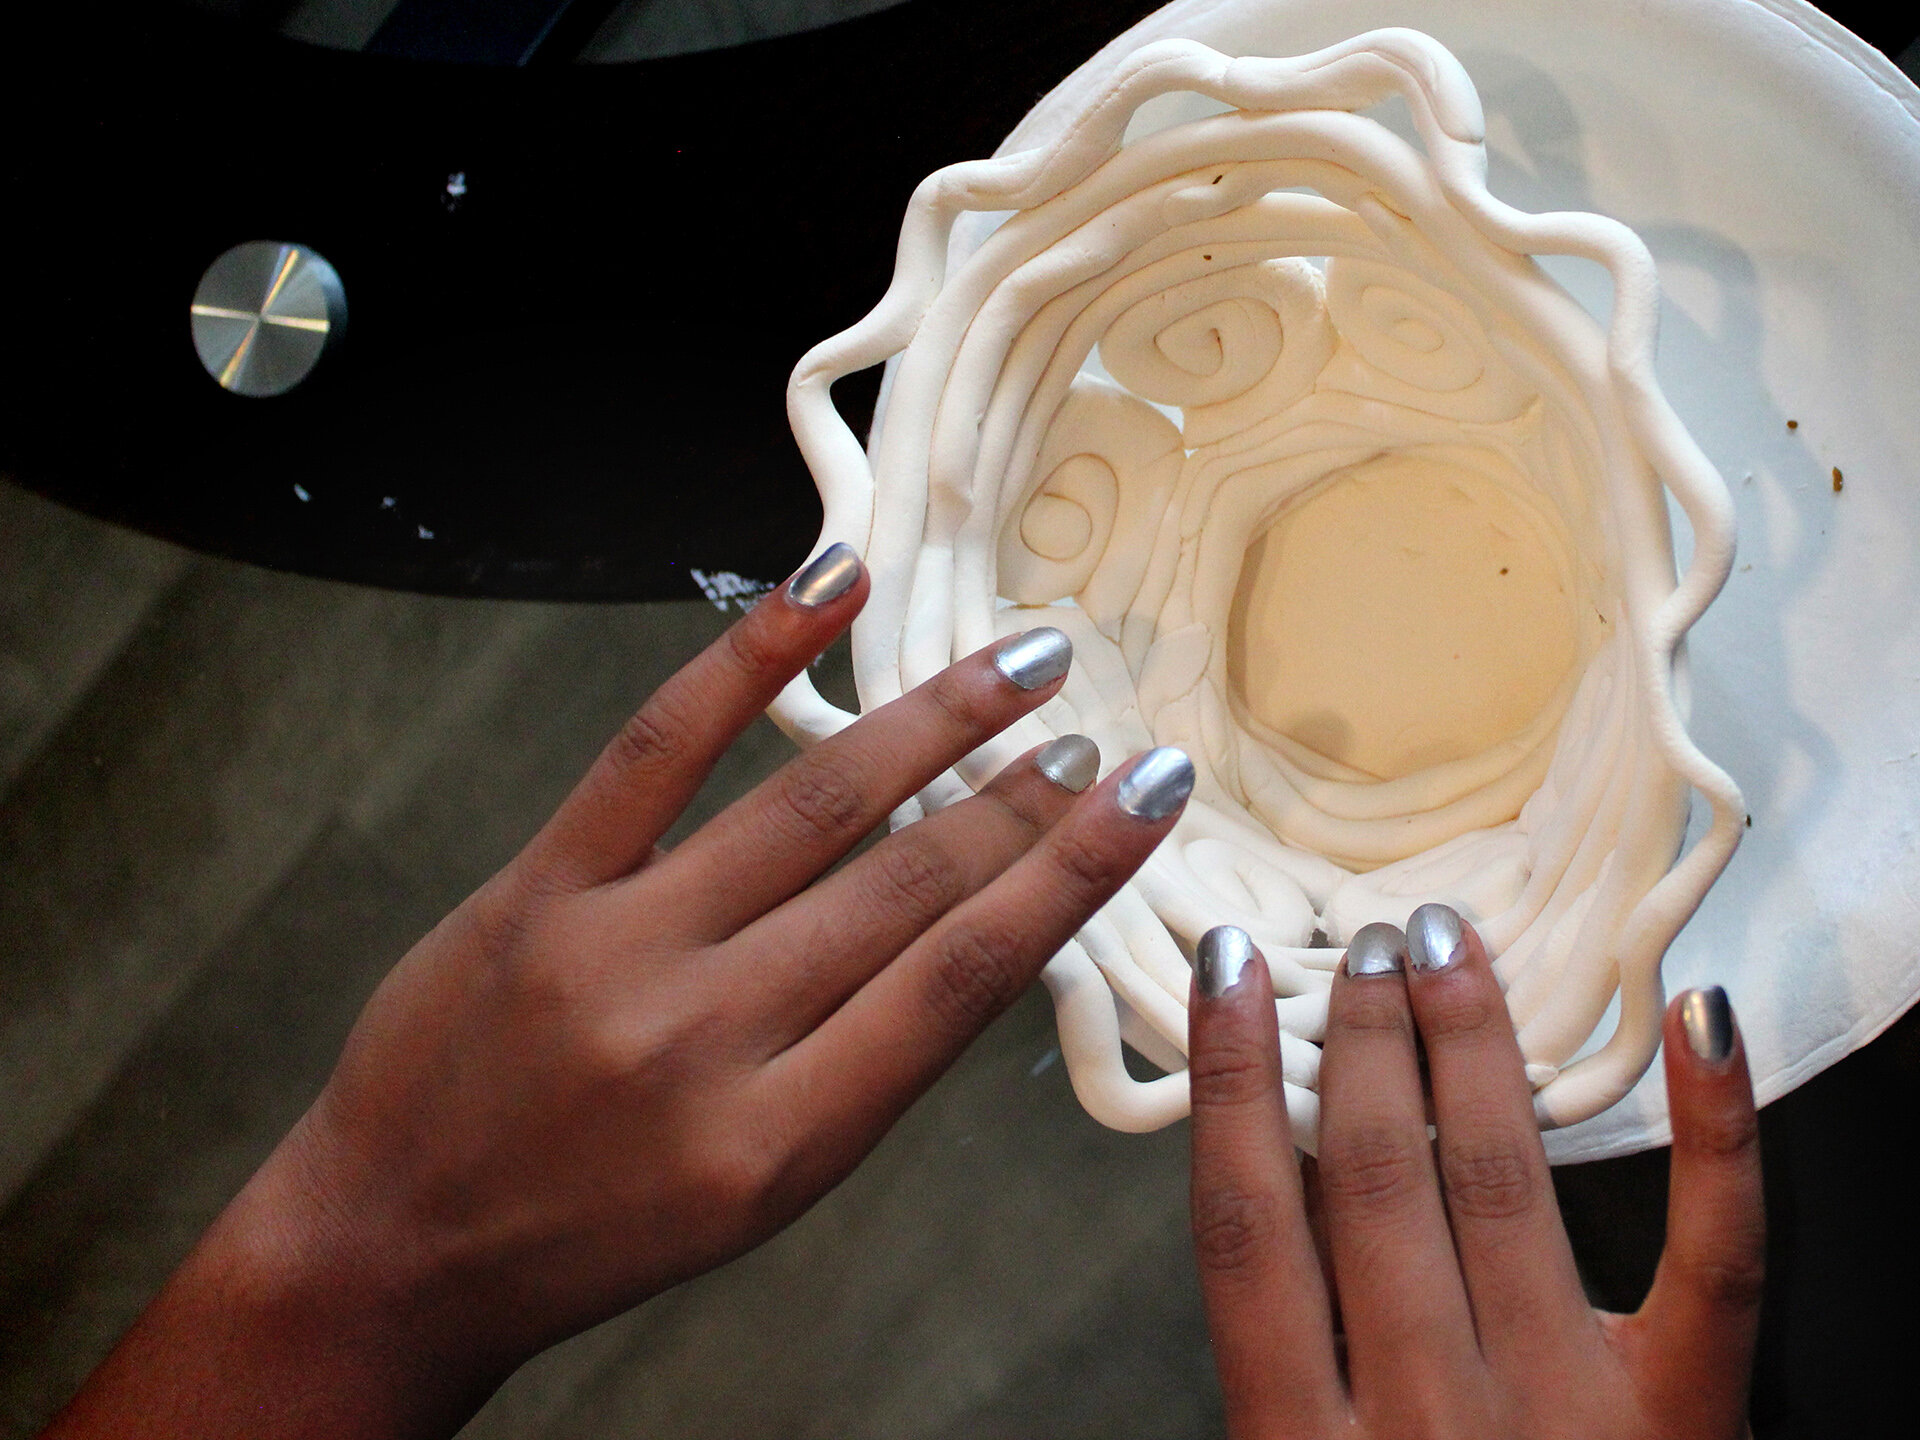
The club continues to spread creativity and positivity through accessible art online. We are excited to continue forming a global community and connecting through tactile art. Attached are pictures of what we created:
For those interested in creating coil pots themselves, here is a transcript of instructions:
How to Make a Coil Pot:
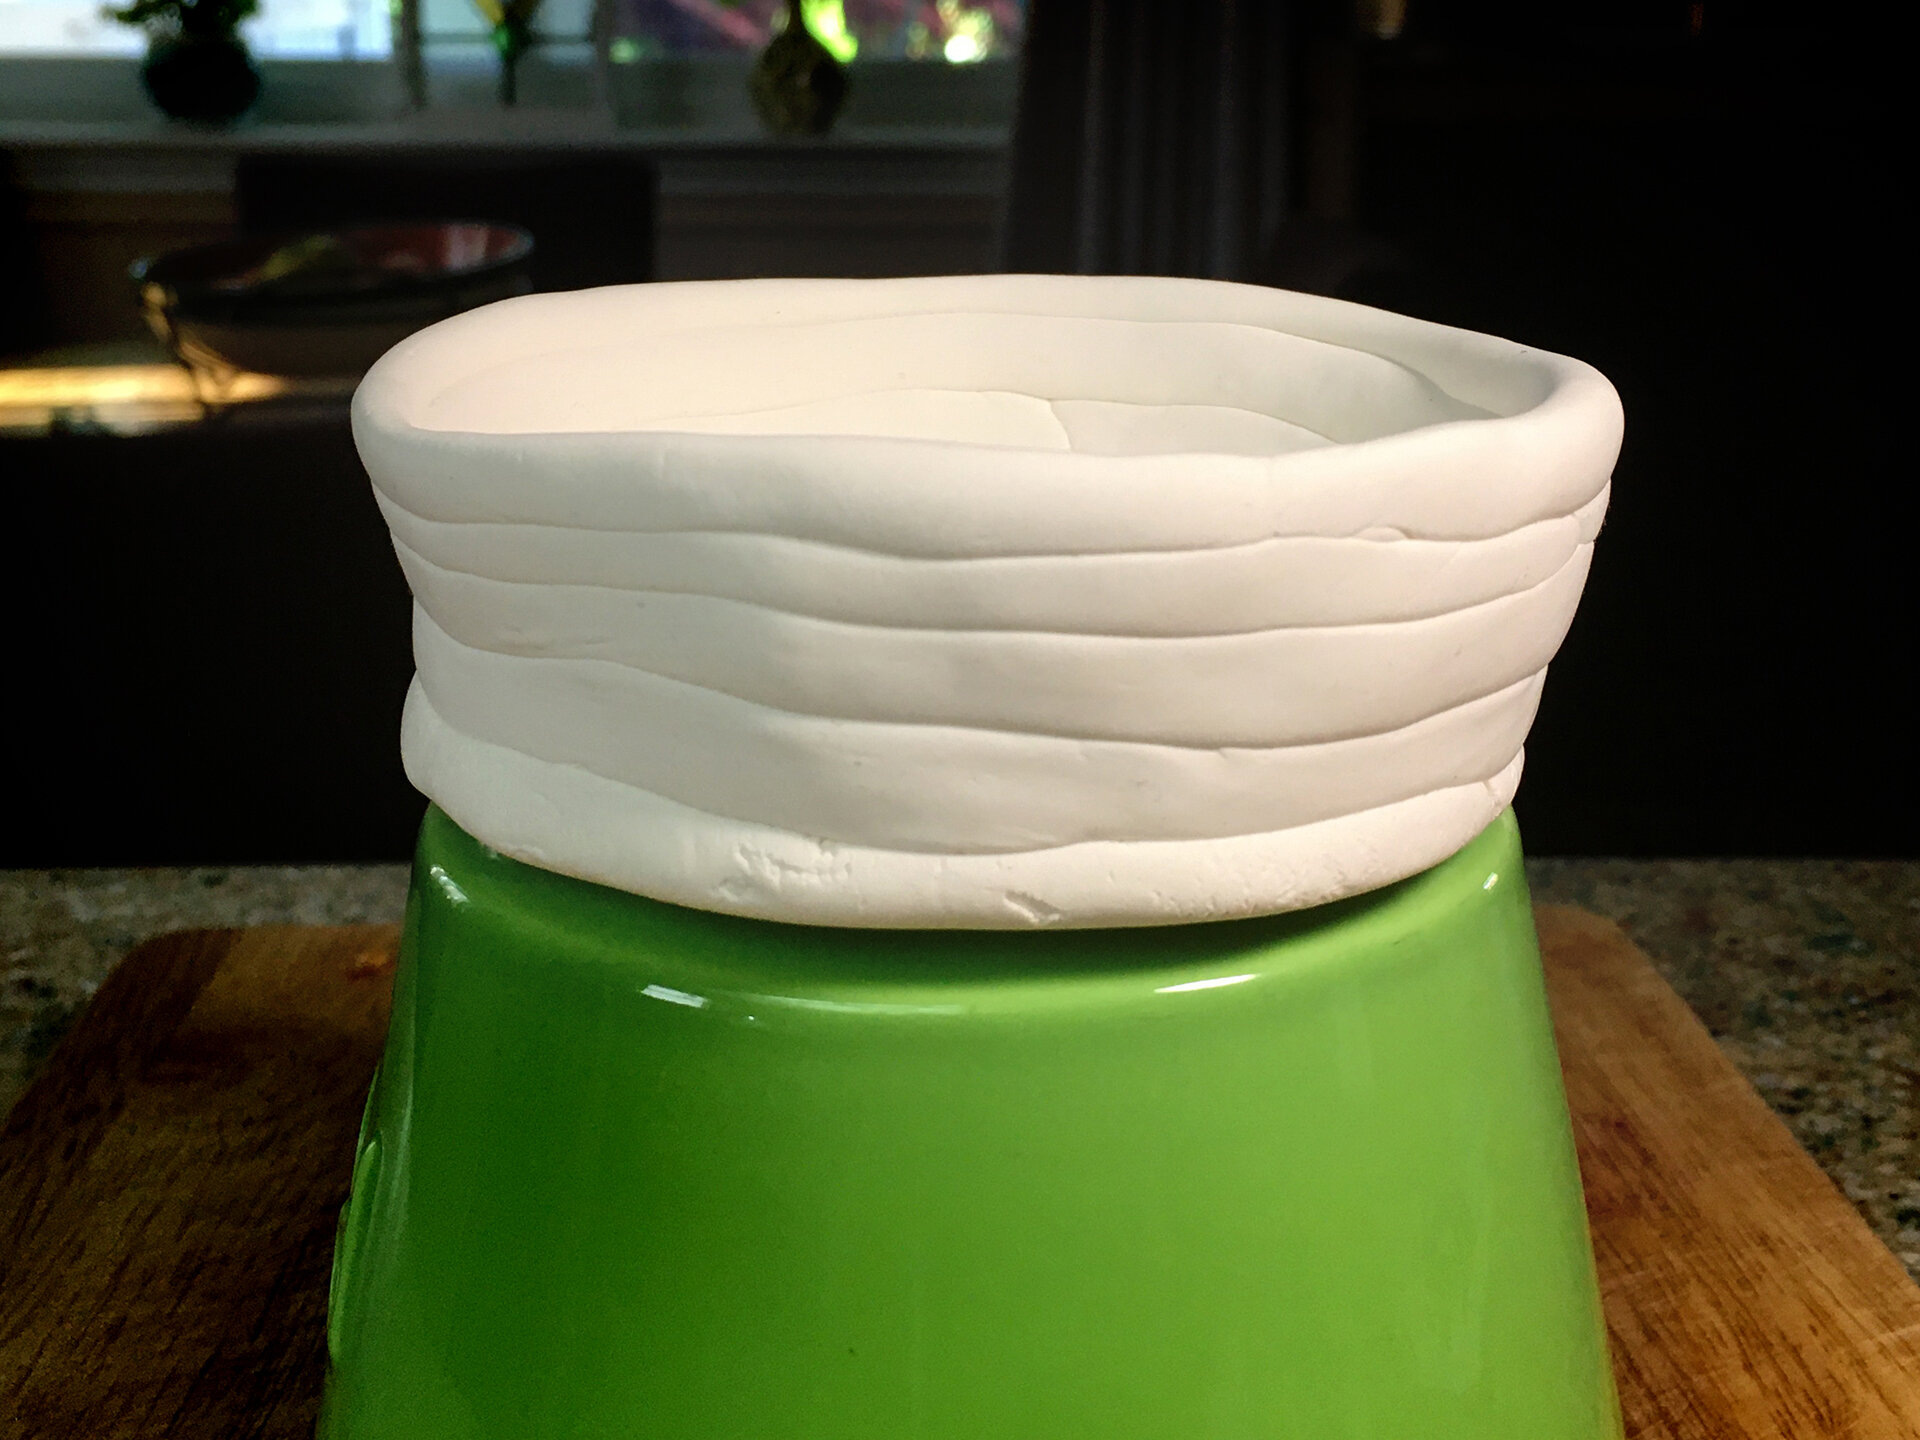
Take a piece of clay the size that you want for the base of your pot (mine is about a plum size).
Roll it into an even sphere.
Using your hands or a rolling pin, carefully spread out the clay from the center outwards until you have an even base. Your base should be fairly thick, around ¼ in.
Now, take a piece of clay and squeeze it into a long tube shape. Lay it down and roll with even pressure across until it is as long as the circumference of the pot. Keep in mind this should also be fairly thick to provide a sturdy base for your pot.
Attach the coil to the base. Press lightly with your fingers to ensure it has complete contact and is stable.
Repeat steps 4 and 5 until you get your desired height! If you want your pot to flare out, make the diameters larger each time; if you want to make it curve inwards, make smaller coils each time.
Now it is up to you! Once you have a strong base of around 4 coils, you are free to add patterns, details, and do whatever you would like with your pot. Here are a few design ideas I enjoy using.
Twist: use the same process to create your coil, but instead of rolling with your fingers, slowly twist it to give it texture. You can also twist two coils together to create a cool effect.
Braid: Braid 3 coils together to add dimension. Lay 3 uniform coils side by side, and pinch them together at the top to initially secure them. Then, alternate bringing the right and the left coil over the middle
Spiral: Create a coil with the thickness of the spiral you want. Then, form it into a tight spiral from the center. Attach it to your base and repeat, making sure you stick spirals together for security and keep layers (how many “rungs” the spiral has from the center) consistent. You could also intertwine the spirals.
Chain link: Make a small loop and attach it vertically to the base. Then. weave a coil into the loop and twist the ends together to create intertwining chain patterns.
Waves /Zigzag: Roll a coil to be slightly longer than the diameter of your pot and lay it on top. Then, use your finger to press down to secure it, lift it up to form an arc, and press your own again. Vary how often you do this based on how stretched out you want your waves to be and how many you want. Repeat this pattern to create a series of rainbows on your pot. You can also do the same thing and crease the top of the rainbow to make a zig-zag.
#tactilceart, #Artfortheblind, #touchart, #visuallyimpaired, #blindartist
Art for the visually impaired, Art for the Blind
